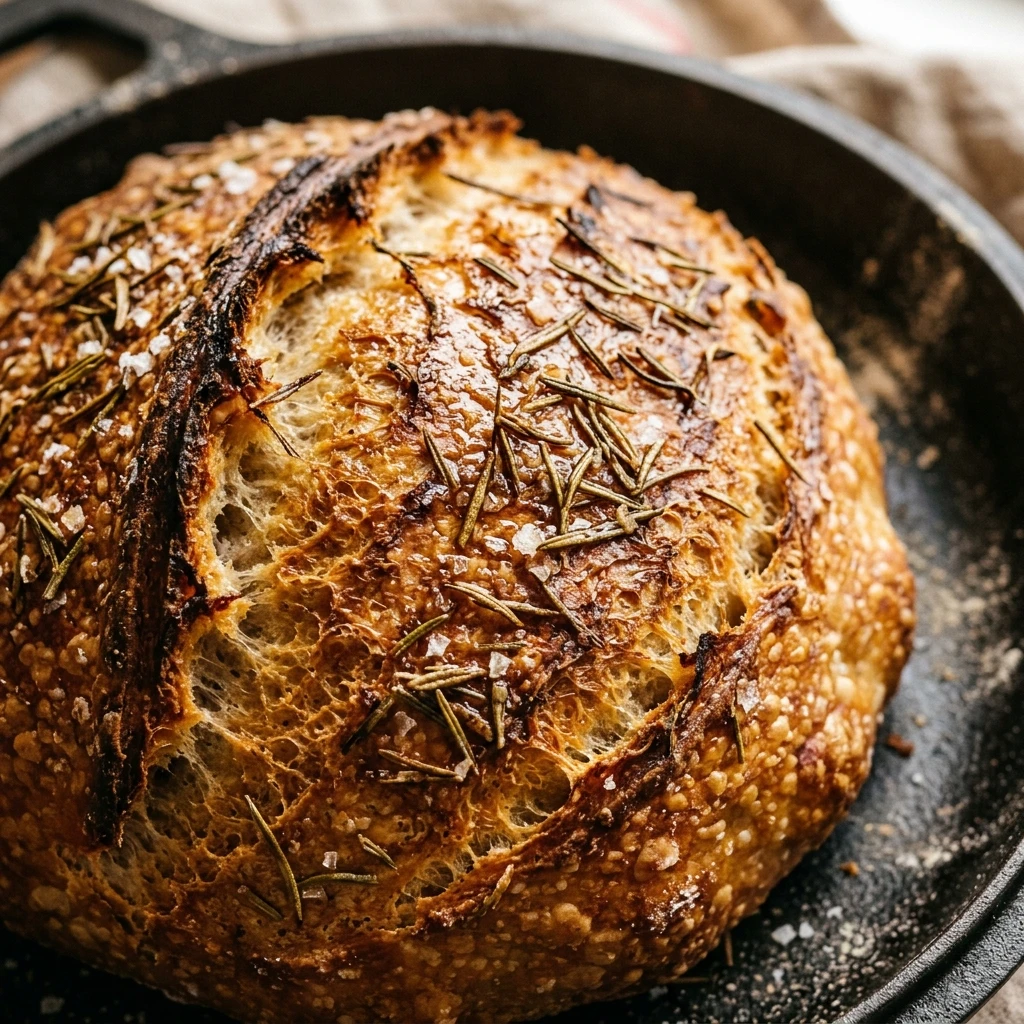

There is something truly magical about the aroma of fresh bread baking in the oven, especially when it is infused with the earthy scent of rosemary. This No Knead Rosemary Dutch Oven Bread is a game-changer for home bakers. You do not need a fancy mixer, professional skills, or even hours of physical labor to create a loaf that looks like it came from a high-end artisan bakery. With just a few basic ingredients and a little bit of patience, you can achieve a perfectly golden, crackly crust and a soft, airy interior.
The beauty of this recipe lies in its simplicity. By allowing time to do the work instead of your muscles, the gluten develops naturally during a long rise. This process not only makes the bread incredibly easy to prepare but also deepens the flavor. Whether you are a beginner or a seasoned pro, this rosemary-infused loaf will quickly become a staple in your kitchen. Let’s dive into how you can make this delicious, rustic bread at home.
Recipe Information
- Prep Time: 15 minutes (plus 12-18 hours rising time)
- Cook Time: 45 minutes
- Total Time: 13 hours 0 minutes
- Servings: 10 slices
- Difficulty Level: Easy
Nutrition Information
- Calories per serving: 165 kcal
- Protein: 5g
- Carbohydrates: 34g
- Fat: 1g
- Fiber: 2g
- Sugar: 0g
- Sodium: 380mg
Why Make This No Knead Rosemary Dutch Oven Bread
This recipe is perfect for anyone who loves high-quality bread but feels intimidated by traditional kneading techniques. The “no-knead” method relies on a long fermentation period, which does all the heavy lifting for you. This results in a complex flavor and a beautiful open crumb structure that is hard to achieve with quick-rise recipes. It is the ultimate low-effort, high-reward baking project.
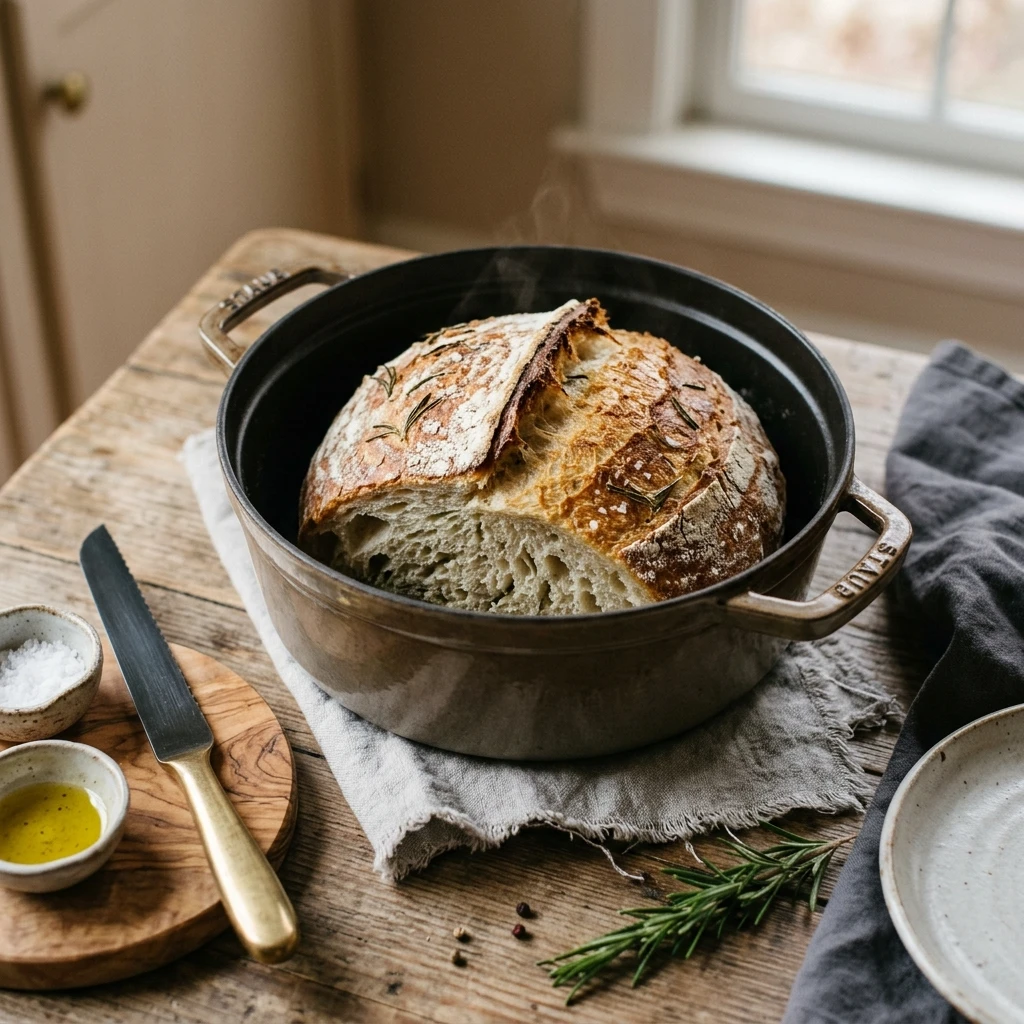
Adding rosemary elevates the bread from a simple side to a gourmet treat. The piney, aromatic herb pairs beautifully with the salty crust. Additionally, using a Dutch oven creates a steam-filled environment that mimics a professional deck oven. This is the secret to getting that thin, shatteringly crisp crust that everyone loves. It is a foolproof way to impress your family and friends with minimal active work.
How to Make No Knead Rosemary Dutch Oven Bread
Making this bread is a simple process of mixing, waiting, and baking. While it takes several hours from start to finish, almost all of that is hands-off time. Follow these steps to create your own artisan masterpiece.
Ingredients
- 3 cups all-purpose flour (or bread flour)
- 1 ½ teaspoons salt
- ½ teaspoon active dry yeast
- 1 ½ cups warm water (about 100°F)
- 2 tablespoons fresh rosemary, finely chopped
- 1 tablespoon olive oil (optional for brushing)
- Extra flour for dusting
Directions
Step 1: Mix the Dry Ingredients
In a large mixing bowl, whisk together the flour, salt, active dry yeast, and chopped rosemary. Ensure the rosemary is evenly distributed so that every bite of bread has that wonderful herbal flavor.
Step 2: Incorporate the Water
Pour the warm water into the flour mixture. Use a sturdy spoon or a spatula to stir until a shaggy, sticky dough forms and no dry flour streaks remain. Do not worry about the dough looking messy; it is supposed to be hydrated and a bit loose.
Step 3: The Long Rise
Cover the bowl tightly with plastic wrap or a clean kitchen towel. Place it in a warm, draft-free spot and let it sit for at least 12 hours, though 18 hours is even better. During this time, the dough will double in size and become dotted with bubbles.
Step 4: Preheat the Dutch Oven
About 30 minutes before you are ready to bake, place your empty Dutch oven (with the lid on) into the oven. Preheat the oven to 450°F (230°C). It is crucial that the pot is extremely hot before the dough goes in.
Step 5: Shape the Dough
Turn the dough out onto a well-floured surface. It will be very sticky, so use plenty of flour on your hands. Gently fold the dough over itself a few times to form a rough ball. Place the dough onto a piece of parchment paper for easy transferring.
Step 6: Bake with Lid On
Carefully remove the hot Dutch oven from the oven. Lift the parchment paper with the dough and lower it into the pot. Cover with the lid and bake for 30 minutes. This traps the steam and allows the bread to rise significantly.
Step 7: Final Browning
Remove the lid from the Dutch oven. Continue baking for another 15 minutes, or until the crust is a deep golden brown and sounds hollow when tapped. Let the bread cool on a wire rack for at least 30 minutes before slicing to ensure the interior sets properly.
How to Serve No Knead Rosemary Dutch Oven Bread
This bread is best served slightly warm. It is incredible when spread with high-quality salted butter or dipped into a mixture of olive oil and balsamic vinegar. Because of the rosemary, it pairs exceptionally well with hearty stews, roasted chicken, or a simple tomato soup. For a fancy breakfast, use it as a base for avocado toast topped with a poached egg and a sprinkle of red pepper flakes.
How to Store No Knead Rosemary Dutch Oven Bread
To keep the crust crispy, store the bread at room temperature in a paper bag for up to 2 days. If you store it in a plastic bag, the crust will soften. For longer storage, you can freeze the bread. Slice the loaf first, wrap it tightly in plastic wrap, and place it in a freezer-safe bag. When you are ready to eat, simply pop a slice into the toaster directly from the freezer.
Expert Tips for Perfect No Knead Rosemary Dutch Oven Bread
First, make sure your yeast is fresh; if it doesn’t foam when mixed with a little warm water, it’s likely dead. Second, don’t skimp on the salt, as it is vital for both flavor and controlling the yeast’s growth. Third, if you want an extra crispy crust, you can spray a little bit of water into the Dutch oven right before closing the lid. Finally, wait for the bread to cool before cutting it! Slicing into hot bread releases the steam too early, which can make the inside gummy.
Delicious Variations
If you want to experiment, try adding half a cup of shredded parmesan cheese to the dry ingredients for a Rosemary Parmesan loaf. You can also mix in some roasted garlic cloves during the shaping process for a more savory flavor. For a Mediterranean twist, add chopped Kalamata olives and a teaspoon of lemon zest. If you prefer a nuttier taste, replace one cup of all-purpose flour with whole wheat flour.
Frequently Asked Questions
Q: Can I use dried rosemary instead of fresh?
Yes, you can use dried rosemary. Since dried herbs are more concentrated, use about 2 teaspoons of dried rosemary instead of the 2 tablespoons of fresh rosemary called for in the recipe.
Q: What if I don’t have a Dutch oven?
A Dutch oven is best for the crust, but you can use a heavy oven-safe pot with a tight-fitting lid. If you have no lid, you can place a pan of water on the bottom rack of the oven to create steam, though the results may vary.
Q: Can I use instant yeast instead of active dry?
Absolutely. You can use the same amount of instant yeast. You don’t need to change anything else; just mix it in with the dry ingredients as usual.
Q: My dough didn’t rise much, what happened?
This could be due to old yeast or the water being too hot (killing the yeast) or too cold (stunting its growth). Ensure your water is lukewarm, around 100°F.
Q: Can I let the dough rise for longer than 18 hours?
If the dough sits for too long (over 24 hours), it might become over-proofed and sour, losing its structure. If you can’t bake it in time, put the bowl in the fridge to slow down the fermentation.
Conclusion
Mastering the art of bread making has never been easier than with this No Knead Rosemary Dutch Oven Bread. It requires very little active time but delivers a loaf that rivals any artisan bakery. The combination of the crispy crust and the aromatic rosemary makes it a standout addition to any meal. Give it a try, and you will see how simple it is to bring the comfort of homemade bread into your daily life.

No Knead Rosemary Dutch Oven Bread
- Cook Time: 13 hours 0 minutes
- Total Time: 13 hours
- Diet: Vegetarian, Vegan
Ingredients
- 3 cups all-purpose flour (or bread flour)
- 1 ½ teaspoons salt
- ½ teaspoon active dry yeast
- 1 ½ cups warm water (about 100°F)
- 2 tablespoons fresh rosemary, finely chopped
- 1 tablespoon olive oil (optional for brushing)
- Extra flour for dusting
Instructions
- In a large mixing bowl, whisk together the flour, salt, active dry yeast, and chopped rosemary. Ensure the rosemary is evenly distributed so that every bite of bread has that wonderful herbal flavor.
- Pour the warm water into the flour mixture. Use a sturdy spoon or a spatula to stir until a shaggy, sticky dough forms and no dry flour streaks remain. Do not worry about the dough looking messy; it is supposed to be hydrated and a bit loose.
- Cover the bowl tightly with plastic wrap or a clean kitchen towel. Place it in a warm, draft-free spot and let it sit for at least 12 hours, though 18 hours is even better. During this time, the dough will double in size and become dotted with bubbles.
- About 30 minutes before you are ready to bake, place your empty Dutch oven (with the lid on) into the oven. Preheat the oven to 450°F (230°C). It is crucial that the pot is extremely hot before the dough goes in.
- Turn the dough out onto a well-floured surface. It will be very sticky, so use plenty of flour on your hands. Gently fold the dough over itself a few times to form a rough ball. Place the dough onto a piece of parchment paper for easy transferring.
- Carefully remove the hot Dutch oven from the oven. Lift the parchment paper with the dough and lower it into the pot. Cover with the lid and bake for 30 minutes. This traps the steam and allows the bread to rise significantly.
- Remove the lid from the Dutch oven. Continue baking for another 15 minutes, or until the crust is a deep golden brown and sounds hollow when tapped. Let the bread cool on a wire rack for at least 30 minutes before slicing to ensure the interior sets properly.