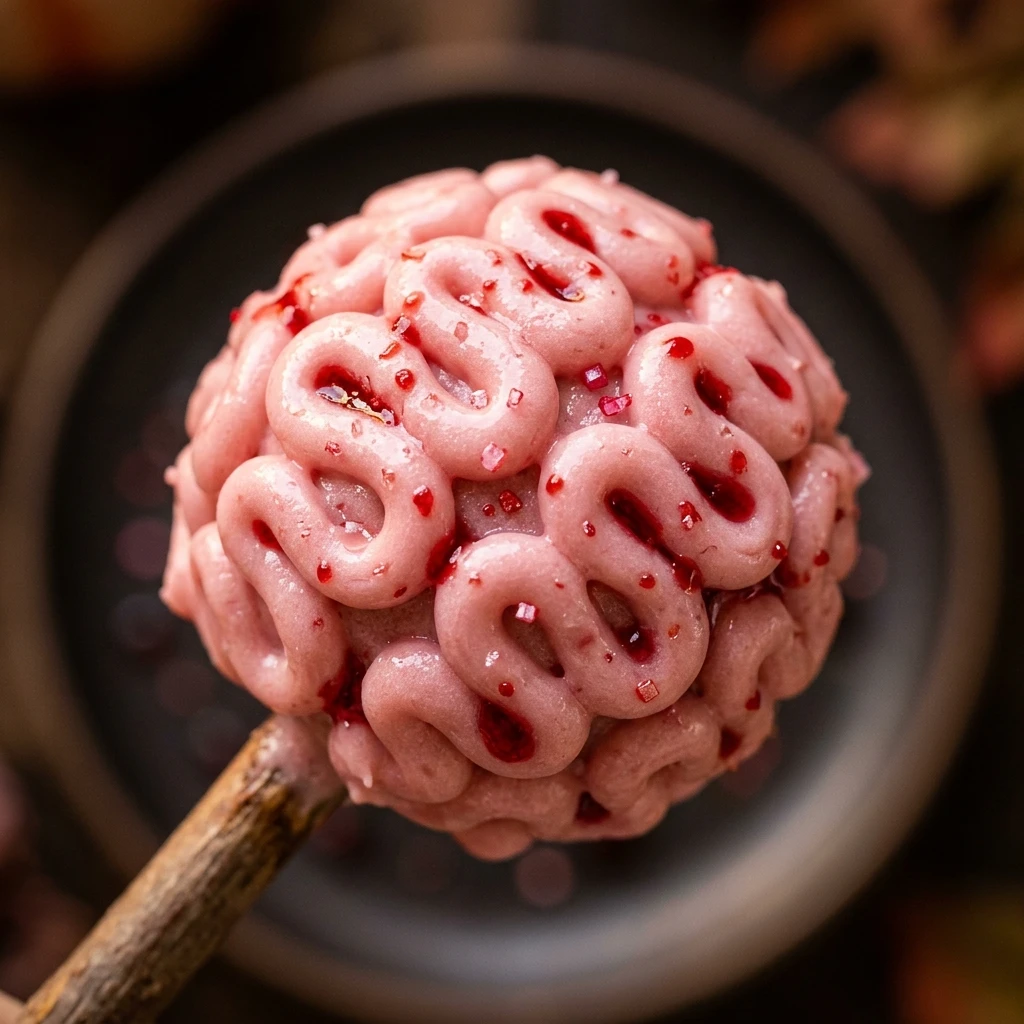

Halloween is the perfect time to get creative in the kitchen with treats that look spooky but taste amazing. These Halloween Zombie Brain Cake Pops are the ultimate showstopper for any costume party or spooky gathering. With their realistic “brain” texture and gooey red interior, they are sure to delight both kids and adults alike.
Making cake pops might seem intimidating, but this recipe breaks it down into simple steps. By using red velvet cake inside and a pink candy coating on the outside, you achieve a gruesome yet delicious effect. Get ready to impress your friends with a dessert that looks like it came straight out of a horror movie!
Recipe Information
- Prep Time: 45 minutes
- Cook Time: 30 minutes
- Total Time: 75 minutes
- Servings: 24 cake pops
- Difficulty Level: Medium
Nutrition Information
- Calories per serving: 210 kcal
- Protein: 2g
- Carbohydrates: 28g
- Fat: 10g
- Fiber: 1g
- Sugar: 22g
- Sodium: 180mg
Why Make This Halloween Zombie Brain Cake Pops Recipe
This recipe is the perfect blend of spooky and sweet. It allows you to practice your decorating skills without needing professional tools. The “brain” squiggles are intentionally messy, which takes the pressure off making them look perfect. If they look a little chaotic, they actually look more realistic!
Beyond the looks, these cake pops are incredibly moist and flavorful. Using red velvet cake adds a hidden “gory” surprise when someone takes a bite. They are also easy to transport and serve, making them the ideal handheld treat for a busy Halloween night.
How to Make Halloween Zombie Brain Cake Pops Recipe
Follow these steps to transform a simple cake into creepy, edible zombie brains that will be the talk of the dessert table.
Ingredients
- 1 box red velvet cake mix (plus ingredients required on the box)
- 1/2 cup vanilla or cream cheese frosting
- 16 oz pink candy melts
- 2 tablespoons vegetable shortening or coconut oil (for thinning)
- Red decorating gel or edible “blood”
- 24 lollipop sticks
- Styrofoam block (for standing the pops)
Directions
Step 1: Bake the Cake
Prepare the red velvet cake according to the package instructions. Bake it in a standard pan and let it cool completely. It is best to let it cool for at least an hour so it doesn’t melt the frosting later.
Step 2: Crumble and Mix
Once the cake is cool, crumble it into a large bowl using your hands or a fork. Add the frosting and mix thoroughly until you have a dough-like consistency that holds its shape when squeezed.
Step 3: Shape the Brains
Scoop about a tablespoon of the mixture and roll it into an oval shape, rather than a perfect circle. Use a toothpick or a knife to press a slight indentation down the center to mimic the two hemispheres of a brain.
Step 4: Chill the Cake Balls
Place the shaped cake balls on a parchment-lined tray and freeze them for about 15 to 20 minutes. You want them firm, but not frozen solid, so they stay on the sticks easily.
Step 5: Melt the Coating
Melt the pink candy melts in a microwave-safe bowl in 30-second intervals, stirring in between. Mix in the shortening or coconut oil to achieve a smooth, pourable consistency.
Step 6: Dip the Pops
Dip the tip of a lollipop stick into the melted candy, then insert it into a cake ball. Dip the entire ball into the pink coating, let the excess drip off, and stick it into the Styrofoam block to dry.
Step 7: Create the Brain Texture
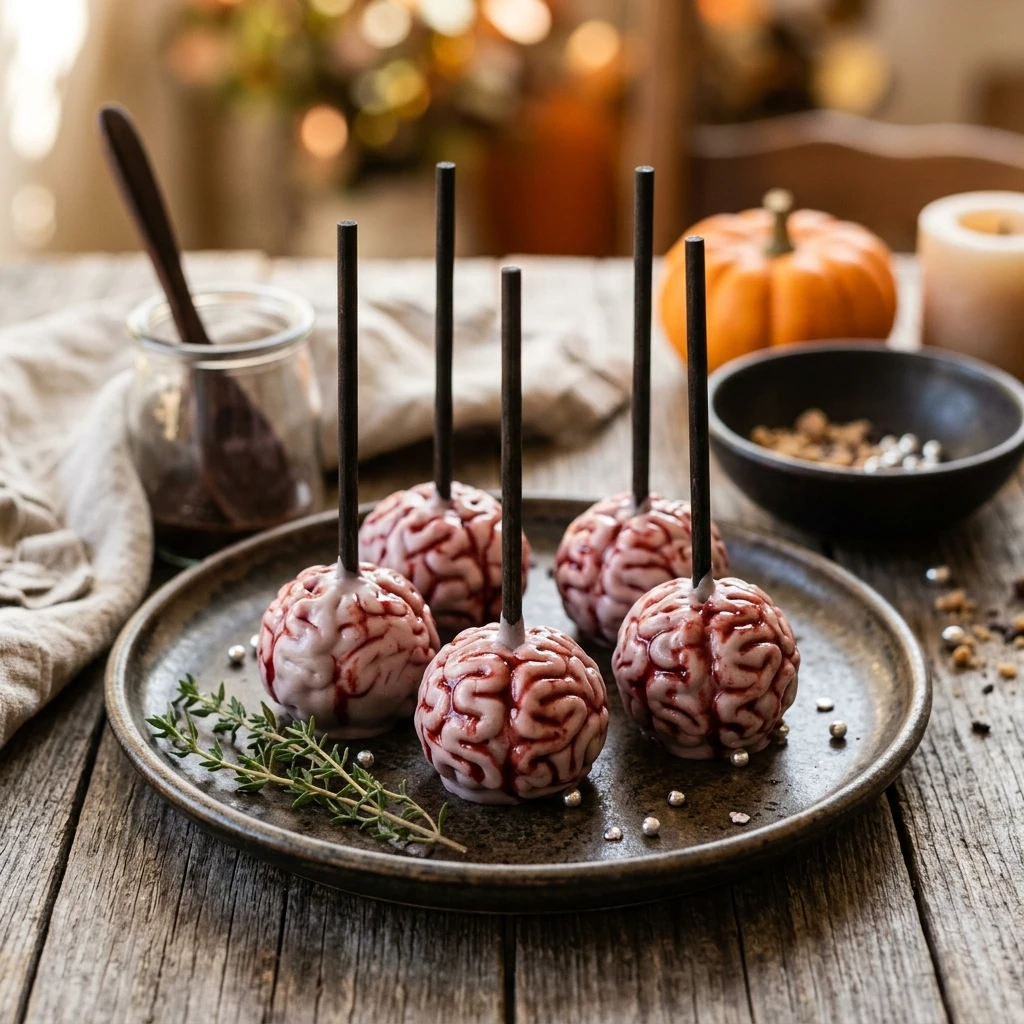
Transfer the remaining melted pink candy into a piping bag or a plastic bag with a tiny corner snipped off. Pipe “squiggle” patterns all over the dry cake pops to create the brain-like texture.
Step 8: Add the “Blood”
Once the squiggles have set, lightly drizzle or dot red decorating gel over the brain to give it a fresh, zombie-themed look.
How to Serve Halloween Zombie Brain Cake Pops Recipe
For the best presentation, stand the cake pops upright in a Styrofoam block covered with black decorative paper. You can also place them in a glass jar filled with black and orange jelly beans. For an extra spooky touch, serve them on a silver platter surrounded by plastic spiders or fake gauze.
How to Store Halloween Zombie Brain Cake Pops Recipe
Store these cake pops in an airtight container in the refrigerator for up to 5 days. If you need to stack them, place parchment paper between the layers to prevent the “brain” squiggles from getting crushed. You can also freeze them for up to a month, but the red gel may run slightly when they thaw.
Expert Tips for Perfect Halloween Zombie Brain Cake Pops Recipe
Make sure your cake balls are cold before dipping, but not frozen. If they are too cold, the candy coating might crack as it warms up. Also, if your candy coating becomes too thick while you are piping the squiggles, simply pop it back in the microwave for 10 seconds to loosen it up again.
Delicious Variations
You can use different cake flavors like chocolate or strawberry for different “internal” colors. If you want a more “rotten” look, add a drop of green food coloring to your pink candy melts to create a greyish-pink hue. You can even add a small piece of gummy candy inside the cake ball for a “tumor” surprise!
Frequently Asked Questions
Q: Can I make these a day in advance?
Yes, these are actually better when made a day ahead as it gives the candy coating and gel time to set completely.
Q: Why did my cake pops fall off the stick?
This usually happens if the cake balls are too heavy or if the stick wasn’t dipped in candy coating before being inserted into the cake.
Q: Can I use homemade cake instead of a box mix?
Absolutely! Any standard red velvet or chocolate cake recipe will work perfectly for this.
Q: What if I can’t find pink candy melts?
You can use white candy melts or white chocolate and add a tiny drop of red oil-based food coloring to achieve a pink shade.
Q: Do I have to use frosting?
The frosting acts as the glue for the cake crumbs. If you prefer, you can use a bit of jam or even cream cheese instead.
Conclusion
Halloween Zombie Brain Cake Pops are a fun, creepy, and delicious way to celebrate the spooky season. They offer a great balance of creative decorating and classic flavor. Whether you are hosting a big party or just making treats for the family, these “brains” are sure to be a hit. Happy Halloween and happy baking!
Halloween Zombie Brain Cake Pops Recipe
- Cook Time: 75 minutes
- Total Time: 1 hour 15 minutes
- Diet: None mentioned
Ingredients
- 1 box red velvet cake mix (plus ingredients required on the box)
- 1/2 cup vanilla or cream cheese frosting
- 16 oz pink candy melts
- 2 tablespoons vegetable shortening or coconut oil (for thinning)
- Red decorating gel or edible “blood”
- 24 lollipop sticks
- Styrofoam block (for standing the pops)
Instructions
- Step 1: Bake the Cake
Prepare the red velvet cake according to the package instructions. Bake it in a standard pan and let it cool completely. It is best to let it cool for at least an hour so it doesn’t melt the frosting later.
- Step 2: Crumble and Mix
Once the cake is cool, crumble it into a large bowl using your hands or a fork. Add the frosting and mix thoroughly until you have a dough-like consistency that holds its shape when squeezed.
- Step 3: Shape the Brains
Scoop about a tablespoon of the mixture and roll it into an oval shape, rather than a perfect circle. Use a toothpick or a knife to press a slight indentation down the center to mimic the two hemispheres of a brain.
- Step 4: Chill the Cake Balls
Place the shaped cake balls on a parchment-lined tray and freeze them for about 15 to 20 minutes. You want them firm, but not frozen solid, so they stay on the sticks easily.
- Step 5: Melt the Coating
Melt the pink candy melts in a microwave-safe bowl in 30-second intervals, stirring in between. Mix in the shortening or coconut oil to achieve a smooth, pourable consistency.
- Step 6: Dip the Pops
Dip the tip of a lollipop stick into the melted candy, then insert it into a cake ball. Dip the entire ball into the pink coating, let the excess drip off, and stick it into the Styrofoam block to dry.
- Step 7: Create the Brain Texture
Transfer the remaining melted pink candy into a piping bag or a plastic bag with a tiny corner snipped off. Pipe “squiggle” patterns all over the dry cake pops to create the brain-like texture.
- Step 8: Add the “Blood”
Once the squiggles have set, lightly drizzle or dot red decorating gel over the brain to give it a fresh, zombie-themed look.