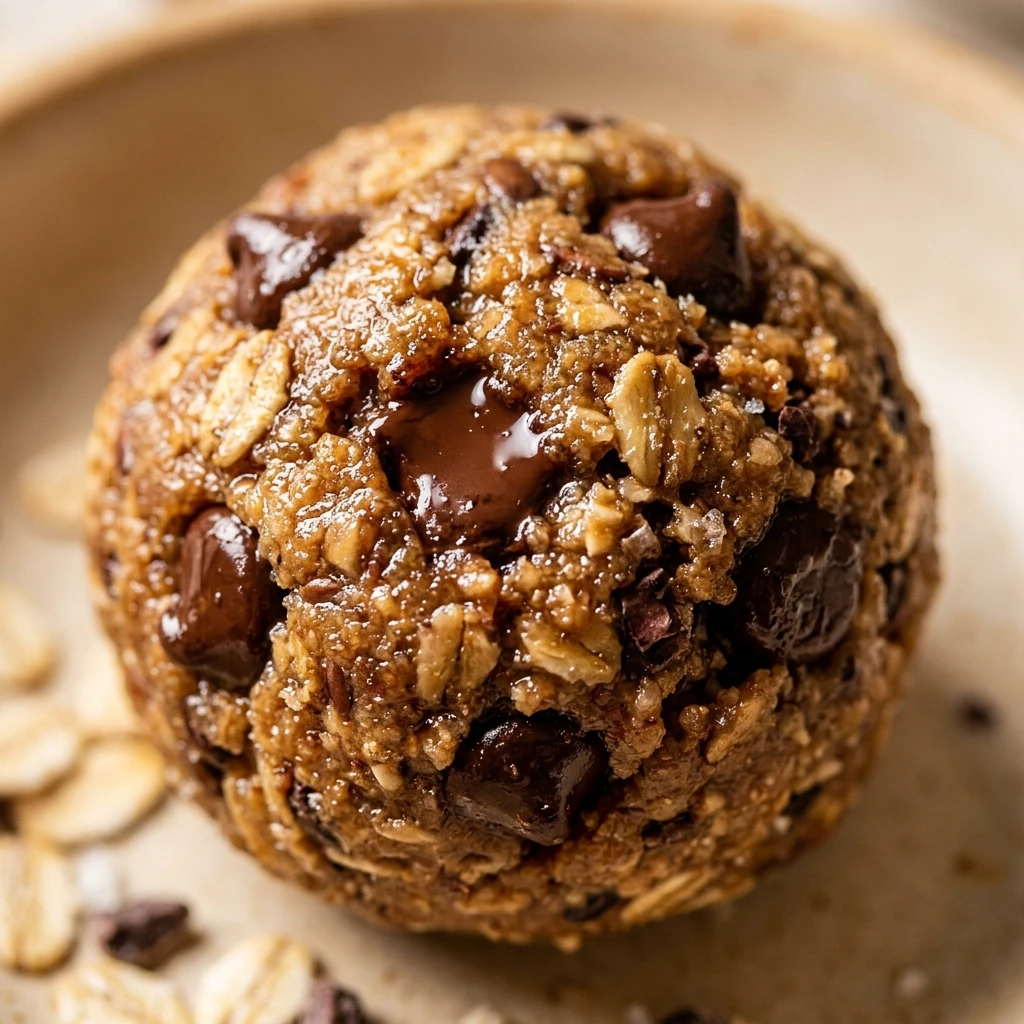

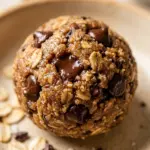
Finding a snack that satisfies your sweet tooth while helping you reach your fitness goals can be a challenge. These High Protein Cookie Dough Balls are the perfect solution for anyone who loves the taste of raw cookie dough but wants a healthier, protein-packed alternative. They are quick to make, require no baking, and use simple ingredients you likely already have in your pantry.
Whether you need a post-workout boost or a guilt-free dessert after dinner, these bite-sized treats deliver a satisfying texture and classic chocolate chip flavor. They are soft, chewy, and packed with enough protein to keep you feeling full and energized throughout the day.
Recipe Information
- Prep Time: 10 minutes
- Cook Time: 0 minutes
- Total Time: 10 minutes
- Servings: 12 balls
- Difficulty Level: Easy
Nutrition Information
- Calories per serving: 115 kcal
- Protein: 8g
- Carbohydrates: 10g
- Fat: 6g
- Fiber: 2g
- Sugar: 4g
- Sodium: 45mg
Why Make This High Protein Cookie Dough Balls
Most traditional cookie dough recipes are loaded with refined sugars and unhealthy fats. This version swaps those out for nutrient-dense ingredients like oat flour and protein powder. By making these at home, you control exactly what goes into your body, ensuring a clean snack without any artificial preservatives.
The best part about this recipe is its convenience. There is no need to preheat an oven or wait for cookies to bake. You can whip up a batch in just ten minutes and have snacks ready for the entire week. They are also highly portable, making them a great option for busy afternoons or as a lunchbox addition.
How to Make High Protein Cookie Dough Balls
Making these protein balls is incredibly straightforward. All you need is one mixing bowl and a few minutes of your time to create a dough that tastes just like the real thing.
Ingredients
- 1 cup oat flour (blended rolled oats)
- 1/2 cup vanilla protein powder
- 1/4 teaspoon salt
- 1/2 cup creamy almond butter or peanut butter
- 3 tablespoons pure maple syrup or honey
- 1 teaspoon vanilla extract
- 2-3 tablespoons unsweetened almond milk (as needed)
- 1/3 cup mini dark chocolate chips
Directions
Step 1: Combine Dry Ingredients
In a medium-sized mixing bowl, whisk together the oat flour, vanilla protein powder, and salt. Ensure there are no large clumps of protein powder so the texture remains smooth.
Step 2: Add Wet Ingredients
Add the almond butter, maple syrup, and vanilla extract to the dry mixture. Stir well with a spatula or wooden spoon until a thick, crumbly dough begins to form.
Step 3: Adjust Consistency
Add the almond milk one tablespoon at a time. Mix after each addition until the dough reaches a consistency that is moist enough to hold together but not sticky. You want it to feel like traditional cookie dough.
Step 4: Fold in Chocolate Chips
Gently fold in the mini chocolate chips using a spatula. Distribute them evenly throughout the dough so every bite has plenty of chocolate.
Step 5: Roll into Balls
Scoop about one tablespoon of dough at a time and roll it between your palms to form a smooth ball. Repeat this process until all the dough is used, which should yield about 12 balls.
Step 6: Chill and Set
Place the balls on a plate or in a container lined with parchment paper. Let them chill in the refrigerator for at least 30 minutes to firm up before eating.
How to Serve High Protein Cookie Dough Balls
These treats are best served cold straight from the fridge. They pair wonderfully with a hot cup of coffee or a glass of cold milk. If you want to get fancy, you can drizzle them with a little bit of melted dark chocolate or a sprinkle of sea salt for a gourmet touch. They also make a fantastic topping for Greek yogurt or smoothie bowls.
How to Store High Protein Cookie Dough Balls
Store your cookie dough balls in an airtight container in the refrigerator for up to 7 days. If you want to keep them longer, they freeze exceptionally well. Place them in a freezer-safe bag for up to 3 months. When you are ready to eat one from the freezer, let it thaw at room temperature for about 10 minutes.
Expert Tips for Perfect High Protein Cookie Dough Balls
To get the best results, use a high-quality protein powder that you actually enjoy the taste of, as it provides much of the flavor. If the dough feels too dry or “sandy,” add a tiny bit more milk. If it is too sticky, add another tablespoon of oat flour. Using mini chocolate chips rather than regular ones ensures that the chips stay inside the small balls more easily.

Delicious Variations
You can easily customize this recipe to suit your tastes. For a “Double Chocolate” version, use chocolate protein powder and add a tablespoon of cocoa powder. If you have a nut allergy, swap the almond butter for sunflower seed butter. You can also add chopped nuts, dried cranberries, or shredded coconut for extra texture and flavor variety.
Frequently Asked Questions
Q: Can I use whey protein or plant-based protein?
Yes, both work well! However, plant-based proteins (like pea or soy) tend to absorb more liquid, so you might need to add an extra splash of milk to reach the right consistency.
Q: Is it safe to eat raw oat flour?
Yes, oat flour is safe to consume raw. If you are concerned, you can heat-treat the flour by microwaving it for 60 seconds or baking it at 350°F for 5 minutes before mixing.
Q: Why is my dough falling apart?
The dough is likely too dry. This often happens if the protein powder is very absorbent. Simply add a teaspoon of milk or more nut butter until it holds its shape.
Q: Can I use honey instead of maple syrup?
Absolutely. Honey is a great substitute, though it may make the balls slightly sweeter and thicker than maple syrup.
Q: Do I have to refrigerate them?
While they are safe at room temperature for a few hours, they have the best texture and flavor when kept cold. They will soften significantly if left out in a warm kitchen.
Conclusion
These High Protein Cookie Dough Balls are the ultimate hack for healthy snacking. They are easy to prepare, delicious to eat, and keep you on track with your nutritional goals. Give this recipe a try the next time you need a quick energy boost or a sweet treat that loves you back!

High Protein Cookie Dough Balls
- Cook Time: 10 minutes
- Total Time: 10 minutes
- Diet: High-Protein, Vegetarian
Ingredients
- 1 cup oat flour (blended rolled oats)
- 1/2 cup vanilla protein powder
- 1/4 teaspoon salt
- 1/2 cup creamy almond butter or peanut butter
- 3 tablespoons pure maple syrup or honey
- 1 teaspoon vanilla extract
- 2–3 tablespoons unsweetened almond milk (as needed)
- 1/3 cup mini dark chocolate chips
Instructions
- Step 1: Combine Dry Ingredients. In a medium-sized mixing bowl, whisk together the oat flour, vanilla protein powder, and salt. Ensure there are no large clumps of protein powder so the texture remains smooth.
- Step 2: Add Wet Ingredients. Add the almond butter, maple syrup, and vanilla extract to the dry mixture. Stir well with a spatula or wooden spoon until a thick, crumbly dough begins to form.
- Step 3: Adjust Consistency. Add the almond milk one tablespoon at a time. Mix after each addition until the dough reaches a consistency that is moist enough to hold together but not sticky. You want it to feel like traditional cookie dough.
- Step 4: Fold in Chocolate Chips. Gently fold in the mini chocolate chips using a spatula. Distribute them evenly throughout the dough so every bite has plenty of chocolate.
- Step 5: Roll into Balls. Scoop about one tablespoon of dough at a time and roll it between your palms to form a smooth ball. Repeat this process until all the dough is used, which should yield about 12 balls.
- Step 6: Chill and Set. Place the balls on a plate or in a container lined with parchment paper. Let them chill in the refrigerator for at least 30 minutes to firm up before eating.