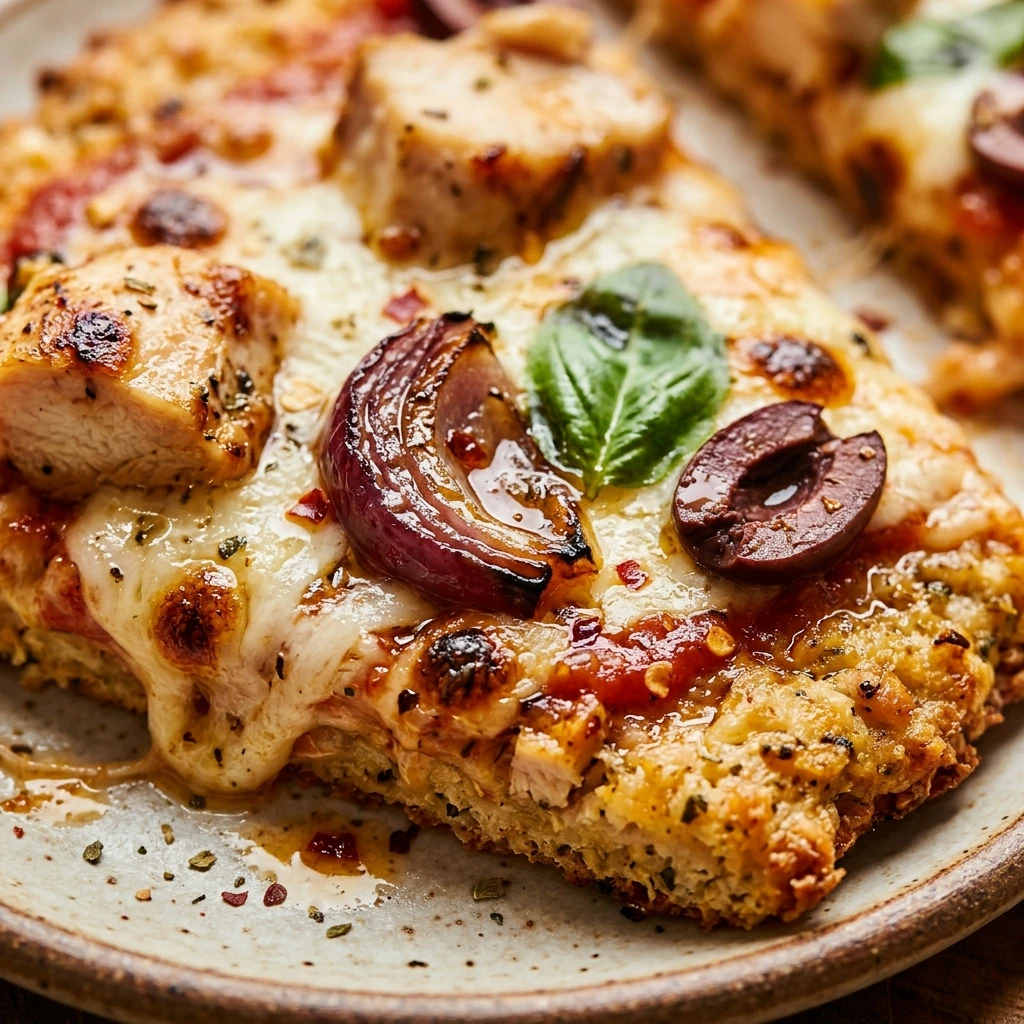

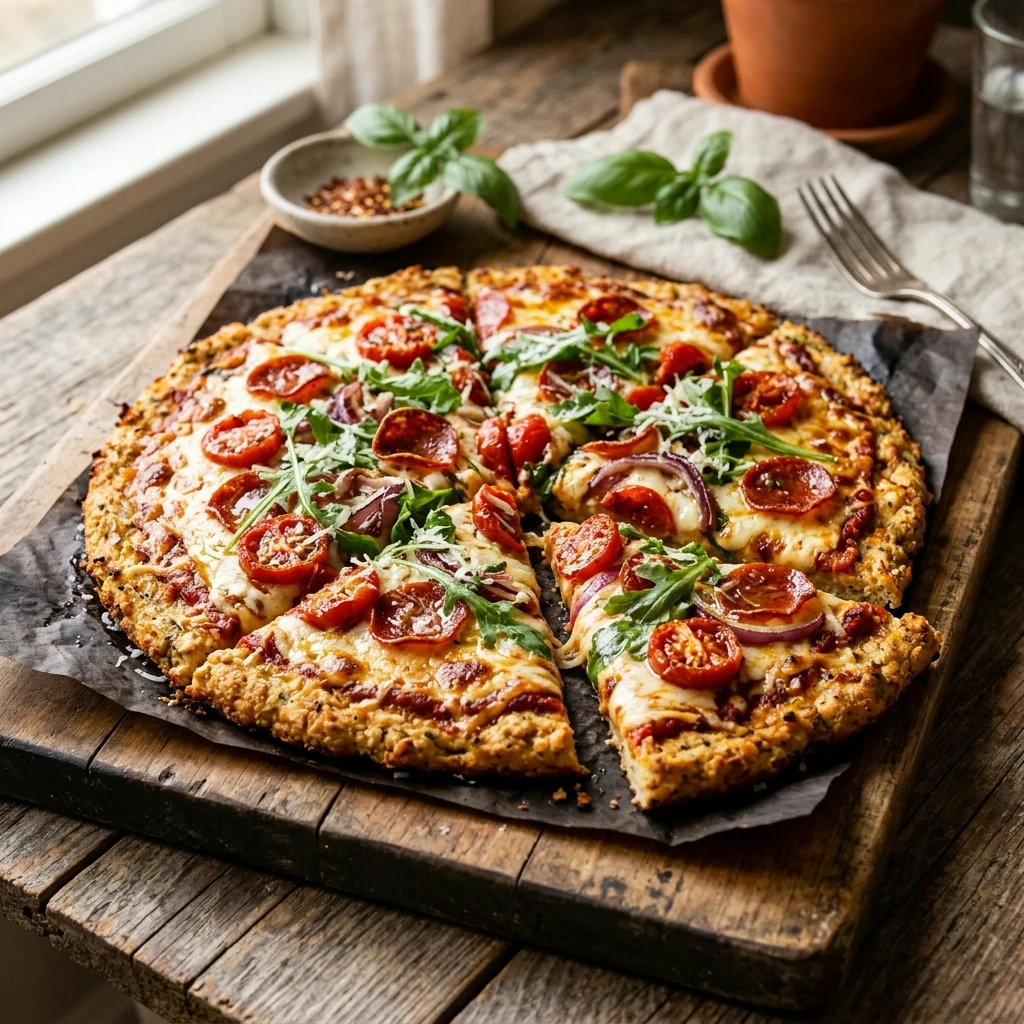
If you are looking for a way to enjoy pizza night without the heavy carb load, look no further than this Chicken Crust Pizza. It is a game-changer for anyone following a ketogenic diet, a gluten-free lifestyle, or simply someone trying to increase their daily protein intake. Instead of a traditional flour-based dough, this recipe uses seasoned chicken to create a sturdy and delicious base for all your favorite toppings.
The beauty of this recipe lies in its simplicity. With just a few basic ingredients and about half an hour, you can have a crispy, savory “crust” that holds up surprisingly well to being picked up by hand. It is satisfying, filling, and packs a punch of flavor that will make you forget all about standard delivery pizzas. Let’s dive into how you can make this high-protein masterpiece in your own kitchen.
Recipe Information
- Prep Time: 10 minutes
- Cook Time: 25 minutes
- Total Time: 35 minutes
- Servings: 2 servings
- Difficulty Level: Easy
Nutrition Information
- Calories per serving: 410 kcal
- Protein: 48g
- Carbohydrates: 4g
- Fat: 22g
- Fiber: 0.5g
- Sugar: 2g
- Sodium: 950mg
Why Make This Chicken Crust Pizza
This Chicken Crust Pizza is the ultimate solution for pizza cravings when you are watching your macros. Traditional crusts are often loaded with empty carbohydrates that can lead to energy crashes. By using chicken as the base, you are getting a massive boost of lean protein that keeps you full for hours. It is also incredibly versatile, allowing you to customize the seasonings in the crust itself to match your toppings.
Another reason to love this recipe is how kid-friendly it is. Even picky eaters who might shy away from vegetable-based “alternative” crusts like cauliflower tend to love the savory, familiar taste of a chicken base. It is essentially one giant, flat chicken nugget topped with cheese and sauce—what’s not to love? Plus, it’s a great way to use up canned chicken or leftovers in a creative way.
How to Make Chicken Crust Pizza
Preparing this pizza is a straightforward process that involves drying out your protein, mixing it with binding agents, and baking it twice to ensure a crispy finish. Follow these simple steps to achieve the perfect low-carb crust.
Ingredients
- 2 cans (10 oz each) premium chicken breast, drained very well
- 1/2 cup grated Parmesan cheese
- 1 large egg
- 1/2 teaspoon garlic powder
- 1/2 teaspoon dried oregano
- 1/4 teaspoon black pepper
- 1/2 cup sugar-free marinara or pizza sauce
- 1 cup shredded mozzarella cheese
- Your choice of toppings (pepperoni, bell peppers, onions, etc.)
Directions
Step 1: Preheat and Prep
Preheat your oven to 400°F (200°C). Line a large baking sheet or a pizza stone with parchment paper. This is a crucial step to prevent the chicken from sticking to the pan.
Step 2: Dry the Chicken
Spread the drained canned chicken out on the prepared baking sheet. Place it in the oven for about 5 to 8 minutes to “dry it out.” This removes excess moisture, which is the secret to a crust that isn’t soggy. Remove from the oven and let it cool slightly.
Step 3: Create the Dough
In a medium mixing bowl, combine the dried chicken, grated Parmesan cheese, egg, garlic powder, oregano, and pepper. Use a fork or your hands to mix everything thoroughly until it forms a consistent, dough-like mixture.
Step 4: Shape the Crust
Place the chicken mixture back onto the parchment-lined baking sheet. Place another piece of parchment paper on top and use a rolling pin or your hands to flatten the “dough” into a circle or rectangle about 1/4 inch thick. Remove the top layer of parchment.
Step 5: The First Bake
Bake the crust in the preheated oven for 15 to 20 minutes. You are looking for the edges to turn golden brown and the crust to feel firm to the touch. This provides the structural integrity needed to hold the toppings.
Step 6: Add Toppings
Remove the crust from the oven. Spread the pizza sauce evenly over the surface, leaving a small border for the “crust” edge. Sprinkle the mozzarella cheese and add your favorite toppings like pepperoni or sliced olives.
Step 7: Final Bake and Melt
Place the pizza back into the oven for another 5 to 10 minutes, or until the cheese is bubbly and starting to brown. For an extra crispy top, you can broil it for the last 60 seconds.
How to Serve Chicken Crust Pizza
Let the pizza rest for about 3 to 5 minutes before slicing. This allows the proteins and cheese to set, making it easier to pick up. Slice it into traditional triangles or squares. It pairs perfectly with a fresh Caesar salad or some roasted zucchini fries. Since it is so high in protein, you will find that a couple of slices are incredibly filling.
How to Store Chicken Crust Pizza
If you have leftovers, store them in an airtight container in the refrigerator for up to 3 or 4 days. To maintain the crispness, avoid using the microwave for reheating. Instead, place the slices in an air fryer at 350°F for 3 minutes or in a toaster oven until the cheese is melted again.
Expert Tips for Perfect Chicken Crust Pizza
The most important tip is to make sure your chicken is as dry as possible before mixing. If using canned chicken, squeeze it between paper towels to remove all the water. If you prefer, you can use ground chicken, but you must cook and crumble it first before using it as a crust base. Also, always use parchment paper—silicone mats or greased foil often result in sticking.
Delicious Variations
You can easily swap flavors to keep things interesting. Try a Buffalo Chicken Pizza by using buffalo sauce instead of marinara and topping it with blue cheese crumbles and celery. For a BBQ version, use a low-carb BBQ sauce, red onions, and cilantro. You can even make a “White Pizza” by using a garlic butter base and topping it with ricotta and spinach.
Frequently Asked Questions
Q: Does the crust taste like chicken?
Yes, it does have a chicken flavor, but once it is seasoned with Parmesan, garlic, and oregano, and topped with pizza sauce and cheese, it tastes very similar to a thin-crust meat-lovers pizza.
Q: Can I use fresh chicken breast instead of canned?
Absolutely. You can use finely minced cooked chicken breast or ground chicken. Just ensure the chicken is fully cooked and very dry before mixing it with the egg and cheese.
Q: Is this recipe keto-friendly?
Yes! This is one of the most popular keto pizza options because it replaces high-carb flour with high-protein chicken and healthy fats from cheese.
Q: Can I freeze the crust?
Yes. You can bake the crust (Step 5), let it cool completely, and then freeze it between layers of parchment paper. When ready to eat, add toppings and bake from frozen until heated through.
Q: Why is my crust falling apart?
This usually happens if the egg was too small or if the chicken was too chunky. Make sure the chicken is finely shredded and that the Parmesan cheese is the finely grated kind, as it acts like a “glue” to hold everything together.
Conclusion
Chicken Crust Pizza is a revolutionary way to enjoy one of the world’s favorite comfort foods without the nutritional drawbacks of traditional dough. It is simple to prepare, incredibly satisfying, and fits perfectly into a variety of healthy eating plans. Whether you are trying to lose weight, build muscle, or just try something new, this recipe is sure to become a regular in your meal rotation. Give it a try this weekend and enjoy a guilt-free pizza experience!
Chicken Crust Pizza
- Cook Time: 35 minutes
- Total Time: 35 minutes
- Diet: Keto, Gluten-Free, Low-Carb
Ingredients
- 2 cans (10 oz each) premium chicken breast, drained very well
- 1/2 cup grated Parmesan cheese
- 1 large egg
- 1/2 teaspoon garlic powder
- 1/2 teaspoon dried oregano
- 1/4 teaspoon black pepper
- 1/2 cup sugar-free marinara or pizza sauce
- 1 cup shredded mozzarella cheese
- Your choice of toppings (pepperoni, bell peppers, onions, etc.)
Instructions
- Preheat and Prep: Preheat your oven to 400°F (200°C). Line a large baking sheet or a pizza stone with parchment paper. This is a crucial step to prevent the chicken from sticking to the pan.
- Dry the Chicken: Spread the drained canned chicken out on the prepared baking sheet. Place it in the oven for about 5 to 8 minutes to “dry it out.” This removes excess moisture, which is the secret to a crust that isn’t soggy. Remove from the oven and let it cool slightly.
- Create the Dough: In a medium mixing bowl, combine the dried chicken, grated Parmesan cheese, egg, garlic powder, oregano, and pepper. Use a fork or your hands to mix everything thoroughly until it forms a consistent, dough-like mixture.
- Shape the Crust: Place the chicken mixture back onto the parchment-lined baking sheet. Place another piece of parchment paper on top and use a rolling pin or your hands to flatten the “dough” into a circle or rectangle about 1/4 inch thick. Remove the top layer of parchment.
- The First Bake: Bake the crust in the preheated oven for 15 to 20 minutes. You are looking for the edges to turn golden brown and the crust to feel firm to the touch. This provides the structural integrity needed to hold the toppings.
- Add Toppings: Remove the crust from the oven. Spread the pizza sauce evenly over the surface, leaving a small border for the “crust” edge. Sprinkle the mozzarella cheese and add your favorite toppings like pepperoni or sliced olives.
- Final Bake and Melt: Place the pizza back into the oven for another 5 to 10 minutes, or until the cheese is bubbly and starting to brown. For an extra crispy top, you can broil it for the last 60 seconds.