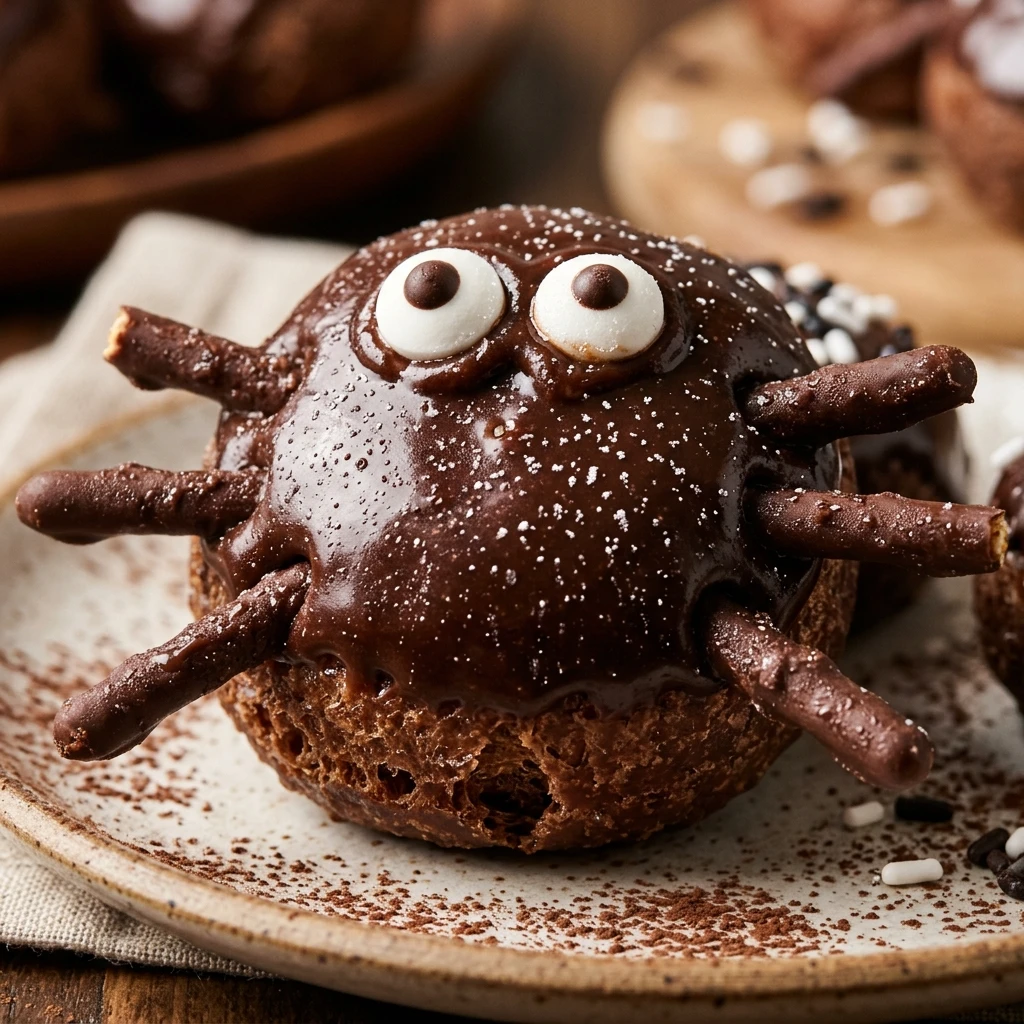

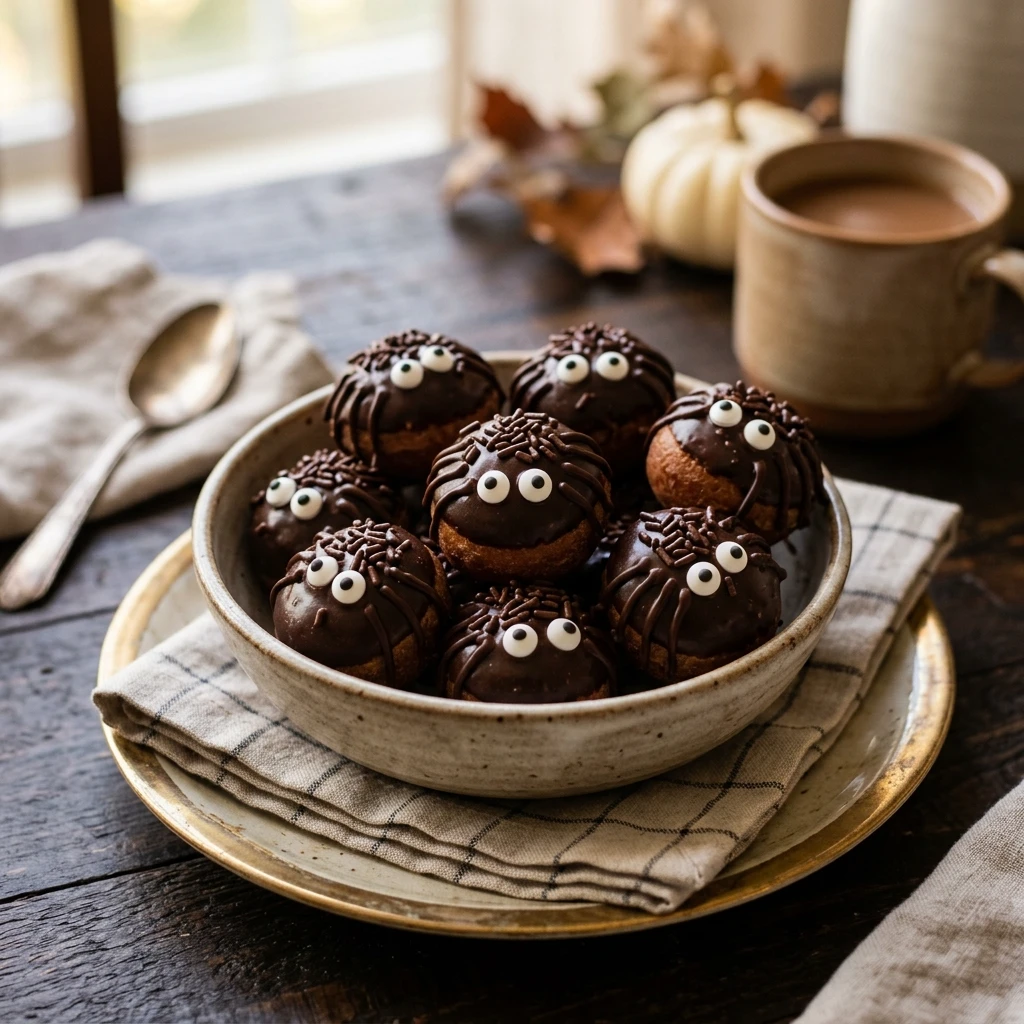
Halloween is the perfect time to get creative in the kitchen without spending hours over a hot stove. These Spider Donut Holes are the ultimate spooky treat that requires zero actual baking. They are cute, just a little bit creepy, and absolutely delicious. Whether you are hosting a neighborhood party or looking for a fun afternoon activity with the kids, these little edible spiders are guaranteed to be a hit.
The best part about this recipe is how quickly it comes together. Using pre-made donut holes means you can focus entirely on the decorating. In just a few minutes, you can transform simple chocolate bites into a tray of festive creatures. They look impressive on a dessert table and taste like a classic chocolatey snack that everyone loves.
Recipe Information
- Prep Time: 25 minutes
- Cook Time: 0 minutes
- Total Time: 25 minutes
- Servings: 12 spiders
- Difficulty Level: Easy
Nutrition Information
- Calories per serving: 185 kcal
- Protein: 2g
- Carbohydrates: 24g
- Fat: 9g
- Fiber: 1g
- Sugar: 15g
- Sodium: 190mg
Why Make This Spider Donut Holes Recipe
You should make this recipe because it is completely stress-free. Halloween can be a busy time with costumes and decorations, so having a “no-bake” option is a total lifesaver. It is also a fantastic way to involve children in the kitchen. Since there is no heat involved, kids can safely help break the pretzels and “glue” on the eyes.
Another reason to love these treats is the perfect flavor combination. You get the soft, cakey texture of the chocolate donut paired with the salty crunch of the pretzel legs. It hits that sweet-and-salty craving perfectly. Plus, they are portion-controlled, making them easy to serve at parties without needing plates or forks.
How to Make Spider Donut Holes Recipe
Creating these spooky snacks is more like a craft project than traditional cooking. Follow these simple steps to bring your chocolate spiders to life.
Ingredients
- 12 chocolate glazed donut holes (store-bought or homemade)
- 24 mini pretzel twists
- 24 edible candy eyes
- 1/4 cup chocolate frosting or melted dark chocolate (to act as glue)
- 1/4 cup chocolate sprinkles (optional, for extra texture)
Directions
Step 1: Prepare the Spider Legs
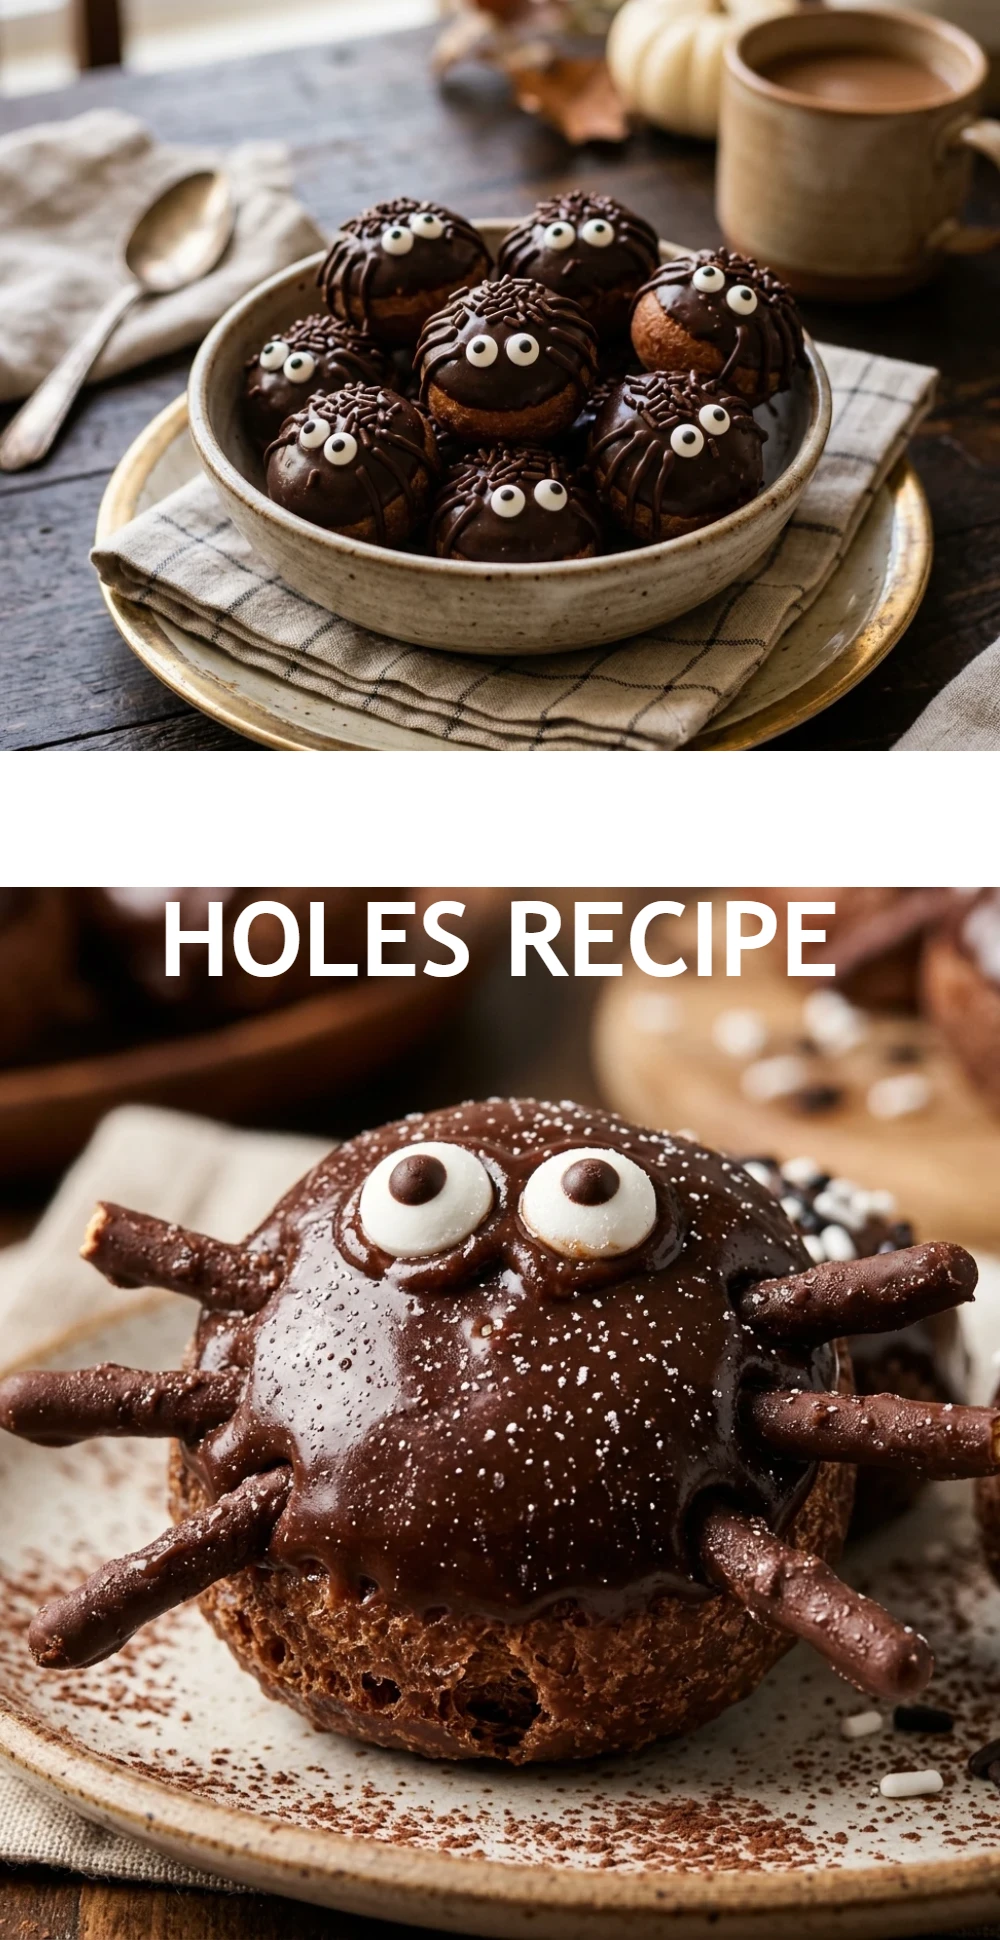
Take your mini pretzel twists and carefully break them into curved “V” shapes or half-circles. You will need eight legs for each spider, so aim for 96 small pretzel pieces in total. It is okay if they aren’t perfectly even; it adds to the spooky look.
Step 2: Create the Leg Holes
Use a toothpick or a small skewer to poke four small holes into the left side of a donut hole and four holes into the right side. This makes it much easier to insert the pretzel legs without crumbling the donut.
Step 3: Attach the Legs
Gently push one pretzel piece into each of the holes you created. If the legs feel loose, you can dip the end of the pretzel into a bit of melted chocolate before inserting it to help it stay in place.
Step 4: Add the Spooky Eyes
Place a tiny dot of chocolate frosting or melted chocolate onto the back of two candy eyes. Press them firmly onto the front of the donut hole. Hold them for a few seconds to ensure they stick.
Step 5: Optional Finishing Touches
If you want a fuzzy look, lightly brush the top of the spider with a tiny bit of melted chocolate and roll it in chocolate sprinkles before adding the eyes. Set the completed spiders on a parchment-lined tray to firm up.
How to Serve Spider Donut Holes Recipe
Serve these spiders on a large white or orange platter to make the dark chocolate pop. For an extra festive touch, you can stretch out some fake cotton “spider webs” on the tray before placing the donuts on top. They look great alongside other Halloween treats like candy corn or orange-frosted cupcakes. If you are serving them at a school function, consider placing each spider in a colorful cupcake liner to make them easy for kids to grab.
How to Store Spider Donut Holes Recipe
These treats are best enjoyed the day they are made because pretzels tend to lose their crunch over time when exposed to air. If you have leftovers, store them in an airtight container at room temperature for up to 2 days. Avoid refrigerating them, as the moisture in the fridge can make the pretzels go soft and the candy eyes may “bleed” color onto the donut.
Expert Tips for Perfect Spider Donut Holes Recipe
To prevent the donut holes from cracking, always use a toothpick to pre-drill the leg holes. If you find your pretzels are breaking too much when you try to snap them, try using a sharp serrated knife to gently saw through the pretzel loops instead. Also, if you can’t find candy eyes, you can use small dots of white icing with a tiny chocolate chip in the center for a homemade version.
Delicious Variations
You can change the “species” of your spider by using different donut flavors. Try powdered sugar donut holes for “Ghost Spiders” or glazed donuts for a lighter look. Instead of pretzels, you can use black licorice strings for long, floppy legs. For a colorful twist, use bright green or purple candy melts to glue the eyes or drizzle over the spiders for a “toxic” effect.
Frequently Asked Questions
Q: Can I use large donuts instead of donut holes?
Yes, you can use full-sized donuts, but you will need larger pretzels or even pretzel rods for the legs to keep the proportions looking right.
Q: My candy eyes keep falling off. What should I do?
Make sure your “glue” (frosting or melted chocolate) is thick. If it is too runny, let it cool for a minute to thicken up before applying the eyes.
Q: Are these spiders nut-free?
Check the labels on your store-bought donuts and candy eyes. Most standard pretzels are nut-free, but many bakeries have cross-contamination risks.
Q: Can I make these a day in advance?
You can prepare the donut “bodies” with the eyes, but it is best to add the pretzel legs right before serving so they stay crunchy.
Q: What is the best way to melt the chocolate for the “glue”?
Microwave chocolate chips in 15-second intervals, stirring in between, until smooth. Be careful not to overheat it or it will become grainy.
Conclusion
Spider Donut Holes are a whimsical and tasty addition to any Halloween celebration. They prove that you don’t need to be a master baker to create something memorable and fun. With just a few store-bought ingredients and a little bit of assembly, you will have a tray of spooky treats that both kids and adults will adore. Give them a try this October and watch them disappear faster than a spider scurrying across the floor!
Spider Donut Holes Recipe
- Cook Time: 25 minutes
- Total Time: 25 minutes
- Diet: Vegetarian
Ingredients
- 12 chocolate glazed donut holes (store-bought or homemade)
- 24 mini pretzel twists
- 24 edible candy eyes
- 1/4 cup chocolate frosting or melted dark chocolate (to act as glue)
- 1/4 cup chocolate sprinkles (optional, for extra texture)
Instructions
- Step 1: Prepare the Spider Legs
Take your mini pretzel twists and carefully break them into curved “V” shapes or half-circles. You will need eight legs for each spider, so aim for 96 small pretzel pieces in total. It is okay if they aren’t perfectly even; it adds to the spooky look.
- Step 2: Create the Leg Holes
Use a toothpick or a small skewer to poke four small holes into the left side of a donut hole and four holes into the right side. This makes it much easier to insert the pretzel legs without crumbling the donut.
- Step 3: Attach the Legs
Gently push one pretzel piece into each of the holes you created. If the legs feel loose, you can dip the end of the pretzel into a bit of melted chocolate before inserting it to help it stay in place.
- Step 4: Add the Spooky Eyes
Place a tiny dot of chocolate frosting or melted chocolate onto the back of two candy eyes. Press them firmly onto the front of the donut hole. Hold them for a few seconds to ensure they stick.
- Step 5: Optional Finishing Touches
If you want a fuzzy look, lightly brush the top of the spider with a tiny bit of melted chocolate and roll it in chocolate sprinkles before adding the eyes. Set the completed spiders on a parchment-lined tray to firm up.