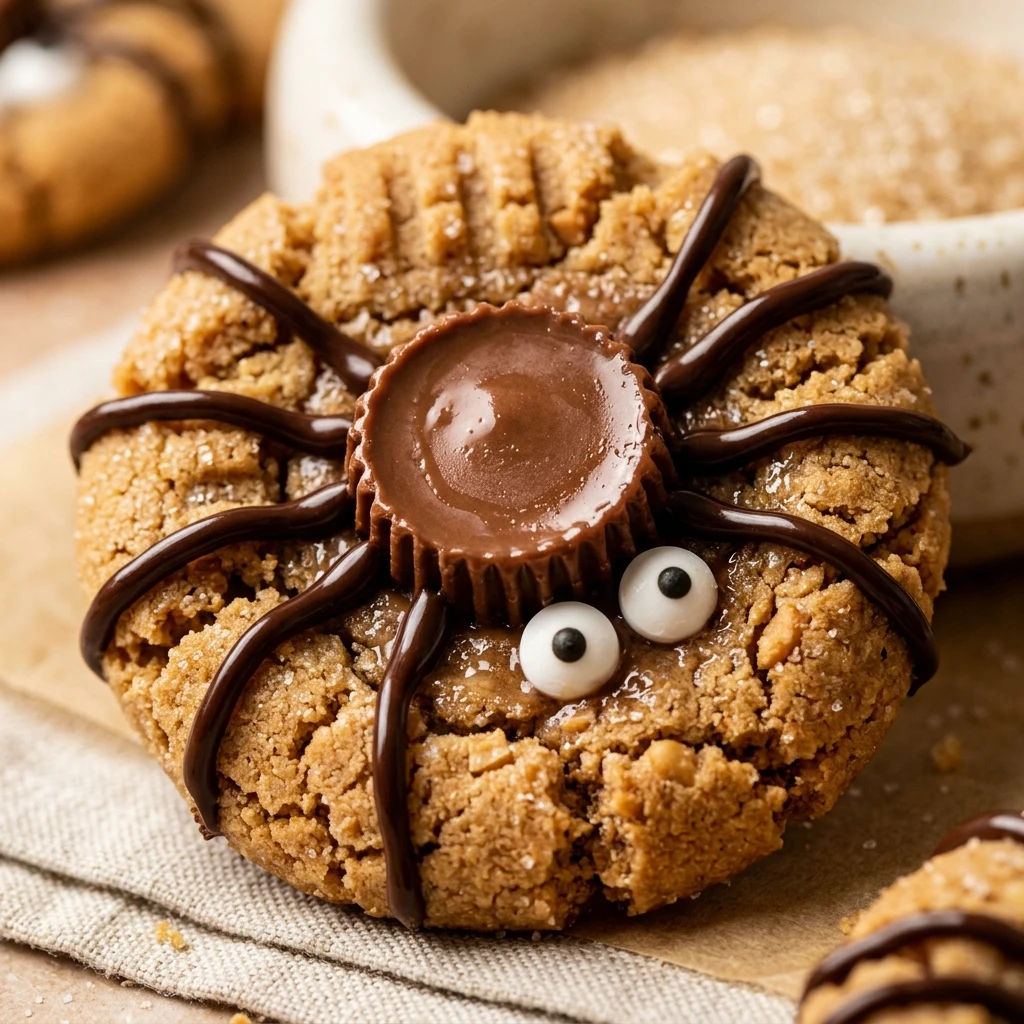

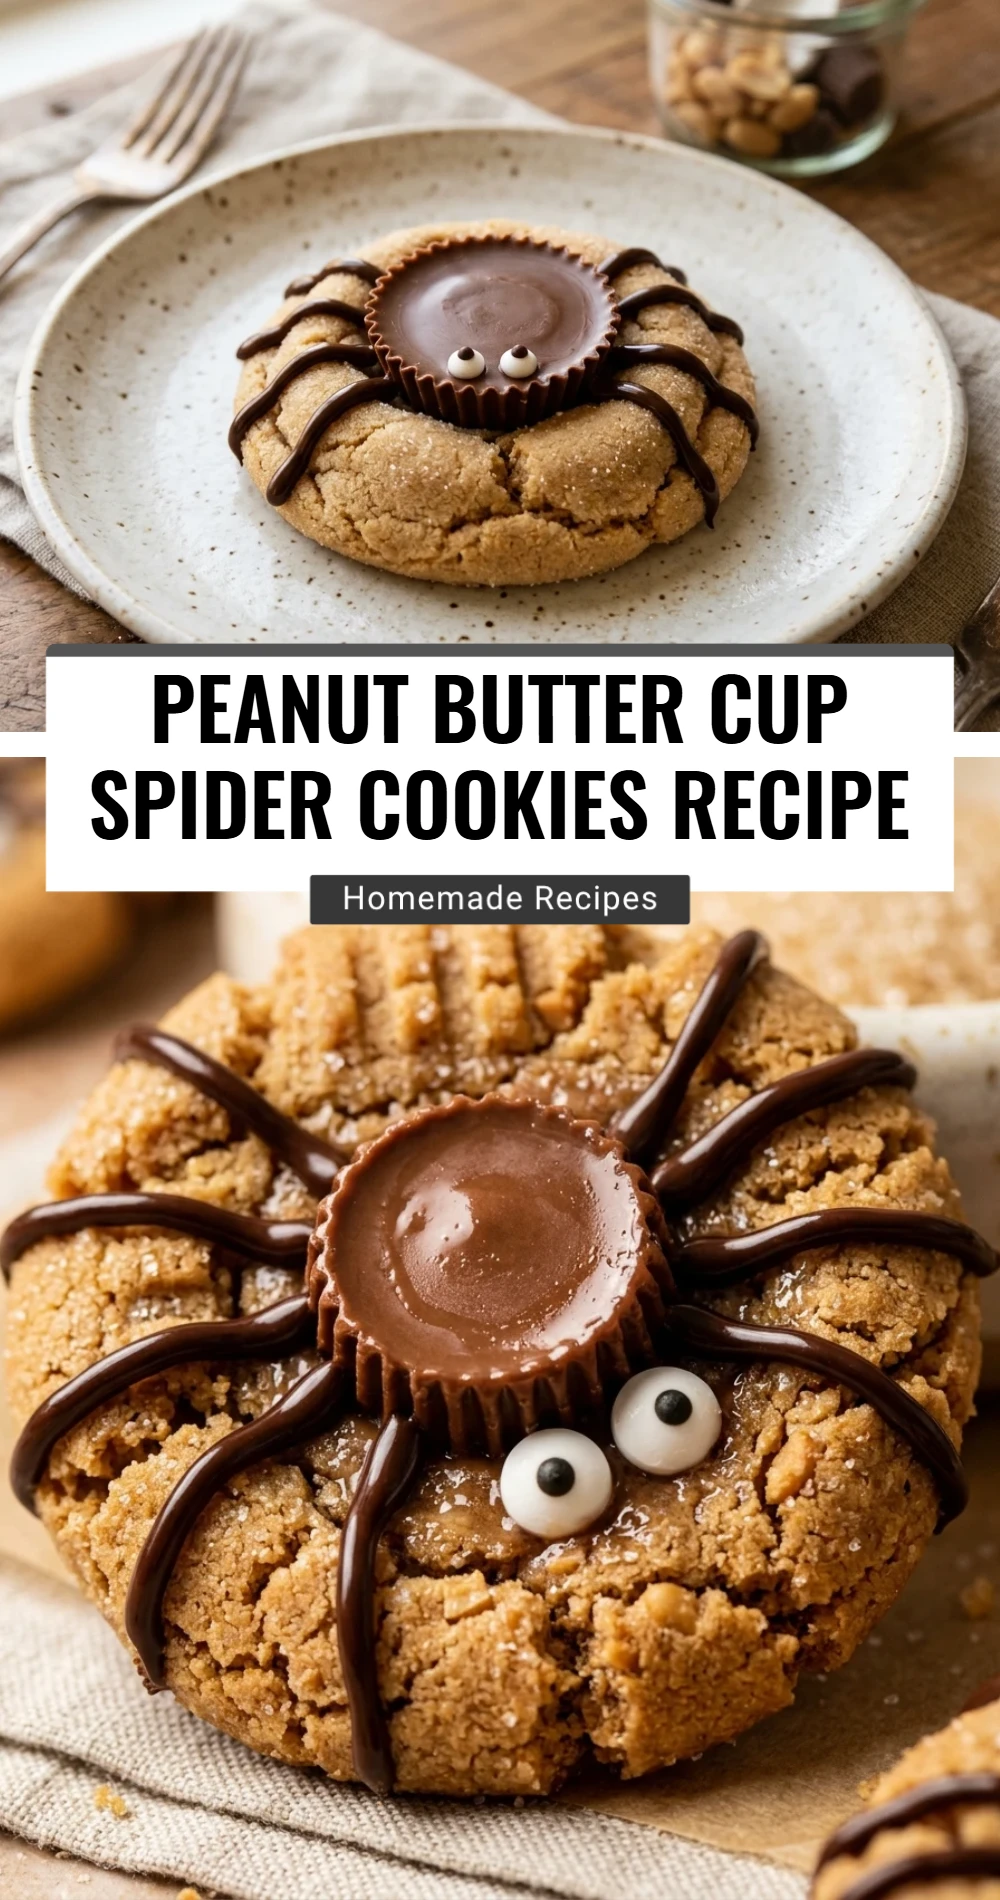
Halloween is the perfect time to get creative in the kitchen, and nothing says spooky fun like these Peanut Butter Cup Spider Cookies. These treats combine the classic, salty-sweet flavor of a peanut butter cookie with the rich indulgence of a chocolate peanut butter cup. They are as adorable as they are delicious, making them a guaranteed hit for school parties, trick-or-treaters, or your own festive gathering.
Whether you are a seasoned baker or just looking for a fun project to do with the kids, this recipe is straightforward and rewarding. The “spiders” come to life with just a few simple decorations, turning a standard cookie into a centerpiece-worthy dessert. Get ready to bake up a batch of these creepy-crawly delights that everyone will be eager to sink their teeth into.
Recipe Information
- Prep Time: 20 minutes
- Cook Time: 10 minutes
- Total Time: 30 minutes
- Servings: 24 cookies
- Difficulty Level: Easy
Nutrition Information
- Calories per serving: 185 kcal
- Protein: 4g
- Carbohydrates: 22g
- Fat: 10g
- Fiber: 1g
- Sugar: 16g
- Sodium: 145mg
Why Make This Peanut Butter Cup Spider Cookies Recipe
This recipe is a must-try because it perfectly balances flavor and presentation. The soft, chewy peanut butter base provides the ideal foundation for the iconic chocolate peanut butter cup. It is a flavor profile that appeals to both children and adults, ensuring no cookie goes uneaten.
Beyond the taste, these cookies are incredibly festive. They offer a playful way to celebrate the holiday season without requiring advanced decorating skills. With just a bit of melted chocolate and some candy eyes, you can transform a simple cookie into a character that brings a smile to everyone’s face.
How to Make Peanut Butter Cup Spider Cookies Recipe
Making these cookies is a multi-step process that involves baking a soft cookie base and then assembling the spider features while the cookies are still warm and pliable.
Ingredients
- 1/2 cup unsalted butter, softened
- 1/2 cup creamy peanut butter
- 1/2 cup granulated sugar
- 1/2 cup packed brown sugar
- 1 large egg
- 1 teaspoon vanilla extract
- 1 1/2 cups all-purpose flour
- 3/4 teaspoon baking soda
- 1/2 teaspoon baking powder
- 1/4 teaspoon salt
- 24 miniature peanut butter cups, unwrapped
- 48 candy eyes
- 1/2 cup semi-sweet chocolate chips (melted for the legs)
Directions
Step 1: Preheat and Prepare
Preheat your oven to 350°F (175°C). Line two large baking sheets with parchment paper or silicone baking mats to prevent the cookies from sticking and to ensure even browning.
Step 2: Cream the Fats and Sugars
In a large mixing bowl, cream together the softened butter, creamy peanut butter, granulated sugar, and brown sugar until the mixture is light and fluffy. This usually takes about 2 to 3 minutes with an electric mixer.
Step 3: Add Wet Ingredients
Beat in the egg and the vanilla extract. Scrape down the sides of the bowl to ensure everything is well incorporated before moving on to the dry ingredients.
Step 4: Mix in Dry Ingredients
In a separate small bowl, whisk together the flour, baking soda, baking powder, and salt. Gradually add this dry mixture to the wet ingredients, mixing on low speed until a soft dough forms.
Step 5: Shape and Bake
Roll the dough into 1-inch balls and place them about 2 inches apart on the prepared baking sheets. Bake for 8 to 10 minutes, or until the edges are just lightly golden. Do not overbake, as they need to be soft for the next step.
Step 6: Add the Spider Body
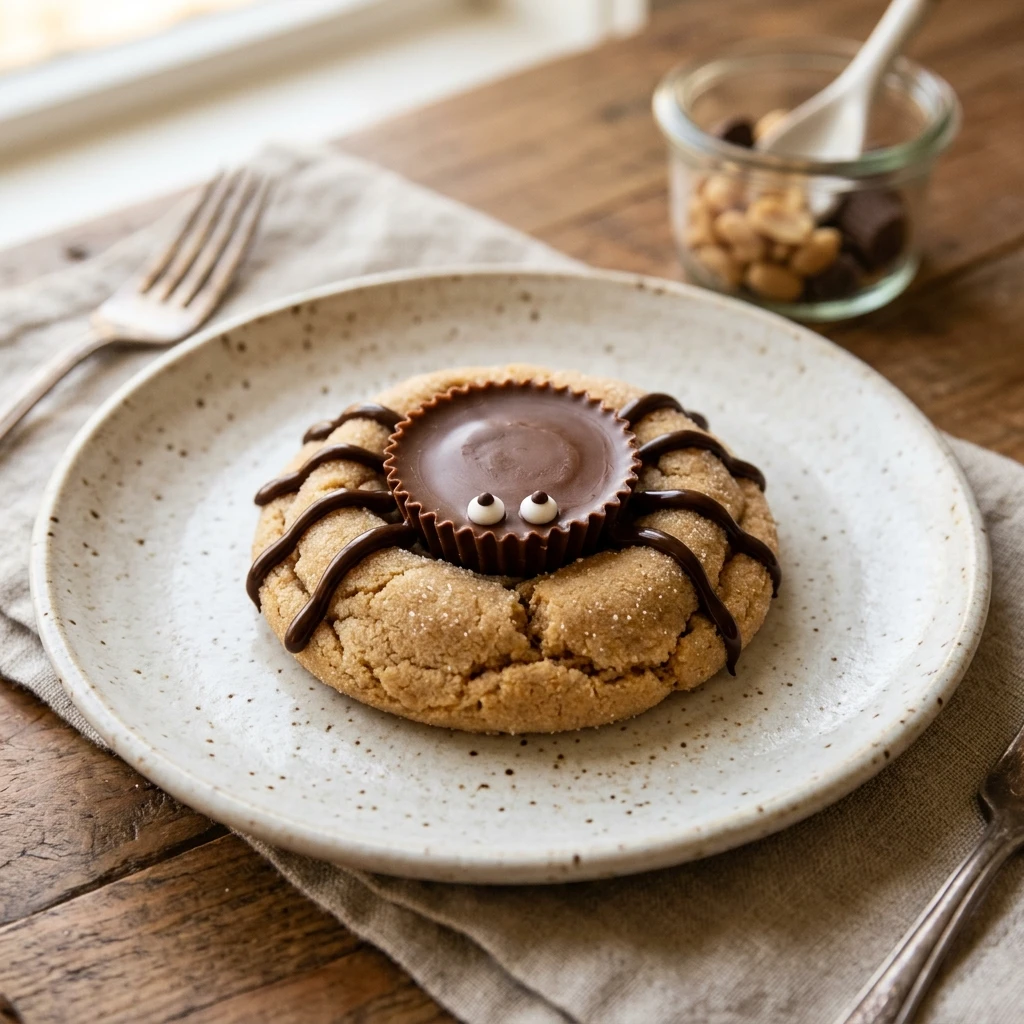
Immediately after removing the cookies from the oven, use the back of a small spoon to press a circular indentation into the center of each cookie. Let them cool for about 5 minutes, then press an upside-down miniature peanut butter cup into the center of each cookie. The residual heat will help it stick without melting it completely.
Step 7: Decorate the Spider
Once the cookies have cooled almost completely, melt the chocolate chips in the microwave in 30-second intervals. Transfer the melted chocolate to a piping bag or a plastic bag with the corner snipped off. Pipe four legs on each side of the peanut butter cup. Finally, use a tiny dot of melted chocolate to “glue” two candy eyes onto the front of each peanut butter cup.
How to Serve Peanut Butter Cup Spider Cookies Recipe
Serve these cookies on a large platter, perhaps scattered with some orange and black sprinkles or fake spider webs for a full Halloween effect. They look fantastic when arranged in rows or a circular pattern on a dessert table. Pair them with a cold glass of milk or a hot cup of cocoa for the perfect afternoon treat.
How to Store Peanut Butter Cup Spider Cookies Recipe
Store your spider cookies in a single layer inside an airtight container. If you must stack them, place a sheet of parchment paper between the layers to keep the chocolate legs and eyes from getting crushed. They will stay fresh at room temperature for up to 5 days. For longer storage, you can freeze the baked cookies for up to 2 months, though the candy eyes may lose some of their luster upon thawing.
Expert Tips for Perfect Peanut Butter Cup Spider Cookies Recipe
To ensure your spiders look their best, make sure the peanut butter cups are unwrapped and ready to go before the cookies come out of the oven. Timing is key; if the cookies are too hot, the peanut butter cup will melt into a puddle. If they are too cold, it won’t stick. Aim for that “just warm” sweet spot. Also, using a high-quality creamy peanut butter for the dough will result in a smoother texture and better flavor.
Delicious Variations
You can easily customize these cookies to suit your taste. Try using a chocolate cookie dough base for a “dark” spider look. If you don’t have candy eyes, you can use small dots of white frosting with a tiny chocolate sprinkle in the center. For a different flavor profile, swap the miniature peanut butter cups for chocolate truffles or even large malted milk balls.
Frequently Asked Questions
Q: Can I use store-bought cookie dough?
Yes, you can use a tube of refrigerated peanut butter cookie dough to save time. Just follow the baking instructions on the package and proceed with the decoration steps.
Q: My peanut butter cups are melting too much. What should I do?
If the cups are melting, let the cookies cool for an extra minute or two before pressing the candy in. You can also pop the peanut butter cups in the freezer for 10 minutes before using them to help them hold their shape.
Q: Can I use chunky peanut butter instead?
You can use chunky peanut butter if you prefer a bit of texture in your cookie, but creamy peanut butter generally makes for a smoother, more cohesive dough that is easier to shape.
Q: How do I get the chocolate legs to look neat?
Use a very small tip on your piping bag. If you are using a plastic bag, snip only a tiny bit of the corner. Slow, steady pressure will give you the most control over the “legs.”
Q: Do I need to refrigerate these cookies?
No, these cookies are best stored at room temperature. Refrigeration can sometimes cause the chocolate to bloom or the candy eyes to become soft.
Conclusion
Peanut Butter Cup Spider Cookies are the ultimate festive treat that combines ease of preparation with high-impact results. They are sure to be the star of any Halloween party and provide a delicious way to enjoy the classic pairing of chocolate and peanut butter. Happy baking and have a spooktacular holiday!
Peanut Butter Cup Spider Cookies Recipe

- Cook Time: 30 minutes
- Total Time: 30 minutes
- Diet: Vegetarian
Ingredients
- 1/2 cup unsalted butter, softened
- 1/2 cup creamy peanut butter
- 1/2 cup granulated sugar
- 1/2 cup packed brown sugar
- 1 large egg
- 1 teaspoon vanilla extract
- 1 1/2 cups all-purpose flour
- 3/4 teaspoon baking soda
- 1/2 teaspoon baking powder
- 1/4 teaspoon salt
- 24 miniature peanut butter cups, unwrapped
- 48 candy eyes
- 1/2 cup semi-sweet chocolate chips (melted for the legs)
Instructions
- Preheat your oven to 350°F (175°C). Line two large baking sheets with parchment paper or silicone baking mats to prevent the cookies from sticking and to ensure even browning.
- In a large mixing bowl, cream together the softened butter, creamy peanut butter, granulated sugar, and brown sugar until the mixture is light and fluffy. This usually takes about 2 to 3 minutes with an electric mixer.
- Beat in the egg and the vanilla extract. Scrape down the sides of the bowl to ensure everything is well incorporated before moving on to the dry ingredients.
- In a separate small bowl, whisk together the flour, baking soda, baking powder, and salt. Gradually add this dry mixture to the wet ingredients, mixing on low speed until a soft dough forms.
- Roll the dough into 1-inch balls and place them about 2 inches apart on the prepared baking sheets. Bake for 8 to 10 minutes, or until the edges are just lightly golden. Do not overbake, as they need to be soft for the next step.
- Immediately after removing the cookies from the oven, use the back of a small spoon to press a circular indentation into the center of each cookie. Let them cool for about 5 minutes, then press an upside-down miniature peanut butter cup into the center of each cookie. The residual heat will help it stick without melting it completely.
- Once the cookies have cooled almost completely, melt the chocolate chips in the microwave in 30-second intervals. Transfer the melted chocolate to a piping bag or a plastic bag with the corner snipped off. Pipe four legs on each side of the peanut butter cup. Finally, use a tiny dot of melted chocolate to “glue” two candy eyes onto the front of each peanut butter cup.