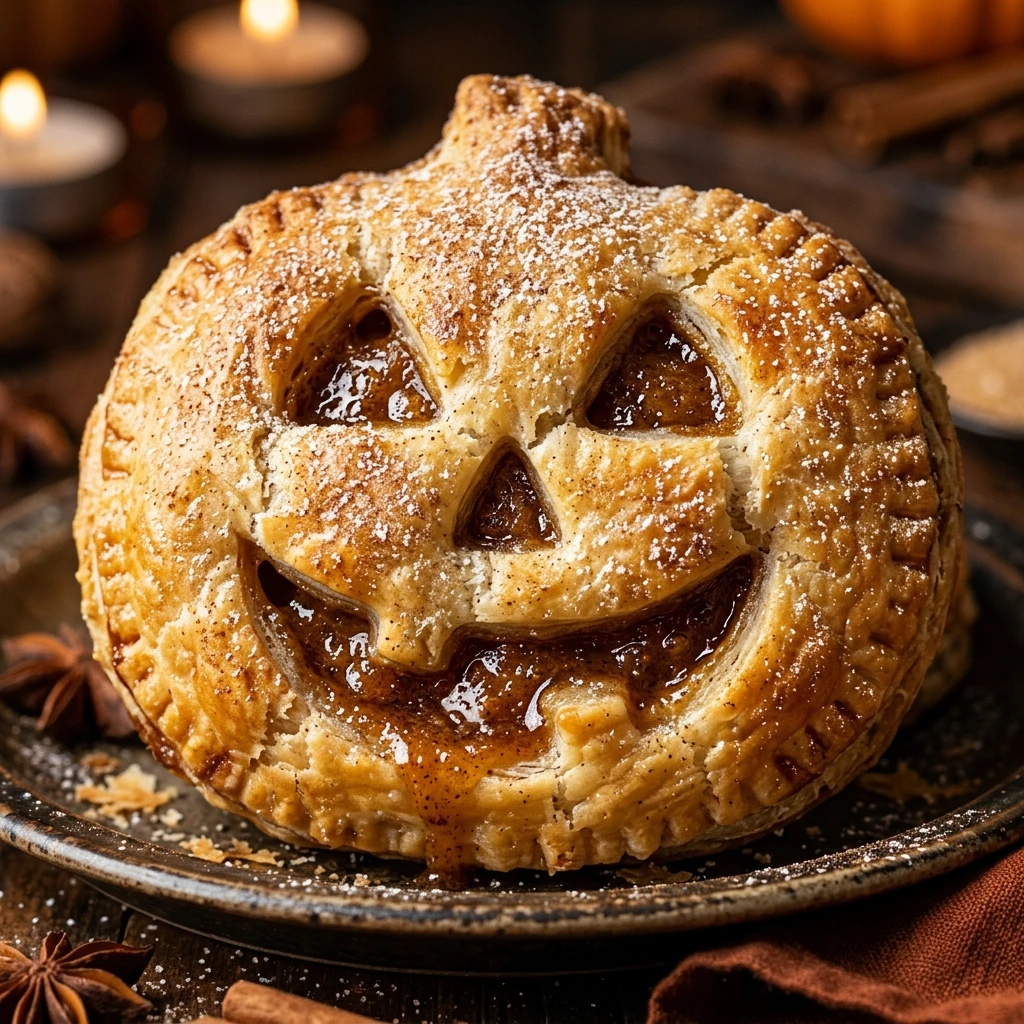

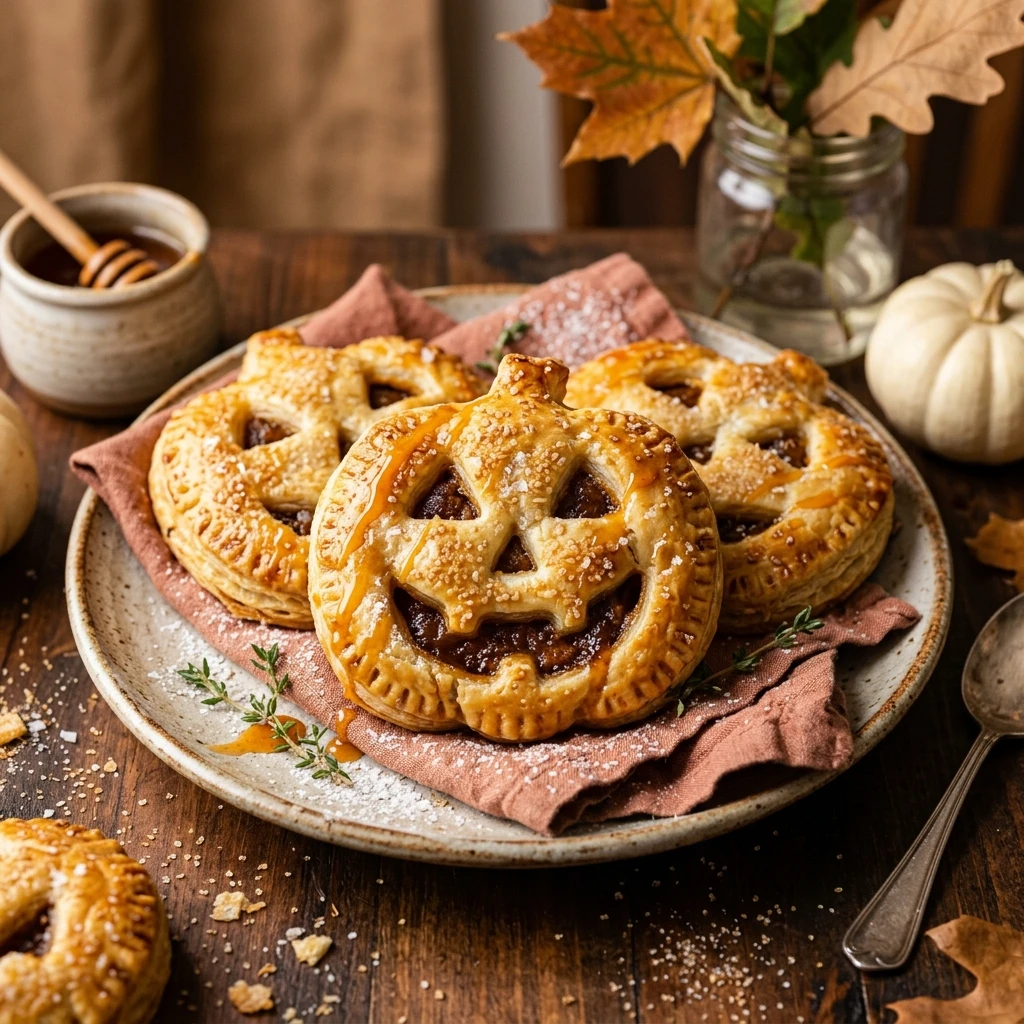
Halloween is the perfect time to get creative in the kitchen, and nothing says festive quite like these Halloween Jack O Lantern Hand Pies. These adorable, portable treats feature a flaky crust and a warm, spiced pumpkin filling that captures the essence of autumn in every bite. Whether you are hosting a spooky party or looking for a fun weekend activity with the kids, these hand pies are sure to be a hit.
The beauty of this recipe lies in its simplicity. By using a few pantry staples and a bit of imagination, you can transform a standard pie into individual masterpieces. Each little pumpkin face adds a touch of personality to your dessert table, making them as much a decoration as they are a delicious snack. Let’s dive into how you can bring these spooky treats to life!
Recipe Information
- Prep Time: 30 minutes
- Cook Time: 20 minutes
- Total Time: 50 minutes
- Servings: 12 hand pies
- Difficulty Level: Easy
Nutrition Information
- Calories per serving: 210 kcal
- Protein: 2g
- Carbohydrates: 28g
- Fat: 10g
- Fiber: 1g
- Sugar: 12g
- Sodium: 150mg
Why Make This Halloween Jack O Lantern Hand Pies Recipe
These hand pies are the ultimate crowd-pleaser for the spooky season. Unlike a traditional large pie, these are perfectly portioned for guests to grab and go. They are much less messy to eat at parties and provide that satisfying crunch of golden-brown pastry in every mouthful. Plus, the pumpkin spice filling is a classic flavor that everyone loves during the fall months.
Making these hand pies is also a fantastic way to express your creativity. You can carve different expressions into each Jack O Lantern, from spooky grins to surprised looks. It is a wonderful craft-like baking project that results in a professional-looking treat without requiring expert-level pastry skills. They are fun, flavorful, and perfectly themed for any October celebration.
How to Make Halloween Jack O Lantern Hand Pies Recipe
Getting these treats ready for the oven is a simple process that involves preparing a quick filling, cutting out festive shapes, and sealing them tight to keep all that pumpkin goodness inside. Follow these easy steps to create your own batch of edible Jack O Lanterns.
Ingredients
- 2 refrigerated pie crusts (1 box)
- 1 cup canned pumpkin puree (not pumpkin pie mix)
- 1/4 cup brown sugar, packed
- 1 teaspoon pumpkin pie spice
- 1/2 teaspoon vanilla extract
- 1 large egg (for egg wash)
- 1 tablespoon water
- Coarse sparkling sugar (optional, for topping)
Directions
Step 1: Preheat and Prepare
Preheat your oven to 375°F (190°C). Line two large baking sheets with parchment paper or silicone baking mats to prevent the pies from sticking and to make cleanup easier.
Step 2: Mix the Pumpkin Filling
In a medium mixing bowl, combine the pumpkin puree, brown sugar, pumpkin pie spice, and vanilla extract. Stir everything together until the mixture is smooth and the sugar is fully incorporated. Set this aside while you work on the dough.
Step 3: Cut the Dough Shapes
Unroll the pie crusts on a lightly floured surface. Use a pumpkin-shaped cookie cutter (about 3-4 inches wide) to cut out as many shapes as possible. Re-roll the scraps once to get more shapes. You will need two pumpkin cutouts for every one hand pie.
Step 4: Carve the Faces
Take half of your pumpkin cutouts and use a small, sharp paring knife to cut out Jack O Lantern faces. You can make simple triangles for eyes and a jagged line for a mouth. These will be the “tops” of your hand pies, allowing steam to escape while they bake.
Step 5: Assemble the Hand Pies
Place the solid pumpkin shapes (the bottoms) onto the prepared baking sheets. Spoon about 1 tablespoon of the pumpkin filling into the center of each bottom piece, leaving a small border around the edges. Lightly brush the edges with a little bit of water or egg wash.
Step 6: Seal and Crimp
Place a carved face cutout on top of each filled bottom piece. Use the tines of a small fork to press and crimp the edges together firmly. This ensures the filling stays inside while baking and adds a decorative touch.
Step 7: Egg Wash and Bake
In a small bowl, whisk the egg and 1 tablespoon of water together. Lightly brush the top of each hand pie with the egg wash. If you like, sprinkle a little coarse sugar over the top for extra crunch. Bake for 18-22 minutes, or until the pastry is golden brown. Let them cool on the pan for at least 10 minutes before serving.
How to Serve Halloween Jack O Lantern Hand Pies Recipe
These hand pies are delicious served warm or at room temperature. For a truly indulgent treat, serve them with a side of whipped cream or a small scoop of vanilla bean ice cream. If you are serving them at a party, arrange them on a dark platter or a wooden board to make the orange pumpkin shapes pop. You can even drizzle a little salted caramel sauce over them for extra flavor.
How to Store Halloween Jack O Lantern Hand Pies Recipe
Store any leftover hand pies in an airtight container at room temperature for up to 2 days. If you want them to last longer, keep them in the refrigerator for up to 5 days. To regain that fresh-baked crispness, you can reheat them in a toaster oven or a regular oven at 350°F for about 5 minutes. They also freeze well; just wrap them individually in plastic wrap and store in a freezer bag for up to 3 months.
Expert Tips for Perfect Halloween Jack O Lantern Hand Pies Recipe
To ensure your hand pies turn out perfectly, make sure your pie crust is chilled but pliable. If the dough gets too warm, it can become sticky and difficult to carve. Also, be careful not to overfill the pies. Too much filling will leak out of the sides or the face cutouts during baking. Finally, always use a sharp knife or even a clean craft knife for the face details to get those clean, spooky lines.
Delicious Variations
While pumpkin is the classic choice, you can easily vary the fillings. Try using a thick apple butter or a cherry pie filling for a “bloody” interior effect. For a chocolate version, use a spoonful of hazelnut spread. You can also add a pinch of cinnamon or nutmeg to the egg wash for extra aroma. If you prefer a savory version, fill them with a mixture of cheddar cheese and ham for a spooky lunch option.
Frequently Asked Questions
Q: Can I use homemade pie crust instead of store-bought?
Absolutely! A homemade flaky butter crust works wonderfully for this recipe. Just make sure to roll it out to a similar thickness as the refrigerated versions.
Q: How do I prevent the filling from leaking out?
The key is to avoid overfilling and to crimp the edges very tightly with a fork. The face cutouts on the top also act as vents to prevent pressure from building up and bursting the seams.
Q: Can I make these ahead of time?
Yes, you can assemble the pies and keep them in the fridge for a few hours before baking. You can also bake them a day in advance and simply reheat them before your event.
Q: What if I don’t have a pumpkin cookie cutter?
You can use a wide-mouth mason jar lid to cut circles instead. They will look like round pumpkins, and you can still carve faces into them!
Q: Are these hand pies vegan-friendly?
They can be! Many store-bought pie crusts are actually vegan, but check the label. Swap the egg wash for a little bit of maple syrup or almond milk, and ensure your sugar is vegan-processed.
Conclusion
Halloween Jack O Lantern Hand Pies are a delightful combination of festive fun and cozy fall flavors. They are easy to make, even easier to eat, and bring a smile to everyone’s face. By following this simple guide, you will have a batch of golden, spiced treats that are perfect for any spooky gathering. Happy baking and Happy Halloween!

Halloween Jack O Lantern Hand Pies Recipe

- Cook Time: 50 minutes
- Total Time: 50 minutes
- Diet: Vegetarian
Ingredients
- 2 refrigerated pie crusts (1 box)
- 1 cup canned pumpkin puree (not pumpkin pie mix)
- 1/4 cup brown sugar, packed
- 1 teaspoon pumpkin pie spice
- 1/2 teaspoon vanilla extract
- 1 large egg (for egg wash)
- 1 tablespoon water
- Coarse sparkling sugar (optional, for topping)
Instructions
- Preheat your oven to 375°F (190°C). Line two large baking sheets with parchment paper or silicone baking mats to prevent the pies from sticking and to make cleanup easier.
- In a medium mixing bowl, combine the pumpkin puree, brown sugar, pumpkin pie spice, and vanilla extract. Stir everything together until the mixture is smooth and the sugar is fully incorporated. Set this aside while you work on the dough.
- Unroll the pie crusts on a lightly floured surface. Use a pumpkin-shaped cookie cutter (about 3-4 inches wide) to cut out as many shapes as possible. Re-roll the scraps once to get more shapes. You will need two pumpkin cutouts for every one hand pie.
- Take half of your pumpkin cutouts and use a small, sharp paring knife to cut out Jack O Lantern faces. You can make simple triangles for eyes and a jagged line for a mouth. These will be the “tops” of your hand pies, allowing steam to escape while they bake.
- Place the solid pumpkin shapes (the bottoms) onto the prepared baking sheets. Spoon about 1 tablespoon of the pumpkin filling into the center of each bottom piece, leaving a small border around the edges. Lightly brush the edges with a little bit of water or egg wash.
- Place a carved face cutout on top of each filled bottom piece. Use the tines of a small fork to press and crimp the edges together firmly. This ensures the filling stays inside while baking and adds a decorative touch.
- In a small bowl, whisk the egg and 1 tablespoon of water together. Lightly brush the top of each hand pie with the egg wash. If you like, sprinkle a little coarse sugar over the top for extra crunch. Bake for 18-22 minutes, or until the pastry is golden brown. Let them cool on the pan for at least 10 minutes before serving.