Halloween Hot Cocoa Bombs Recipe
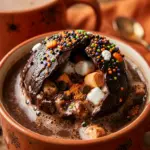
- Cook Time: 35 minutes
- Total Time: 35 minutes
- Diet: Vegetarian
Ingredients
Scale
- 12 oz high-quality dark or milk chocolate melting wafers
- 6 tablespoons instant hot cocoa mix
- 1/2 cup mini marshmallows
- 2 tablespoons Halloween-themed sprinkles (ghosts, bats, or pumpkins)
- 4 oz orange or purple candy melts for drizzling
- Edible candy eyeballs (optional)
Instructions
- Place your chocolate melting wafers in a microwave-safe bowl. Heat in 30-second intervals, stirring thoroughly between each session, until the chocolate is completely smooth and liquid. Be careful not to overheat it, as chocolate can burn easily.
- Using a spoon or a clean paintbrush, apply a thick layer of melted chocolate to the inside of a semi-sphere silicone mold. Make sure to coat the sides well, particularly around the top edges, to prevent cracking later. Place the mold in the freezer for 5 to 10 minutes to set.
- Apply a second thin layer of chocolate, focusing on any thin spots or the rims. Freeze for another 5 minutes. This ensures your bombs are sturdy enough to handle. Once fully set, gently peel the silicone mold away from the chocolate spheres.
- Take six of the chocolate halves and place them on a clean surface. Fill each with 1 tablespoon of hot cocoa mix, a handful of mini marshmallows, and a pinch of Halloween sprinkles.
- Heat a small plate in the microwave for about 30 seconds. Take an empty chocolate half and briefly press the open rim against the warm plate to melt the edge. Immediately press it onto a filled half to fuse them together. Use a clean finger to smooth out any excess chocolate around the seam.
- Melt the orange or purple candy melts and drizzle them over the top of the sealed bombs. While the drizzle is still wet, add more sprinkles or press on edible candy eyeballs to give them a spooky personality.
- Allow the decorations to harden at room temperature or place them in the refrigerator for 2 minutes. Once set, your Halloween Hot Cocoa Bombs are ready to use or gift!