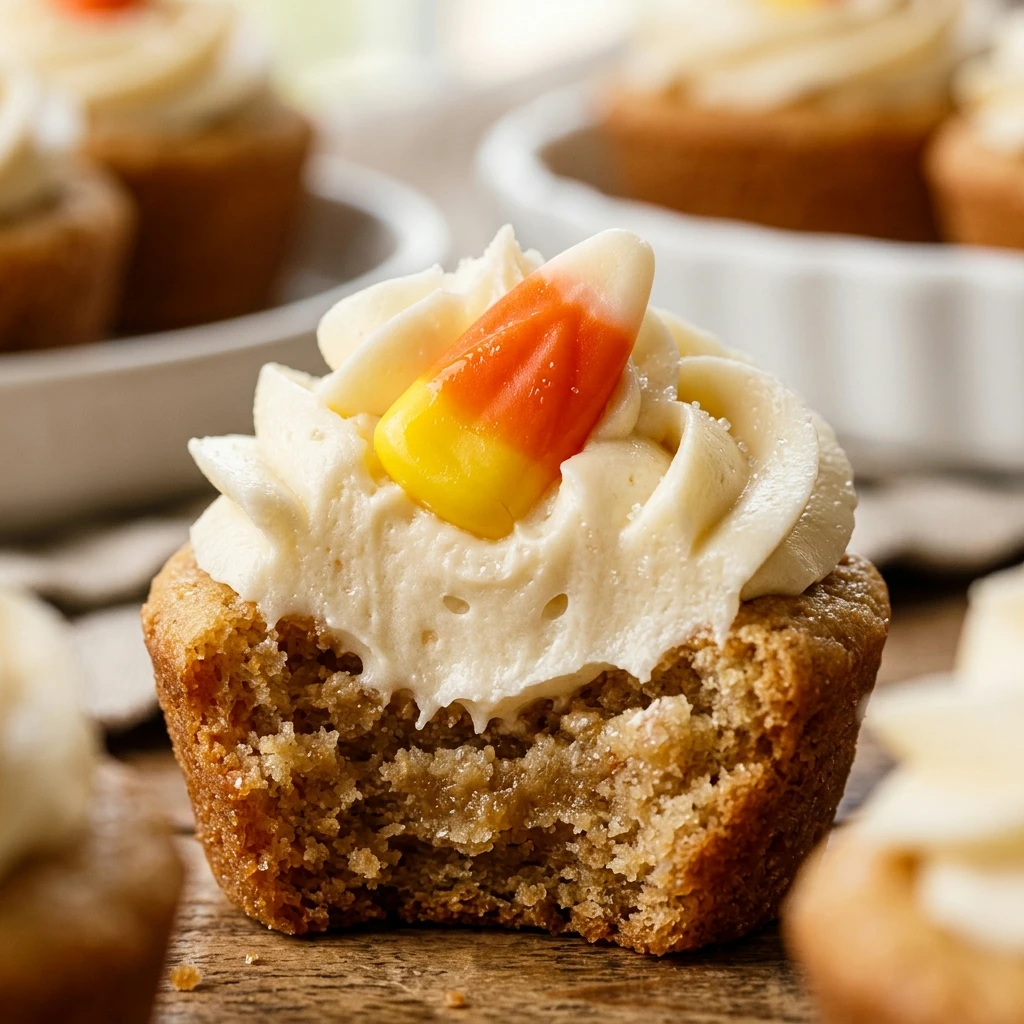

Celebrate the magic of fall and the spooky season with these adorable Candy Corn Sugar Cookie Cups. These bite-sized treats capture the iconic colors of autumn’s most famous candy in a delicious, buttery cookie format. Whether you are hosting a Halloween bash or looking for a festive after-school snack, these cookie cups are guaranteed to be a hit with kids and adults alike.
The beauty of this recipe lies in its simplicity and visual appeal. By combining a classic sugar cookie base with layers of vibrant buttercream frosting, you create a dessert that looks like it came from a professional bakery. The final touch of a single candy corn piece on top makes them unmistakably festive and perfectly themed for the season.
Recipe Information
- Prep Time: 20 minutes
- Cook Time: 12 minutes
- Total Time: 32 minutes
- Servings: 24 cookie cups
- Difficulty Level: Easy
Nutrition Information
- Calories per serving: 165 kcal
- Protein: 1g
- Carbohydrates: 23g
- Fat: 8g
- Fiber: 0g
- Sugar: 17g
- Sodium: 95mg
Why Make This Candy Corn Sugar Cookie Cups Recipe
This recipe is a fantastic choice for anyone who wants a high-impact dessert with minimal effort. Using a sugar cookie base provides a sturdy “cup” that holds a generous amount of frosting, making every bite a perfect balance of crunch and creaminess. It is a great way to get the festive look of candy corn without the polarizing texture of the actual candy for those who aren’t fans.
Beyond the taste, these treats are incredibly portable and easy to serve. Since they are baked in a mini muffin tin, they are naturally portion-controlled and do not require any slicing or messy serving utensils. They add a bright pop of color to any dessert table and can be customized with different frosting flavors if you want to get creative.
How to Make Candy Corn Sugar Cookie Cups Recipe
Creating these festive treats is a fun process that involves baking simple cookie shells and layering them with colorful frosting. Follow these straightforward steps to achieve the perfect Halloween dessert.
Ingredients
- 1 package (16.5 oz) refrigerated sugar cookie dough (or homemade equivalent)
- 1/2 cup unsalted butter, softened
- 2 cups powdered sugar
- 1 teaspoon vanilla extract
- 1 to 2 tablespoons milk
- Orange and yellow food coloring (gel preferred)
- 24 pieces of candy corn for garnish
Directions
Step 1: Prepare the Oven and Pan
Preheat your oven to 350°F (175°C). Lightly grease a 24-cup mini muffin tin with non-stick cooking spray to ensure the cookie cups release easily after baking.
Step 2: Portion the Dough
Divide the sugar cookie dough into 24 equal-sized balls, approximately one tablespoon each. Place one ball into each well of the prepared mini muffin tin. You do not need to flatten them, as they will spread and fill the wells as they bake.
Step 3: Bake the Cookie Shells
Place the tin in the oven and bake for 10 to 12 minutes, or until the edges are just starting to turn a light golden brown. Be careful not to overbake, as you want the centers to remain soft.
Step 4: Create the Cup Shape
Immediately after removing the tin from the oven, use the back of a small measuring spoon or a tart tamper to gently press down the center of each cookie. This creates the “cup” or indentation for the frosting. Allow the cookies to cool completely in the tin before removing them.
Step 5: Prepare the Buttercream Frosting
In a medium bowl, beat the softened butter with an electric mixer until creamy. Gradually add the powdered sugar, vanilla extract, and one tablespoon of milk. Beat on high until light and fluffy. If the frosting is too thick, add the remaining milk one teaspoon at a time until you reach the desired consistency.
Step 6: Tint the Frosting
Divide the frosting into three separate bowls. Leave one bowl white. Add orange food coloring to the second bowl and yellow food coloring to the third bowl. Mix well until the colors are vibrant and even.
Step 7: Layer and Garnish
Using a piping bag or a small spoon, layer the frosting into the cooled cookie cups. Start with a layer of yellow frosting at the bottom, followed by a layer of orange, and top it with a swirl of white frosting. Finish by placing a single piece of candy corn on top of the white frosting.
How to Serve Candy Corn Sugar Cookie Cups Recipe
These cookie cups look best when arranged on a flat platter or a tiered dessert stand. For a truly spooky effect, you can scatter extra candy corn or Halloween-themed sprinkles around the base of the serving tray. They are best served at room temperature so the frosting stays soft and the cookie remains tender.
How to Store Candy Corn Sugar Cookie Cups Recipe
Store your cookie cups in an airtight container at room temperature for up to 3 days. If your kitchen is particularly warm, you may want to store them in the refrigerator to prevent the buttercream from melting. They can also be frozen for up to a month; just ensure they are in a single layer or separated by parchment paper to protect the frosting designs.
Expert Tips for Perfect Candy Corn Sugar Cookie Cups Recipe
To get the best results, make sure your cookie cups are completely cool before you begin frosting them. If the cookies are even slightly warm, the buttercream will melt and lose its shape. Using gel food coloring instead of liquid coloring will give you much more vibrant “candy corn” hues without thinning out your frosting. Lastly, if you find the cookies sticking to the pan, run a thin knife around the edges once they are cool to pop them right out.

Delicious Variations
If you want to change things up, try using a chocolate chip cookie dough base for a “dark” Halloween look. You can also flavor the yellow frosting with lemon extract and the orange frosting with orange extract for a citrusy twist. For a different texture, consider using a cream cheese frosting instead of a standard buttercream.
Frequently Asked Questions
Q: Can I use homemade sugar cookie dough?
Absolutely! Homemade dough works perfectly. Just make sure it is a “roll-out” style recipe so the cups hold their shape during baking.
Q: How do I get the frosting layers to look neat?
Using piping bags with a simple round tip (or just cutting the corner off a plastic storage bag) allows for much cleaner layers than using a spoon.
Q: What if I don’t have a mini muffin tin?
You can use a regular-sized muffin tin, but you will need to double the amount of dough per cup and adjust the baking time to about 15-18 minutes.
Q: Can I make these ahead of time?
Yes, you can bake the cookie shells a day in advance and store them in an airtight container. Frost them on the day you plan to serve for the freshest taste.
Q: Why did my cookie cups collapse?
If the cookies are underbaked, the walls may not be strong enough to hold the cup shape. Ensure they are lightly golden on the edges before removing them from the oven.
Conclusion
Candy Corn Sugar Cookie Cups are a whimsical and delicious way to celebrate the autumn season. With their bright layers and classic flavor, they are sure to become a requested favorite at every October gathering. Enjoy the process of decorating these tiny treats and sharing them with your friends and family!

Candy Corn Sugar Cookie Cups Recipe

- Cook Time: 32 minutes
- Total Time: 32 minutes
- Diet: Vegetarian
Ingredients
- 1 package (16.5 oz) refrigerated sugar cookie dough (or homemade equivalent)
- 1/2 cup unsalted butter, softened
- 2 cups powdered sugar
- 1 teaspoon vanilla extract
- 1 to 2 tablespoons milk
- Orange and yellow food coloring (gel preferred)
- 24 pieces of candy corn for garnish
Instructions
- Preheat your oven to 350°F (175°C). Lightly grease a 24-cup mini muffin tin with non-stick cooking spray to ensure the cookie cups release easily after baking.
- Divide the sugar cookie dough into 24 equal-sized balls, approximately one tablespoon each. Place one ball into each well of the prepared mini muffin tin. You do not need to flatten them, as they will spread and fill the wells as they bake.
- Place the tin in the oven and bake for 10 to 12 minutes, or until the edges are just starting to turn a light golden brown. Be careful not to overbake, as you want the centers to remain soft.
- Immediately after removing the tin from the oven, use the back of a small measuring spoon or a tart tamper to gently press down the center of each cookie. This creates the “cup” or indentation for the frosting. Allow the cookies to cool completely in the tin before removing them.
- In a medium bowl, beat the softened butter with an electric mixer until creamy. Gradually add the powdered sugar, vanilla extract, and one tablespoon of milk. Beat on high until light and fluffy. If the frosting is too thick, add the remaining milk one teaspoon at a time until you reach the desired consistency.
- Divide the frosting into three separate bowls. Leave one bowl white. Add orange food coloring to the second bowl and yellow food coloring to the third bowl. Mix well until the colors are vibrant and even.
- Using a piping bag or a small spoon, layer the frosting into the cooled cookie cups. Start with a layer of yellow frosting at the bottom, followed by a layer of orange, and top it with a swirl of white frosting. Finish by placing a single piece of candy corn on top of the white frosting.