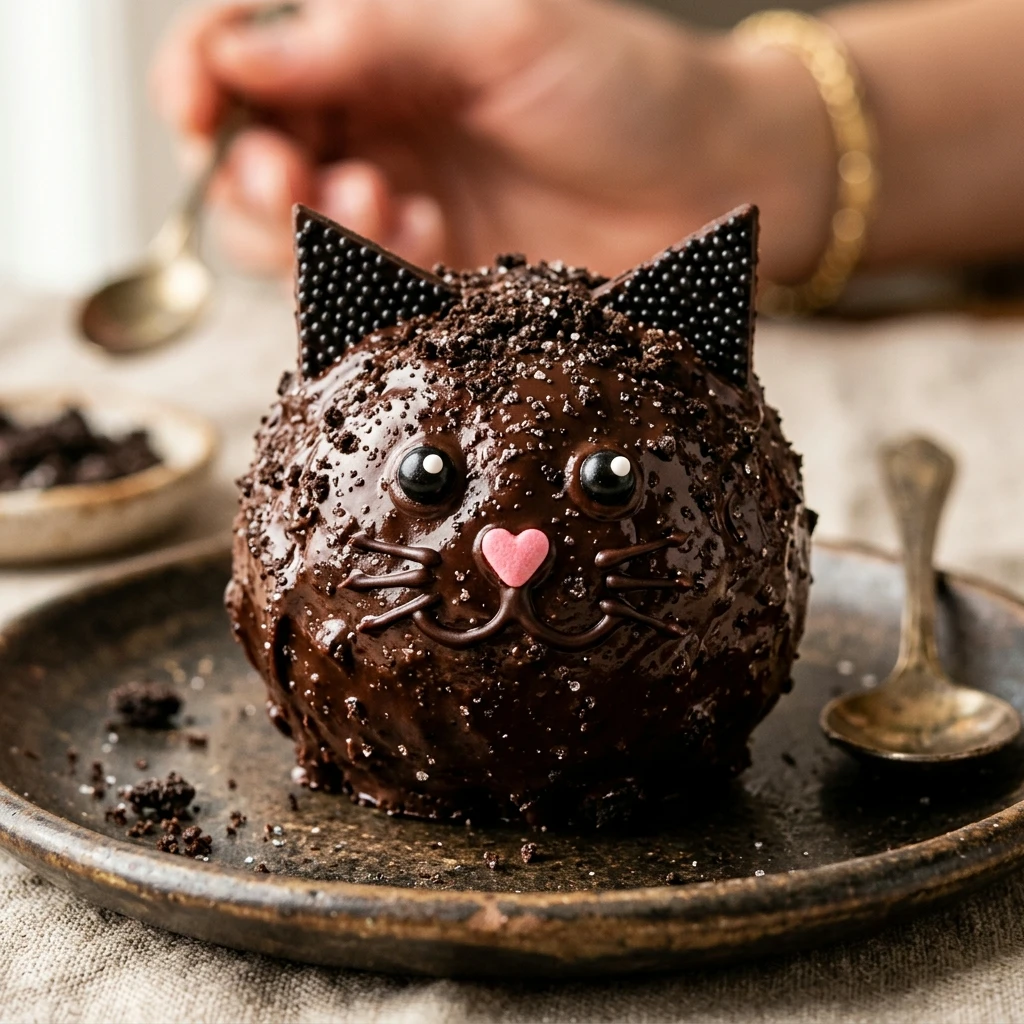

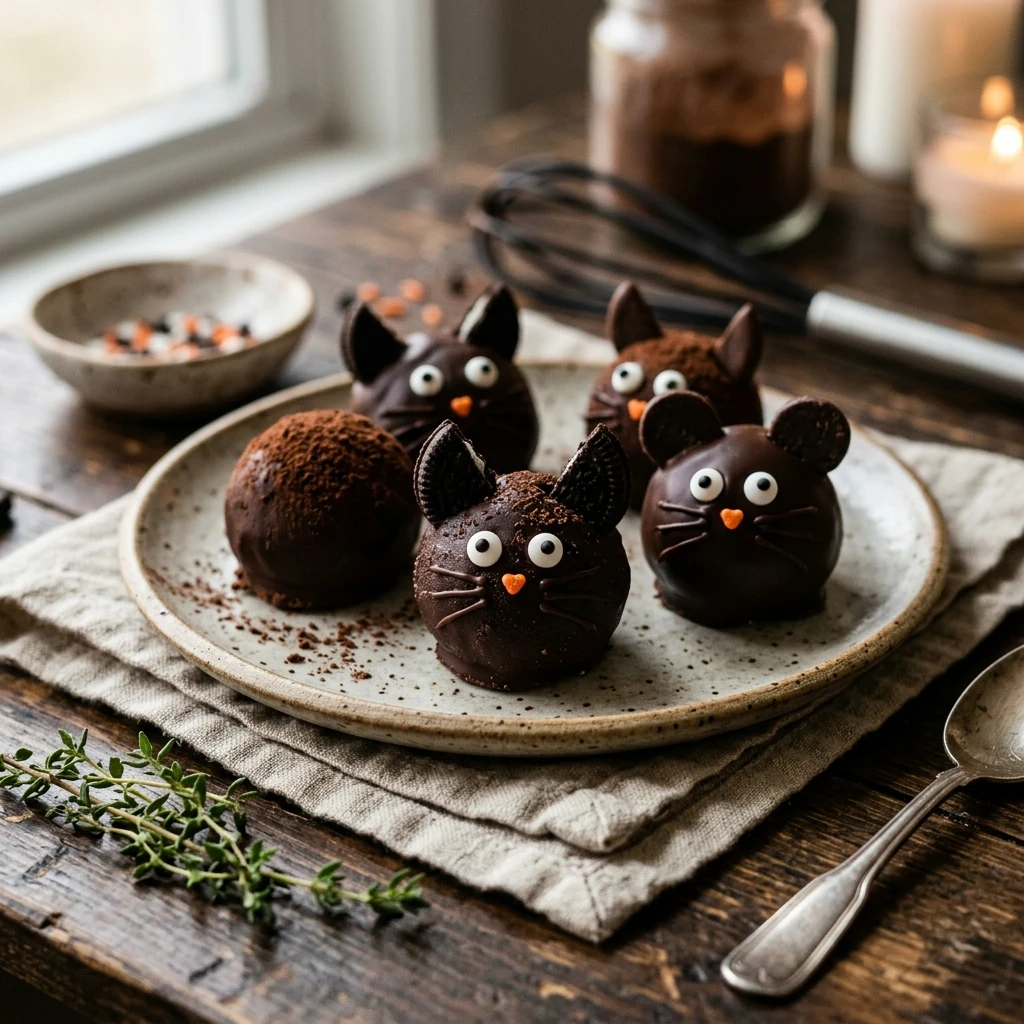
Halloween is the perfect time to get creative in the kitchen, and these Black Cat Oreo Balls are the ultimate spooky treat. Combining the classic taste of cookies and cream with a fun, feline twist, these no-bake truffles are sure to be a hit at any party. They are simple to make, look professionally decorated, and taste absolutely divine.
Whether you are hosting a haunted house gathering or just want a festive snack for the family, these little black cats are the perfect solution. Kids love helping with the decorating, and adults can’t resist the rich, chocolatey center. Let’s dive into how you can create these adorable edible kitties in your own kitchen.
Recipe Information
- Prep Time: 45 minutes
- Cook Time: 0 minutes
- Total Time: 1 hour 45 minutes
- Servings: 24 balls
- Difficulty Level: Easy
Nutrition Information
- Calories per serving: 185 kcal
- Protein: 2g
- Carbohydrates: 23g
- Fat: 10g
- Fiber: 1g
- Sugar: 18g
- Sodium: 125mg
Why Make This Black Cat Oreo Balls Recipe
This recipe is a must-make because it requires zero time in the oven. When your kitchen is busy with other holiday cooking, a no-bake dessert is a lifesaver. The base is made of only two main ingredients, making it one of the most budget-friendly and accessible recipes for beginners.
Beyond the ease of preparation, the visual appeal is unmatched. These treats double as table decor for a Halloween spread. Plus, the flavor of Oreo cookies mixed with cream cheese creates a cheesecake-like texture that is universally loved. It is a foolproof recipe that delivers high-impact results every single time.
How to Make Black Cat Oreo Balls Recipe
Making these treats is a fun process that involves crushing, mixing, and dipping. Follow these simple steps to ensure your cats look sleek and spooky.
Ingredients
- 36 Oreo cookies (standard size, not Double Stuf)
- 8 oz cream cheese, softened to room temperature
- 12 oz black candy melts or dark chocolate melting wafers
- 48 edible candy eyes
- 24 pink heart sprinkles or small round sprinkles (for noses)
- 48 brown or black chocolate chips (for ears)
- Black sanding sugar or chocolate sprinkles (optional, for fur texture)
Directions
Step 1: Crushing the Cookies
Place the Oreo cookies in a food processor and pulse until they become fine crumbs. If you do not have a food processor, place the cookies in a large plastic zip-top bag and crush them with a rolling pin until no large chunks remain.
Step 2: Combining Ingredients
In a large mixing bowl, combine the Oreo crumbs and the softened cream cheese. Use a hand mixer or a sturdy spatula to blend them together until the mixture is uniform and holds its shape when pressed.
Step 3: Shaping the Balls
Line a baking sheet with parchment paper. Scoop about one tablespoon of the mixture and roll it between your palms to form a smooth ball. Place the balls on the prepared baking sheet. Repeat until all the mixture is used.
Step 4: Chilling the Base
Place the baking sheet in the freezer for at least 30 to 60 minutes. Chilling the balls is essential because it prevents them from falling apart or melting when they are dipped into the warm candy coating.
Step 5: Melting the Coating
In a microwave-safe bowl, melt the black candy melts in 30-second intervals, stirring between each session, until the mixture is smooth and completely melted. Be careful not to overheat the candy, as it can become thick and lumpy.
Step 6: Dipping and Decorating
Using a fork or a dipping tool, submerge one ball into the melted candy. Lift it out, let the excess drip off, and place it back on the parchment paper. While the coating is still wet, immediately add two chocolate chips for ears, two candy eyes, and one pink sprinkle for the nose. If desired, sprinkle with black sanding sugar for a “furry” look.
Step 7: Final Setting
Allow the decorated cats to sit at room temperature for about 20 minutes until the coating has completely hardened. For faster results, you can place them in the refrigerator for 10 minutes.
How to Serve Black Cat Oreo Balls Recipe
For a festive presentation, serve these black cats on a bright orange platter or a cake stand lined with purple decorative mesh. You can also place each cat in a mini black cupcake liner to make them easier for guests to grab. They look great alongside other Halloween treats like pumpkin cookies or ghost brownies. If you want to get extra creative, draw “whiskers” on the serving plate using a little bit of leftover melted chocolate.
How to Store Black Cat Oreo Balls Recipe
Because these treats contain cream cheese, they must be stored in the refrigerator. Place them in an airtight container in a single layer, or separate layers with parchment paper to prevent sticking. They will stay fresh for up to one week in the fridge. If you want to make them far in advance, you can freeze them for up to two months. Just thaw them in the refrigerator before serving so the chocolate doesn’t “sweat” too much.
Expert Tips for Perfect Black Cat Oreo Balls Recipe
To get the smoothest finish, make sure your cream cheese is truly at room temperature before mixing. If it is too cold, you will end up with white lumps in your dark cookie dough. Also, avoid using Double Stuf Oreos, as the extra filling can make the balls too soft and oily, causing them to lose their shape. If the candy coating starts to thicken while you are dipping, simply pop it back in the microwave for 10-15 seconds and stir well.
Delicious Variations
You can easily customize this recipe by changing the Oreo flavor. Mint Oreos make for a refreshing “grasshopper” style cat, while Peanut Butter Oreos offer a classic flavor combination. If you cannot find black candy melts, you can use dark chocolate and add oil-based food coloring (do not use water-based coloring or the chocolate will seize). For a “Calico” cat, use white chocolate and drizzle with milk chocolate and orange-colored melts.
Frequently Asked Questions
Q: Can I make these without a food processor?
Yes! Just put the cookies in a heavy-duty freezer bag and crush them with a rolling pin or a heavy pan until they are fine crumbs.
Q: Why is my candy coating cracking?
Cracking usually happens if the Oreo balls are too cold (straight from the freezer) and the candy is too hot. Let the balls sit for a few minutes after taking them out of the freezer before dipping.
Q: Do I need to remove the cream filling from the Oreos?
No, you use the whole cookie! The cream filling helps bind the crumbs together with the cream cheese.
Q: How do I get the ears to stay on?
The key is to place the chocolate chips on the ball while the black coating is still wet. It acts like glue as it hardens.
Q: Can I use regular chocolate chips for the coating?
You can, but the coating won’t be jet black. It will be dark brown. For a true black cat look, candy melts are the best option.
Conclusion
Black Cat Oreo Balls are a delightful combination of spooky fun and delicious flavor. They are the perfect project for a rainy October afternoon or a last-minute addition to a Halloween party menu. With their creamy centers and crunchy shells, they are guaranteed to disappear faster than a cat in the night. Enjoy making these charming treats and have a wonderful Halloween!

Black Cat Oreo Balls Recipe

- Cook Time: 1 hour 45 minutes
- Total Time: 1 hour 45 minutes
- Diet: Vegetarian
Ingredients
- 36 Oreo cookies (standard size, not Double Stuf)
- 8 oz cream cheese, softened to room temperature
- 12 oz black candy melts or dark chocolate melting wafers
- 48 edible candy eyes
- 24 pink heart sprinkles or small round sprinkles (for noses)
- 48 brown or black chocolate chips (for ears)
- Black sanding sugar or chocolate sprinkles (optional, for fur texture)
Instructions
- Place the Oreo cookies in a food processor and pulse until they become fine crumbs. If you do not have a food processor, place the cookies in a large plastic zip-top bag and crush them with a rolling pin until no large chunks remain.
- In a large mixing bowl, combine the Oreo crumbs and the softened cream cheese. Use a hand mixer or a sturdy spatula to blend them together until the mixture is uniform and holds its shape when pressed.
- Line a baking sheet with parchment paper. Scoop about one tablespoon of the mixture and roll it between your palms to form a smooth ball. Place the balls on the prepared baking sheet. Repeat until all the mixture is used.
- Place the baking sheet in the freezer for at least 30 to 60 minutes. Chilling the balls is essential because it prevents them from falling apart or melting when they are dipped into the warm candy coating.
- In a microwave-safe bowl, melt the black candy melts in 30-second intervals, stirring between each session, until the mixture is smooth and completely melted. Be careful not to overheat the candy, as it can become thick and lumpy.
- Using a fork or a dipping tool, submerge one ball into the melted candy. Lift it out, let the excess drip off, and place it back on the parchment paper. While the coating is still wet, immediately add two chocolate chips for ears, two candy eyes, and one pink sprinkle for the nose. If desired, sprinkle with black sanding sugar for a “furry” look.
- Allow the decorated cats to sit at room temperature for about 20 minutes until the coating has completely hardened. For faster results, you can place them in the refrigerator for 10 minutes.