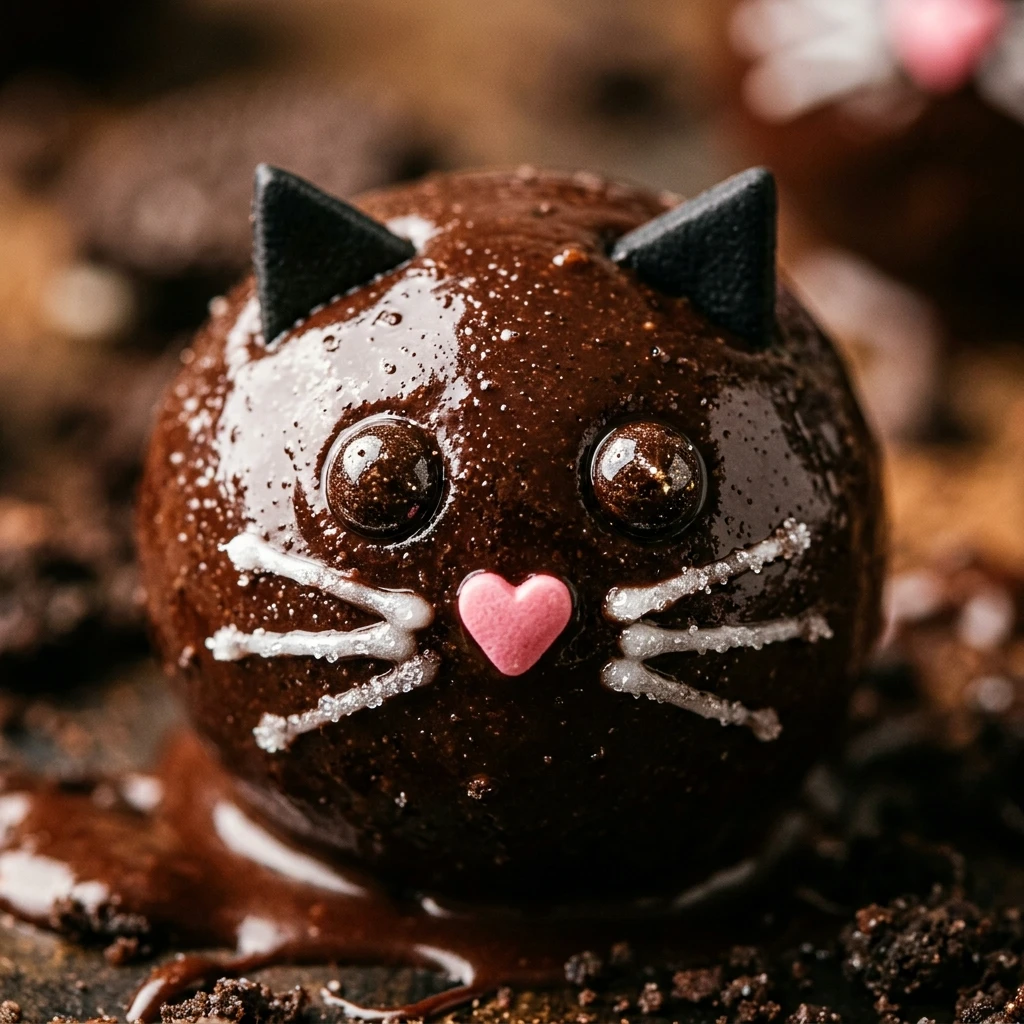

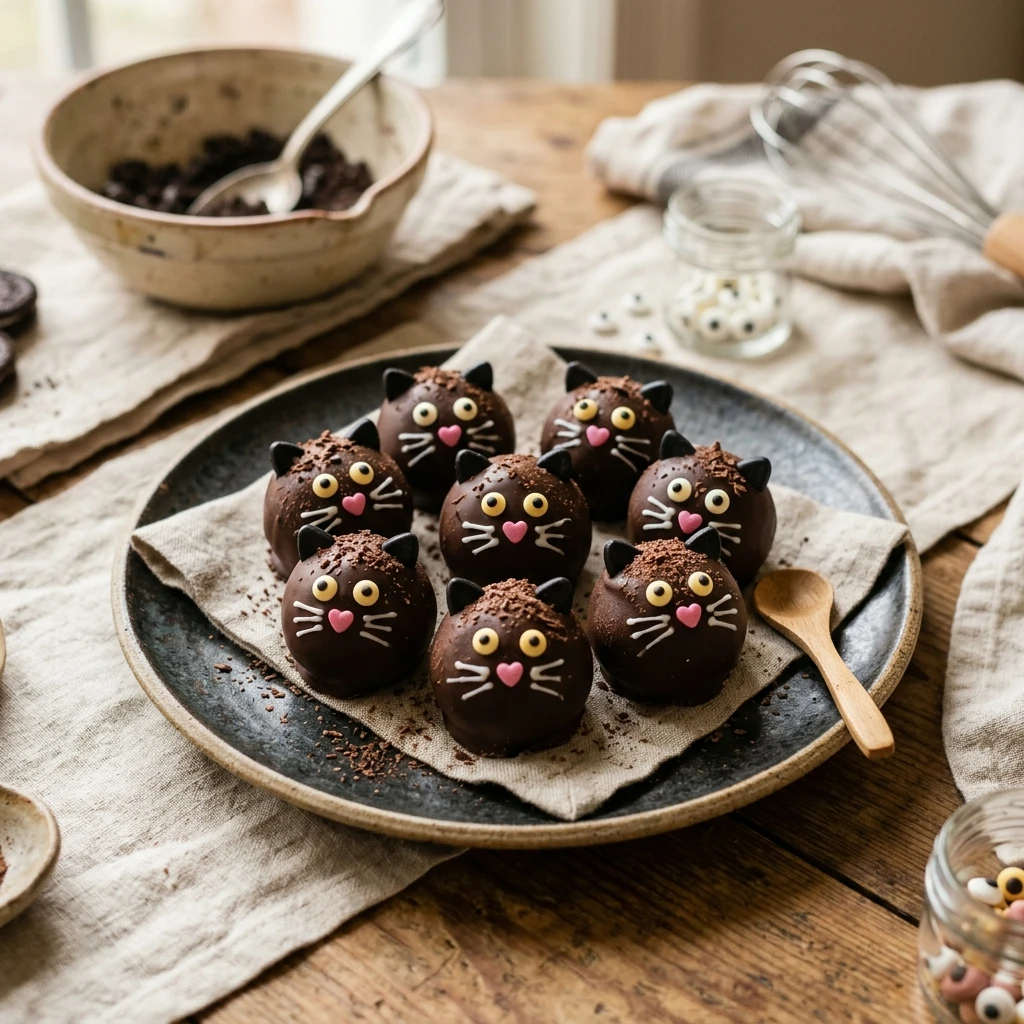
Get ready for the spookiest and cutest treat of the season! These Black Cat Oreo Balls are the perfect addition to any Halloween party or fall gathering. They are simple to make, require no baking, and combine the classic flavor of chocolate cookies with a rich cream cheese filling. Everyone loves a good truffle, but when they look like adorable black cats, they become the star of the dessert table.
Making these treats is a fun activity for the whole family. Kids will love helping to roll the dough and adding the tiny ears and eyes to bring these little feline friends to life. With just a few ingredients and a little bit of creativity, you can create a festive snack that tastes just as good as it looks. Let’s dive into how you can make these charming chocolate treats at home.
Recipe Information
- Prep Time: 45 minutes
- Cook Time: 0 minutes
- Total Time: 105 minutes
- Servings: 24
- Difficulty Level: Easy
Nutrition Information
- Calories per serving: 155 kcal
- Protein: 1.5g
- Carbohydrates: 19g
- Fat: 8.5g
- Fiber: 0.8g
- Sugar: 15g
- Sodium: 98mg
Why Make This Black Cat Oreo Balls Recipe
This recipe is a must-try because it is incredibly versatile and festive. Halloween can often be filled with store-bought candy, so serving a homemade treat that looks professional really stands out. The combination of dark chocolate and the creamy Oreo center is a crowd-pleaser that appeals to both children and adults. Plus, since they are bite-sized, they are perfect for parties where guests want to sample different snacks.
Another reason to love these Oreo balls is that they are “no-bake.” This means you don’t have to worry about heating up your kitchen or timing things in the oven. They are also very easy to customize. If you want to change the look or flavor, you can swap out the decorations or the type of cookie used. It is a stress-free recipe that delivers high-impact results for any holiday celebration.
How to Make Black Cat Oreo Balls Recipe
The process is straightforward: you will create a delicious cookie truffle base, coat it in smooth dark chocolate, and use simple candies to create the cat features. It is all about the assembly and letting the chocolate set properly for that perfect finish.
Ingredients
- 1 package (14.3 oz) Oreo cookies (regular, not Double Stuf)
- 1 package (8 oz) cream cheese, softened to room temperature
- 16 oz dark chocolate melting wafers or black candy melts
- 48 chocolate-covered sunflower seeds or almond slivers (for the ears)
- 48 edible candy eyes
- 24 pink heart-shaped sprinkles (for the noses)
- Optional: White icing for whiskers
Directions
Step 1: Crush the Cookies
Place the entire package of Oreo cookies into a food processor. Pulse the cookies until they become fine crumbs. If you do not have a food processor, you can place the cookies in a large zip-top bag and crush them with a rolling pin until no large chunks remain.
Step 2: Mix with Cream Cheese
In a large mixing bowl, combine the cookie crumbs and the softened cream cheese. Use a hand mixer or a sturdy spatula to blend them together until a uniform, moist dough forms. Ensure there are no white streaks of cream cheese left in the mixture.
Step 3: Roll into Balls
Scoop about one tablespoon of the mixture at a time and roll it between your palms to form a smooth ball, approximately one inch in diameter. Place the balls on a baking sheet lined with parchment paper. Once all the balls are formed, place the tray in the freezer for about 30 minutes to firm up.
Step 4: Melt the Chocolate
Place the dark chocolate melting wafers in a microwave-safe bowl. Microwave in 30-second intervals, stirring in between, until the chocolate is completely smooth and melted. Be careful not to overheat the chocolate, as it can scorch or seize.
Step 5: Coat and Add Ears
Remove the balls from the freezer. Use a fork or a dipping tool to dip each ball into the melted chocolate, tapping off the excess. Return the ball to the parchment paper. While the chocolate is still wet, press two chocolate-covered sunflower seeds or almond slivers into the top of the ball to act as the cat’s ears.
Step 6: Decorate the Face
Once the coating has started to set but is still slightly tacky, place two candy eyes on the front of the ball. Below the eyes, add a pink heart sprinkle for the nose. If the chocolate has already hardened, use a tiny dot of melted chocolate as “glue” to attach the eyes and nose. Allow the cats to set completely at room temperature or in the fridge before serving.
How to Serve Black Cat Oreo Balls Recipe
Serve these adorable black cats on a large platter decorated with festive Halloween props like fake spider webs or orange napkins. They look great when placed inside mini cupcake liners, which also makes them easier for guests to pick up without getting chocolate on their fingers. For a truly spooky display, you can arrange them on a cake stand of varying heights.
How to Store Black Cat Oreo Balls Recipe
Because these treats contain cream cheese, they should be stored in the refrigerator. Place them in an airtight container in a single layer, or separate layers with parchment paper to prevent sticking. They will stay fresh for up to one week. You can also freeze them for up to two months; just thaw them in the fridge before serving.
Expert Tips for Perfect Black Cat Oreo Balls Recipe
To get the best results, make sure your cream cheese is truly at room temperature before mixing. This ensures a smooth texture without lumps. If the chocolate starts to thicken while you are dipping, pop it back in the microwave for 10 seconds to loosen it up. Also, using a toothpick to help slide the ball off the fork onto the parchment paper can keep the bottom of your cat balls looking neat and tidy.
Delicious Variations
You can easily switch up this recipe by using different Oreo flavors, such as Peanut Butter or Mint Oreos, for a surprise center. If you want to make “tuxedo cats,” you can dip the bottom half in white chocolate. For extra detail, use a toothpick dipped in white icing to draw tiny whiskers on each side of the nose after the dark chocolate has fully hardened.
Frequently Asked Questions
Q: Can I use low-fat cream cheese?
It is best to use full-fat brick cream cheese. Low-fat or spreadable cream cheese has a higher water content and may make the filling too soft to hold its shape.
Q: Do I need to remove the cream filling from the Oreos?
No, you should crush the entire cookie, including the cream filling. This helps hold the truffle together and adds sweetness.
Q: Why is my chocolate cracking?
Chocolate often cracks if the Oreo balls are too cold when dipped. If you find the coating is cracking, let the frozen balls sit at room temperature for 5 minutes before dipping them into the warm chocolate.
Q: What if I can’t find candy eyes?
You can use small dots of white icing and a tiny dot of black icing to create eyes, or even use small white sprinkles.
Q: Can I make these ahead of time?
Yes, these are great for making a day or two in advance. Store them in the fridge until you are ready to display them at your event.
Conclusion
Black Cat Oreo Balls are a delightful combination of spooky fun and delicious flavor. They are the perfect centerpiece for any Halloween dessert spread and are sure to get plenty of compliments from your guests. With their creamy centers and crunchy chocolate shells, these little cats are as satisfying to eat as they are fun to make. Happy Halloween and enjoy your sweet treats!

Black Cat Oreo Balls Recipe

- Cook Time: 105 minutes
- Total Time: 1 hour 45 minutes
- Diet: Vegetarian
Ingredients
- 1 package (14.3 oz) Oreo cookies (regular, not Double Stuf)
- 1 package (8 oz) cream cheese, softened to room temperature
- 16 oz dark chocolate melting wafers or black candy melts
- 48 chocolate-covered sunflower seeds or almond slivers (for the ears)
- 48 edible candy eyes
- 24 pink heart-shaped sprinkles (for the noses)
- Optional: White icing for whiskers
Instructions
- Step 1: Crush the Cookies Place the entire package of Oreo cookies into a food processor. Pulse the cookies until they become fine crumbs. If you do not have a food processor, you can place the cookies in a large zip-top bag and crush them with a rolling pin until no large chunks remain.
- Step 2: Mix with Cream Cheese In a large mixing bowl, combine the cookie crumbs and the softened cream cheese. Use a hand mixer or a sturdy spatula to blend them together until a uniform, moist dough forms. Ensure there are no white streaks of cream cheese left in the mixture.
- Step 3: Roll into Balls Scoop about one tablespoon of the mixture at a time and roll it between your palms to form a smooth ball, approximately one inch in diameter. Place the balls on a baking sheet lined with parchment paper. Once all the balls are formed, place the tray in the freezer for about 30 minutes to firm up.
- Step 4: Melt the Chocolate Place the dark chocolate melting wafers in a microwave-safe bowl. Microwave in 30-second intervals, stirring in between, until the chocolate is completely smooth and melted. Be careful not to overheat the chocolate, as it can scorch or seize.
- Step 5: Coat and Add Ears Remove the balls from the freezer. Use a fork or a dipping tool to dip each ball into the melted chocolate, tapping off the excess. Return the ball to the parchment paper. While the chocolate is still wet, press two chocolate-covered sunflower seeds or almond slivers into the top of the ball to act as the cat’s ears.
- Step 6: Decorate the Face Once the coating has started to set but is still slightly tacky, place two candy eyes on the front of the ball. Below the eyes, add a pink heart sprinkle for the nose. If the chocolate has already hardened, use a tiny dot of melted chocolate as “glue” to attach the eyes and nose. Allow the cats to set completely at room temperature or in the fridge before serving.