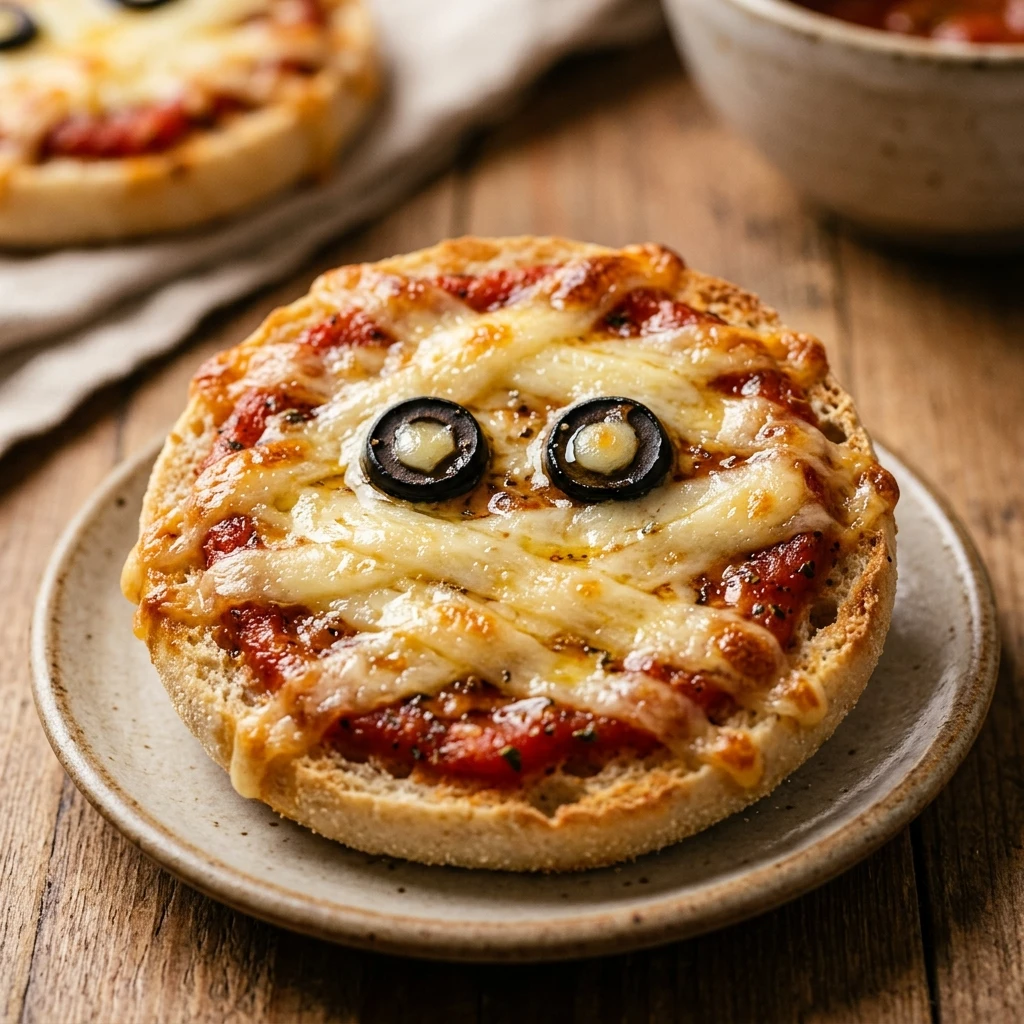

Halloween is the perfect time to get creative in the kitchen, and these Mini Mummy Pizzas are the ultimate festive treat. They are spooky, adorable, and incredibly delicious, making them a hit for both kids and adults alike.
Whether you are hosting a spooky party or just want a fun weeknight dinner before trick-or-treating, these pizzas come together in minutes. With just a few simple ingredients, you can transform ordinary muffins into creepy-cool mummies that taste as good as they look.
Recipe Information
- Prep Time: 15 minutes
- Cook Time: 10 minutes
- Total Time: 25 minutes
- Servings: 4 servings (8 mini pizzas)
- Difficulty Level: Easy
Nutrition Information
- Calories per serving: 185 kcal
- Protein: 9g
- Carbohydrates: 22g
- Fat: 7g
- Fiber: 2g
- Sugar: 3g
- Sodium: 480mg
Why Make This Mini Mummy Pizzas Recipe
This recipe is a lifesaver for busy parents during the holiday season. It requires minimal cleanup and uses pantry staples that you likely already have on hand. It is also an excellent way to get children involved in cooking, as they can help “wrap” their mummies with cheese strips.
Beyond being cute, these mini pizzas are the perfect size for snacking. They provide a satisfying crunch from the toasted base paired with gooey melted cheese and tangy tomato sauce. It is a foolproof recipe that guarantees smiles around the dinner table.
How to Make Mini Mummy Pizzas Recipe
Creating these spooky snacks is simpler than you might think. Follow these easy steps to bring your mummy creations to life using just your oven and a bit of imagination.
Ingredients
- 4 English muffins (split in half)
- 1/2 cup pizza sauce or marinara sauce
- 4 sticks of low-moisture mozzarella string cheese
- 1 small can of sliced black olives
- Optional: Dried oregano or garlic powder for extra flavor
Directions
Step 1: Prep Oven and Baking Sheet
Preheat your oven to 400°F (200°C). Line a large baking sheet with parchment paper or a silicone baking mat to prevent sticking and make cleanup easier.
Step 2: Prepare the Pizza Bases
Place the halved English muffins onto the prepared baking sheet with the cut side facing up. If you prefer a crispier crust, you can toast them in the oven for 2 minutes before adding any toppings.
Step 3: Spread the Sauce
Spoon approximately 1 tablespoon of pizza sauce onto each muffin half. Use the back of the spoon to spread it evenly to the edges, leaving a small border for the “crust.”
Step 4: Create Mummy Bandages
Pull the string cheese apart into thin, flat strips of varying widths. Lay the strips across the sauce-covered muffins in a crisscross pattern to mimic the look of mummy bandages. Be sure to leave a small gap near the top third for the eyes.
Step 5: Add the Eyes
Place two sliced black olives in the upper gap of the cheese strips on each pizza to create the eyes. If you want more detail, you can place a tiny piece of red pepper or a drop of sauce in the center of the olive hole.
Step 6: Bake and Serve
Place the baking sheet in the oven and bake for 8 to 10 minutes. You want the cheese to be melted and bubbly, but not so browned that you lose the mummy bandage effect. Remove from the oven and let cool slightly before serving.
How to Serve Mini Mummy Pizzas Recipe
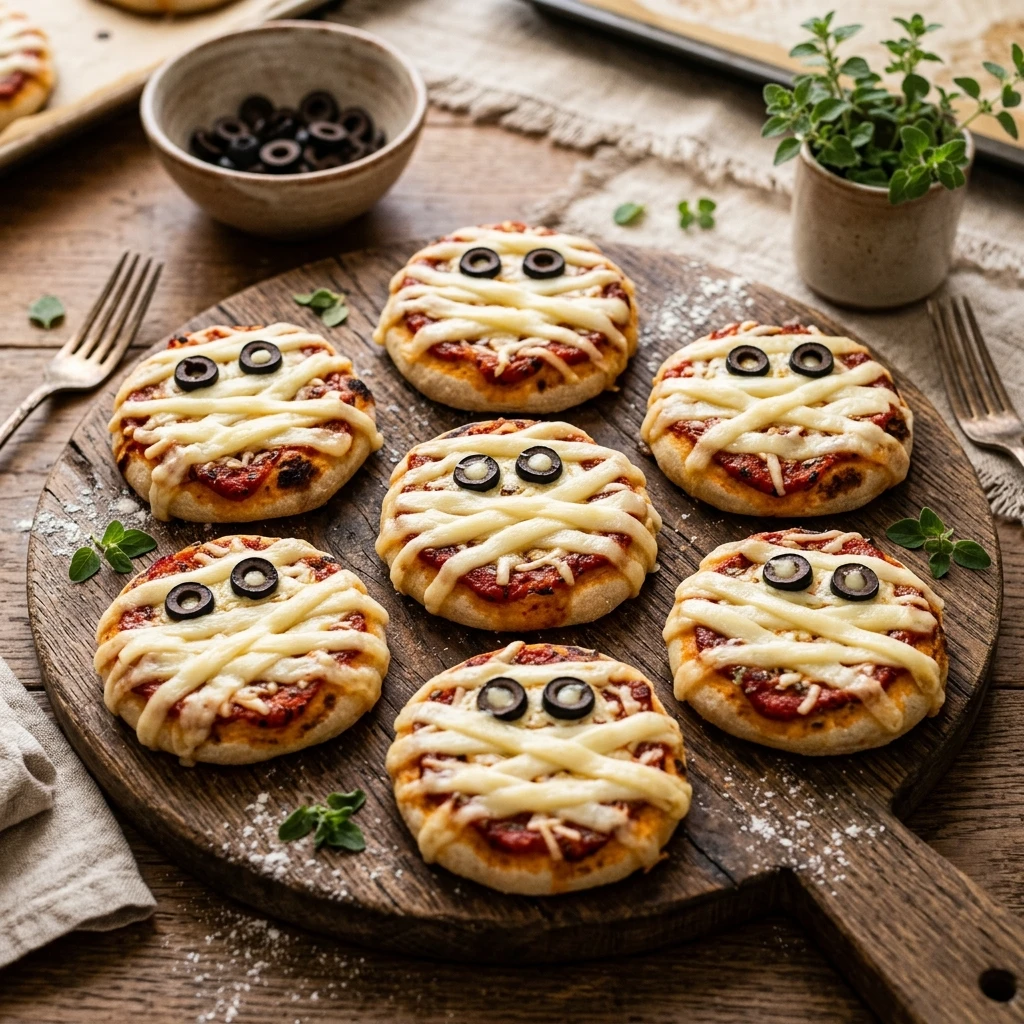
Serve these pizzas warm right out of the oven for the best flavor. Arrange them on a dark platter or a wooden board decorated with plastic spiders for a full Halloween aesthetic. They pair wonderfully with a side of “witch’s brew” (green fruit punch) or a simple garden salad to balance out the meal.
How to Store Mini Mummy Pizzas Recipe
If you have leftovers, store them in an airtight container in the refrigerator for up to 3 days. To reheat, use a toaster oven or the regular oven at 350°F until the cheese is melted again. Avoid using the microwave if possible, as it can make the English muffin base a bit chewy.
Expert Tips for Perfect Mini Mummy Pizzas Recipe
For the best visual results, do not over-layer the cheese. If the cheese is too thick, it will melt into one solid blob and you will lose the mummy bandage appearance. Using string cheese rather than shredded cheese is the secret to getting those distinct “wrapped” lines.
Also, make sure to blot your olive slices with a paper towel before placing them on the pizza. This prevents excess moisture from the brine from bleeding into the cheese and turning your mummy’s face gray during the baking process.
Delicious Variations
You can easily customize these pizzas by adding “hidden” toppings under the cheese bandages. Try adding a layer of finely chopped pepperoni, cooked sausage, or sautéed spinach before you put the cheese on. For a vegetarian version with more color, use green olives or slices of bell pepper for the eyes.
Frequently Asked Questions
Q: Can I make these ahead of time?
Yes, you can assemble the pizzas up to 4 hours in advance. Keep them covered in the fridge and simply pop them in the oven when you are ready to eat.
Q: What can I use instead of English muffins?
You can use bagel halves, small flour tortillas, or even slices of French bread as your pizza base. Just adjust the baking time slightly depending on the thickness of the bread.
Q: Can I use shredded cheese instead of string cheese?
While you can use shredded cheese, it won’t look as much like a mummy. If you must use it, try to lay the shreds in parallel lines rather than scattering them randomly.
Q: How do I make these vegan?
Simply use a vegan-friendly bread base and replace the string cheese with strips of your favorite vegan mozzarella-style cheese slices cut into ribbons.
Q: Can I freeze these pizzas?
Yes, you can freeze them before baking. Flash-freeze them on a tray first so they don’t stick together, then move them to a freezer bag. Bake directly from frozen, adding 3-5 minutes to the cooking time.
Conclusion
Mini Mummy Pizzas are a delightful way to celebrate the spooky season without spending hours in the kitchen. They are festive, flavorful, and fast, making them the ultimate Halloween recipe for busy families. Give them a try this year and watch them vanish from the plate like magic!
Mini Mummy Pizzas Recipe

- Cook Time: 25 minutes
- Total Time: 25 minutes
- Diet: Vegetarian
Ingredients
- 4 English muffins (split in half)
- 1/2 cup pizza sauce or marinara sauce
- 4 sticks of low-moisture mozzarella string cheese
- 1 small can of sliced black olives
- Optional: Dried oregano or garlic powder for extra flavor
Instructions
- Step 1: Prep Oven and Baking Sheet. Preheat your oven to 400°F (200°C). Line a large baking sheet with parchment paper or a silicone baking mat to prevent sticking and make cleanup easier.
- Step 2: Prepare the Pizza Bases. Place the halved English muffins onto the prepared baking sheet with the cut side facing up. If you prefer a crispier crust, you can toast them in the oven for 2 minutes before adding any toppings.
- Step 3: Spread the Sauce. Spoon approximately 1 tablespoon of pizza sauce onto each muffin half. Use the back of the spoon to spread it evenly to the edges, leaving a small border for the “crust.”
- Step 4: Create Mummy Bandages. Pull the string cheese apart into thin, flat strips of varying widths. Lay the strips across the sauce-covered muffins in a crisscross pattern to mimic the look of mummy bandages. Be sure to leave a small gap near the top third for the eyes.
- Step 5: Add the Eyes. Place two sliced black olives in the upper gap of the cheese strips on each pizza to create the eyes. If you want more detail, you can place a tiny piece of red pepper or a drop of sauce in the center of the olive hole.
- Step 6: Bake and Serve. Place the baking sheet in the oven and bake for 8 to 10 minutes. You want the cheese to be melted and bubbly, but not so browned that you lose the mummy bandage effect. Remove from the oven and let cool slightly before serving.