
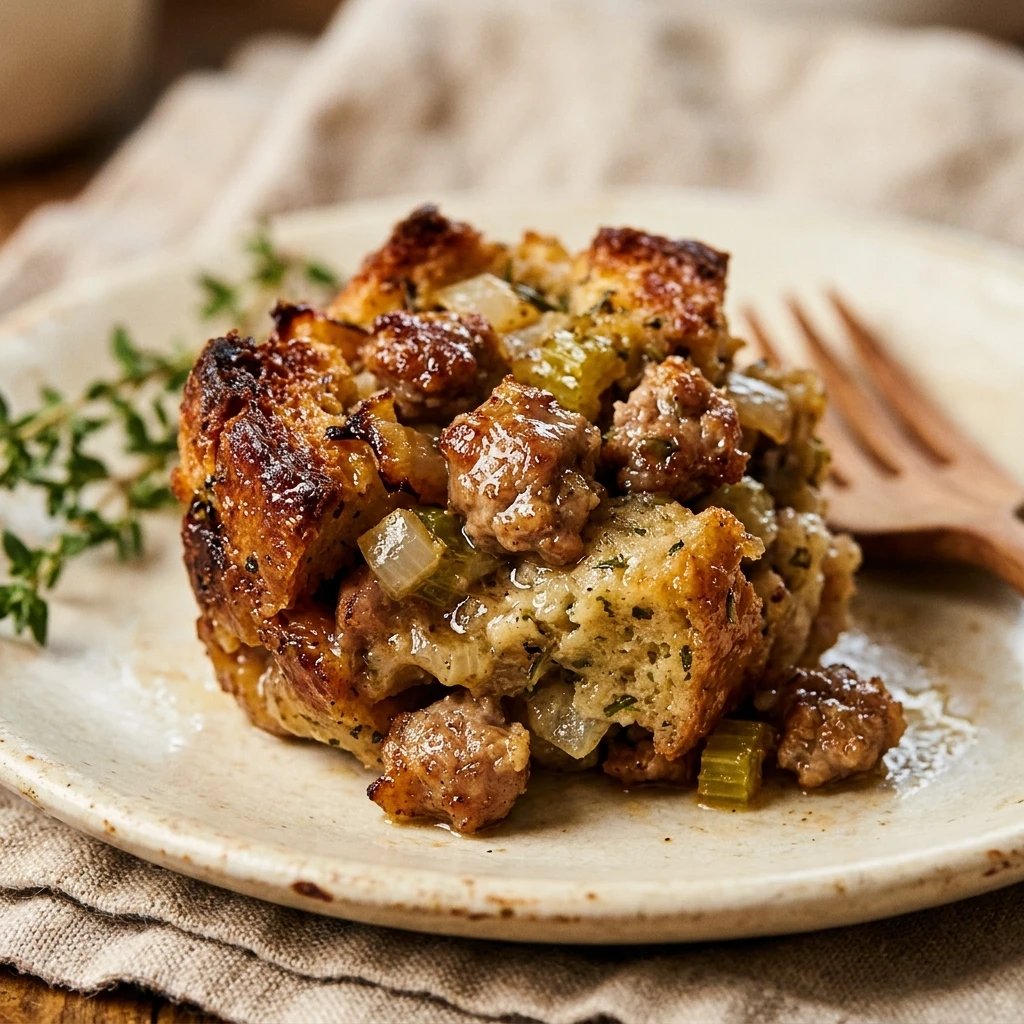

There is nothing quite like the comforting flavors of traditional holiday stuffing, but why wait for a special occasion to enjoy it? These Freezer-Friendly Sausage Stuffing Bites take everything you love about the classic side dish and turn it into a convenient, bite-sized snack or appetizer. They are crispy on the outside, moist on the inside, and packed with savory sausage flavor.
The best part about this recipe is its versatility. You can whip up a big batch ahead of time, freeze them, and then simply pop a few into the oven whenever you need a quick snack or an easy addition to dinner. Whether you are hosting a party or just looking for a way to meal prep your favorite flavors, these stuffing bites are the perfect solution.
Recipe Information
- Prep Time: 20 minutes
- Cook Time: 25 minutes
- Total Time: 45 minutes
- Servings: 24 bites
- Difficulty Level: Easy
Nutrition Information
- Calories per serving: 115 kcal
- Protein: 5g
- Carbohydrates: 12g
- Fat: 6g
- Fiber: 1g
- Sugar: 1g
- Sodium: 310mg
Why Make This Freezer-Friendly Sausage Stuffing Bites
This recipe is a game-changer for anyone who loves holiday food but hates the stress of kitchen prep on the big day. By making these bites in advance, you free up oven space and time during busy celebrations. They are also perfectly portioned, which makes them great for kids or as an easy-to-grab appetizer for guests.
Beyond the holidays, these stuffing bites serve as a fantastic protein-packed snack. The combination of savory sausage and seasoned breadcrumbs is incredibly satisfying. Plus, they freeze and reheat beautifully without losing their texture, ensuring you always have a delicious homemade treat ready in minutes.
How to Make Freezer-Friendly Sausage Stuffing Bites
Creating these savory bites is a simple process that involves browning your meat, mixing in the classic aromatics, and baking them in a muffin tin for the perfect shape. Follow these steps to ensure a moist interior and a lovely golden-brown crust.
Ingredients
- 1 lb ground pork sausage (mild or spicy)
- 6 cups dried bread cubes or stuffing mix
- 1 medium yellow onion, finely diced
- 2 stalks celery, finely diced
- 1/2 cup unsalted butter
- 1 1/2 cups chicken or turkey broth
- 2 large eggs, lightly beaten
- 1 tablespoon fresh sage, minced
- 1 tablespoon fresh thyme, minced
- 1/2 teaspoon black pepper
- Salt to taste
Directions
Step 1: Preparation and Preheating
Preheat your oven to 375°F (190°C). Generously grease a 24-cup mini muffin tin with cooking spray or butter to ensure the stuffing bites don’t stick after baking.
Step 2: Sauté the Sausage and Vegetables
In a large skillet over medium heat, cook the ground sausage until browned and crumbled. Use a slotted spoon to remove the sausage and set it aside, leaving the drippings in the pan. Add the butter, onion, and celery to the skillet. Sauté for about 5 to 7 minutes until the vegetables are soft and translucent.
Step 3: Combine Ingredients
In a very large mixing bowl, combine the dried bread cubes, cooked sausage, and sautéed vegetables. Stir in the sage, thyme, pepper, and a pinch of salt. Gradually pour in the chicken broth and the beaten eggs, tossing gently until the bread is evenly moistened but not soggy.
Step 4: Form the Bites
Using a spoon or a cookie scoop, firmly press the stuffing mixture into the prepared mini muffin tins. Pack them tightly so they hold their shape. The tops should be slightly rounded.
Step 5: Bake Until Golden
Place the muffin tin in the oven and bake for 20 to 25 minutes. The bites are done when the tops are golden brown and slightly crisp to the touch. Remove from the oven and let them cool in the pan for 5 minutes before removing them.
How to Serve Freezer-Friendly Sausage Stuffing Bites
These bites are delicious on their own, but they truly shine when paired with a dipping sauce. Serve them warm with a side of turkey gravy or a zesty cranberry sauce for the ultimate holiday experience. If you are serving them as a party appetizer, arrange them on a platter with toothpicks for easy grabbing. They also make a great side dish alongside roasted chicken or a simple green salad.
How to Store Freezer-Friendly Sausage Stuffing Bites
To store in the refrigerator, place the cooled bites in an airtight container for up to 4 days. For freezing, place the cooled bites on a baking sheet in a single layer and freeze until solid (about 1-2 hours). Once frozen, transfer them to a heavy-duty freezer bag. They will stay fresh for up to 3 months. To reheat, bake the frozen bites at 350°F (175°C) for 12-15 minutes until heated through and crispy.
Expert Tips for Perfect Freezer-Friendly Sausage Stuffing Bites
For the best results, make sure your bread cubes are completely dry; if they are too soft, the bites may become mushy. If you want a bit more crunch, you can broil the bites for the last 1-2 minutes of baking. Also, try to chop your onions and celery very finely so they distribute evenly throughout each bite, ensuring every mouthful has the perfect balance of flavor.
Delicious Variations
You can easily customize this recipe to suit your taste. For a sweet and savory twist, add 1/2 cup of dried cranberries or chopped apples to the mix. If you prefer a bit of heat, use “hot” Italian sausage and add a pinch of red pepper flakes. You can also swap the pork sausage for turkey sausage for a leaner option, or add 1/4 cup of grated Parmesan cheese for a salty, savory kick.

Frequently Asked Questions
Q: Can I use store-bought bagged stuffing mix?
A: Yes! You can use pre-seasoned stuffing mix. Just be mindful of the added salt in the mix and adjust your seasonings accordingly.
Q: How do I prevent the bites from falling apart?
A: The eggs act as a binder, so make sure they are well-mixed. Also, be sure to press the mixture firmly into the muffin tin before baking.
Q: Can I make these vegetarian?
A: Absolutely. Replace the sausage with a plant-based meat alternative or chopped mushrooms, and use vegetable broth instead of chicken broth.
Q: Do I need to thaw them before reheating?
A: No, you can reheat them directly from the freezer. It just takes a few extra minutes in the oven to get them hot and crispy.
Q: Can I use a regular-sized muffin tin?
A: Yes, but you will need to increase the baking time to about 30-35 minutes. This will result in larger “stuffing muffins” rather than bite-sized pieces.
Conclusion
Freezer-Friendly Sausage Stuffing Bites are the ultimate solution for stress-free entertaining and delicious snacking. With their savory flavor and perfect texture, they bring the spirit of the holidays to your table any time of year. Give this recipe a try, and you’ll love having a stash of these tasty morsels ready in your freezer!

Freezer-Friendly Sausage Stuffing Bites

- Cook Time: 45 minutes
- Total Time: 45 minutes
- Diet: Not specified
Ingredients
- 1 lb ground pork sausage (mild or spicy)
- 6 cups dried bread cubes or stuffing mix
- 1 medium yellow onion, finely diced
- 2 stalks celery, finely diced
- 1/2 cup unsalted butter
- 1 1/2 cups chicken or turkey broth
- 2 large eggs, lightly beaten
- 1 tablespoon fresh sage, minced
- 1 tablespoon fresh thyme, minced
- 1/2 teaspoon black pepper
- Salt to taste
Instructions
- Step 1: Preparation and Preheating: Preheat your oven to 375°F (190°C). Generously grease a 24-cup mini muffin tin with cooking spray or butter to ensure the stuffing bites don’t stick after baking.
- Step 2: Sauté the Sausage and Vegetables: In a large skillet over medium heat, cook the ground sausage until browned and crumbled. Use a slotted spoon to remove the sausage and set it aside, leaving the drippings in the pan. Add the butter, onion, and celery to the skillet. Sauté for about 5 to 7 minutes until the vegetables are soft and translucent.
- Step 3: Combine Ingredients: In a very large mixing bowl, combine the dried bread cubes, cooked sausage, and sautéed vegetables. Stir in the sage, thyme, pepper, and a pinch of salt. Gradually pour in the chicken broth and the beaten eggs, tossing gently until the bread is evenly moistened but not soggy.
- Step 4: Form the Bites: Using a spoon or a cookie scoop, firmly press the stuffing mixture into the prepared mini muffin tins. Pack them tightly so they hold their shape. The tops should be slightly rounded.
- Step 5: Bake Until Golden: Place the muffin tin in the oven and bake for 20 to 25 minutes. The bites are done when the tops are golden brown and slightly crisp to the touch. Remove from the oven and let them cool in the pan for 5 minutes before removing them.