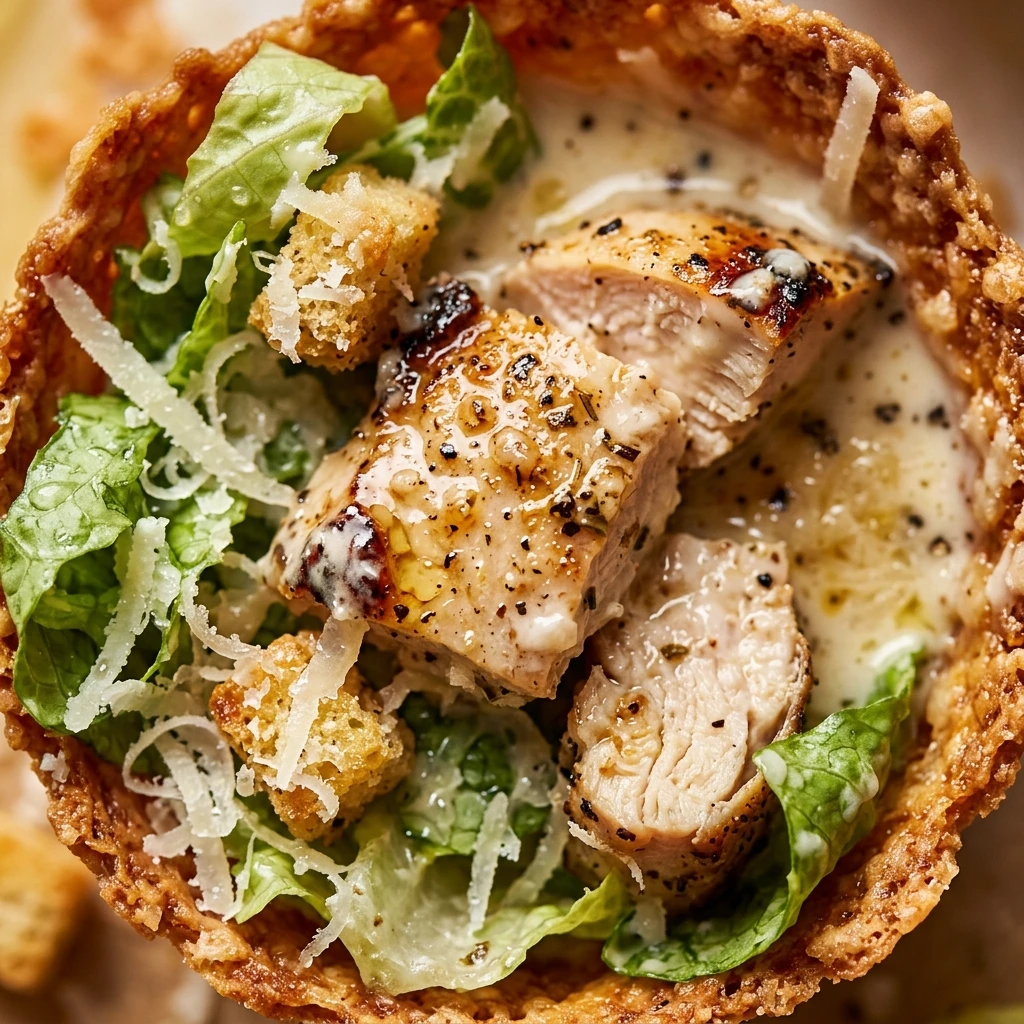

Chicken Caesar Cups are the ultimate bite-sized appetizer for your next gathering or a fun, light lunch. Imagine all the classic flavors of a traditional Caesar salad—savory chicken, crisp lettuce, and creamy dressing—all nestled inside a crunchy, golden Parmesan cheese cup. They are elegant enough for a cocktail party but simple enough to whip up on a weeknight.
These little treats are not only delicious but also naturally low-carb and gluten-free, making them a fantastic option for guests with various dietary needs. The combination of the warm, salty cheese shell and the cool, refreshing salad filling creates a perfect balance of textures and temperatures in every single bite.
Recipe Information
- Prep Time: 15 minutes
- Cook Time: 10 minutes
- Total Time: 25 minutes
- Servings: 12 cups
- Difficulty Level: Easy
Nutrition Information
- Calories per serving: 115
- Protein: 9g
- Carbohydrates: 2g
- Fat: 8g
- Fiber: 0.5g
- Sugar: 0.5g
- Sodium: 290mg
Why Make This Chicken Caesar Cups
You should make these Chicken Caesar Cups because they take a classic flavor profile and turn it into something portable and fun. Instead of a messy salad bowl, you have a perfectly portioned snack that looks professional but requires very little effort. It is a creative way to use leftover rotisserie chicken and transform it into a gourmet-style hors d’oeuvre.
Additionally, these cups are a great “hack” for anyone watching their carb intake. By using baked Parmesan cheese as the “bread” or “cup,” you get all the crunch of a crouton without the extra flour. They are impressive to look at and even better to eat, ensuring they will be the first thing to disappear from the snack table.
How to Make Chicken Caesar Cups
Making these cups is a simple two-part process: first, you create the crispy cheese shells, and then you fill them with a fresh Caesar mixture. Follow these easy steps to get a perfect result every time.
Ingredients
- 1 ½ cups freshly grated Parmesan cheese
- 1 ½ cups cooked chicken breast, finely shredded or diced
- 1/3 cup creamy Caesar dressing
- 1 cup Romaine lettuce, very finely chopped
- 2 tablespoons shredded Parmesan cheese (for garnish)
- ¼ teaspoon freshly cracked black pepper
- Optional: Chopped fresh parsley or small crouton crumbs for garnish
Directions
Step 1: Preheat and Prep
Preheat your oven to 375°F (190°C). Line a large baking sheet with a silicone baking mat or parchment paper to prevent the cheese from sticking.
Step 2: Bake the Cheese Circles
Spoon approximately 1 to 1.5 tablespoons of grated Parmesan cheese onto the baking sheet for each cup. Space them about 2 inches apart. Flatten each mound slightly into a circle. Bake for 5 to 7 minutes, or until the edges are golden brown and the cheese is bubbly.
Step 3: Mold the Cups
Let the cheese circles cool for about 30 seconds until they are firm enough to lift but still pliable. Use a spatula to carefully lift a circle and press it into the well of a mini-muffin tin to create a cup shape. Repeat with all circles and let them cool completely until hardened.
Step 4: Prepare the Filling
In a medium mixing bowl, combine the shredded chicken, creamy Caesar dressing, and black pepper. Stir until the chicken is evenly coated. Just before serving, fold in the finely chopped Romaine lettuce to keep it crisp.
Step 5: Assemble and Garnish
Spoon a generous tablespoon of the chicken salad mixture into each cooled Parmesan cup. Top with a sprinkle of extra shredded Parmesan and a pinch of parsley if desired.
How to Serve Chicken Caesar Cups
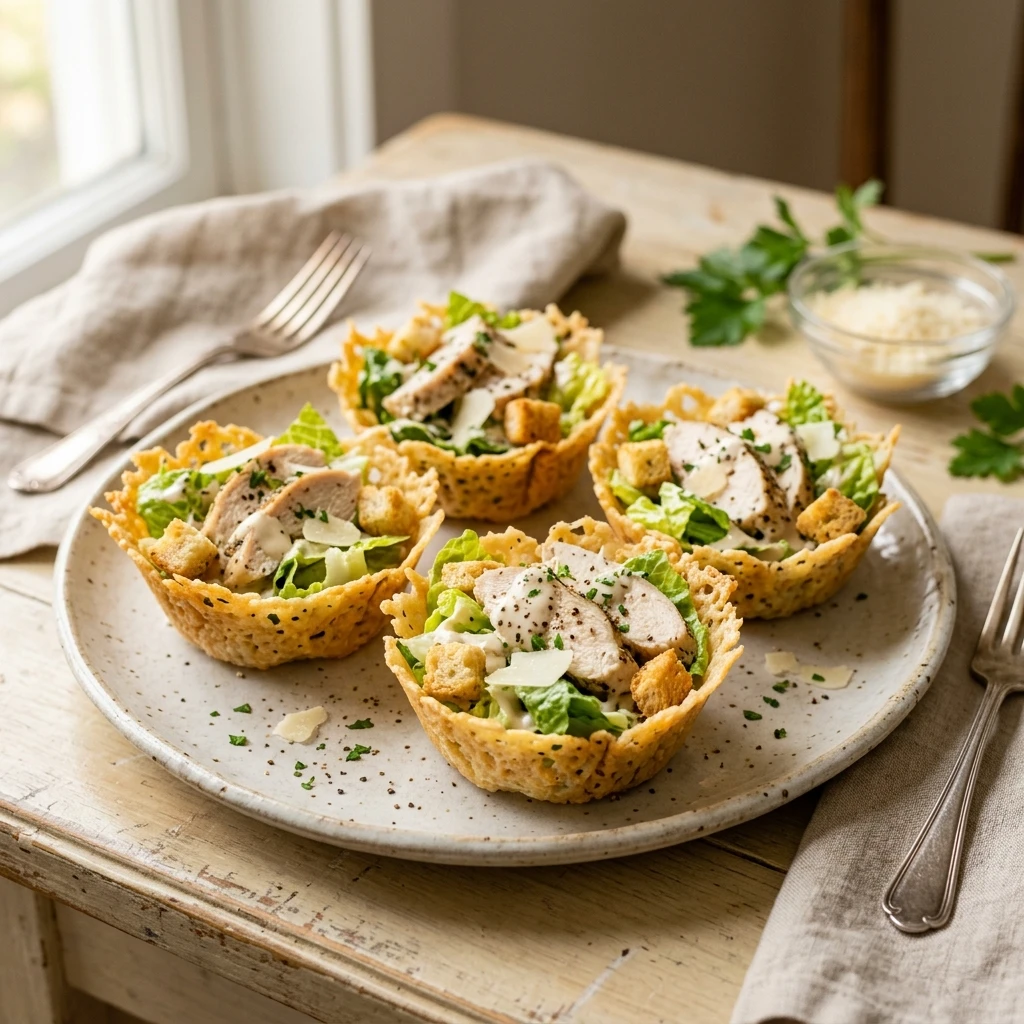
Serve these cups immediately after filling to ensure the lettuce stays crisp and the cheese cups remain crunchy. They look beautiful arranged on a white ceramic platter or a rustic wooden board. If you are serving them at a party, you can add a small lemon wedge on the side for a bright pop of color and extra acidity.
How to Store Chicken Caesar Cups
It is best to store the components separately. Keep the baked Parmesan cups in an airtight container at room temperature for up to 2 days. Keep the chicken salad mixture in the refrigerator for up to 3 days. Do not assemble the cups until you are ready to eat, as the dressing will eventually soften the cheese shells.
Expert Tips for Perfect Chicken Caesar Cups
Use freshly grated Parmesan cheese rather than the powdered kind in a can; the fresh cheese melts and binds together much better. If your cheese cups are too oily when they come out of the oven, gently pat them with a paper towel before molding them into the muffin tin. For an extra kick of flavor, add a tiny bit of lemon zest or a drop of Worcestershire sauce to your chicken mixture.
Delicious Variations
There are many ways to customize this recipe! Try adding crumbled crispy bacon for a “Chicken Club” style Caesar cup. For a bit of heat, mix a teaspoon of buffalo sauce into the dressing. If you want a vegetarian version, swap the chicken for chickpeas or finely chopped hard-boiled eggs. You can also add a sun-dried tomato sliver on top for a Mediterranean twist.
Frequently Asked Questions
Q: Can I make the cheese cups in advance?
Yes, you can make the Parmesan cups up to 24 hours in advance. Store them in an airtight container in a cool, dry place so they stay crispy.
Q: Can I use store-bought rotisserie chicken?
Absolutely! Using a rotisserie chicken is a great time-saver and adds excellent flavor to the filling.
Q: My cheese cups are falling apart. What happened?
This usually happens if the cheese isn’t baked long enough to lace together or if the cheese wasn’t grated finely enough. Ensure the edges are golden brown before removing them from the oven.
Q: Is there a substitute for Parmesan cheese?
Asiago or Romano cheese also work well for making baked cheese cups because they have a low moisture content and melt into a crisp texture.
Q: Can I freeze these?
We do not recommend freezing this dish. The lettuce will wilt, and the cheese cups may lose their signature crunch when thawed.
Conclusion
Chicken Caesar Cups are a delightful and modern way to enjoy a timeless salad. Whether you are looking for a low-carb snack or an impressive appetizer for your next party, these little bites are sure to satisfy. They are quick to prepare, easy to customize, and incredibly delicious. Give them a try and watch them become a new favorite in your recipe rotation!

Chicken Caesar Cups

- Cook Time: 25 minutes
- Total Time: 25 minutes
- Diet: low-carb, gluten-free
Ingredients
- 1 ½ cups freshly grated Parmesan cheese
- 1 ½ cups cooked chicken breast, finely shredded or diced
- 1/3 cup creamy Caesar dressing
- 1 cup Romaine lettuce, very finely chopped
- 2 tablespoons shredded Parmesan cheese (for garnish)
- ¼ teaspoon freshly cracked black pepper
- Optional: Chopped fresh parsley or small crouton crumbs for garnish
Instructions
- Step 1: Preheat and Prep. Preheat your oven to 375°F (190°C). Line a large baking sheet with a silicone baking mat or parchment paper to prevent the cheese from sticking.
- Step 2: Bake the Cheese Circles. Spoon approximately 1 to 1.5 tablespoons of grated Parmesan cheese onto the baking sheet for each cup. Space them about 2 inches apart. Flatten each mound slightly into a circle. Bake for 5 to 7 minutes, or until the edges are golden brown and the cheese is bubbly.
- Step 3: Mold the Cups. Let the cheese circles cool for about 30 seconds until they are firm enough to lift but still pliable. Use a spatula to carefully lift a circle and press it into the well of a mini-muffin tin to create a cup shape. Repeat with all circles and let them cool completely until hardened.
- Step 4: Prepare the Filling. In a medium mixing bowl, combine the shredded chicken, creamy Caesar dressing, and black pepper. Stir until the chicken is evenly coated. Just before serving, fold in the finely chopped Romaine lettuce to keep it crisp.
- Step 5: Assemble and Garnish. Spoon a generous tablespoon of the chicken salad mixture into each cooled Parmesan cup. Top with a sprinkle of extra shredded Parmesan and a pinch of parsley if desired.