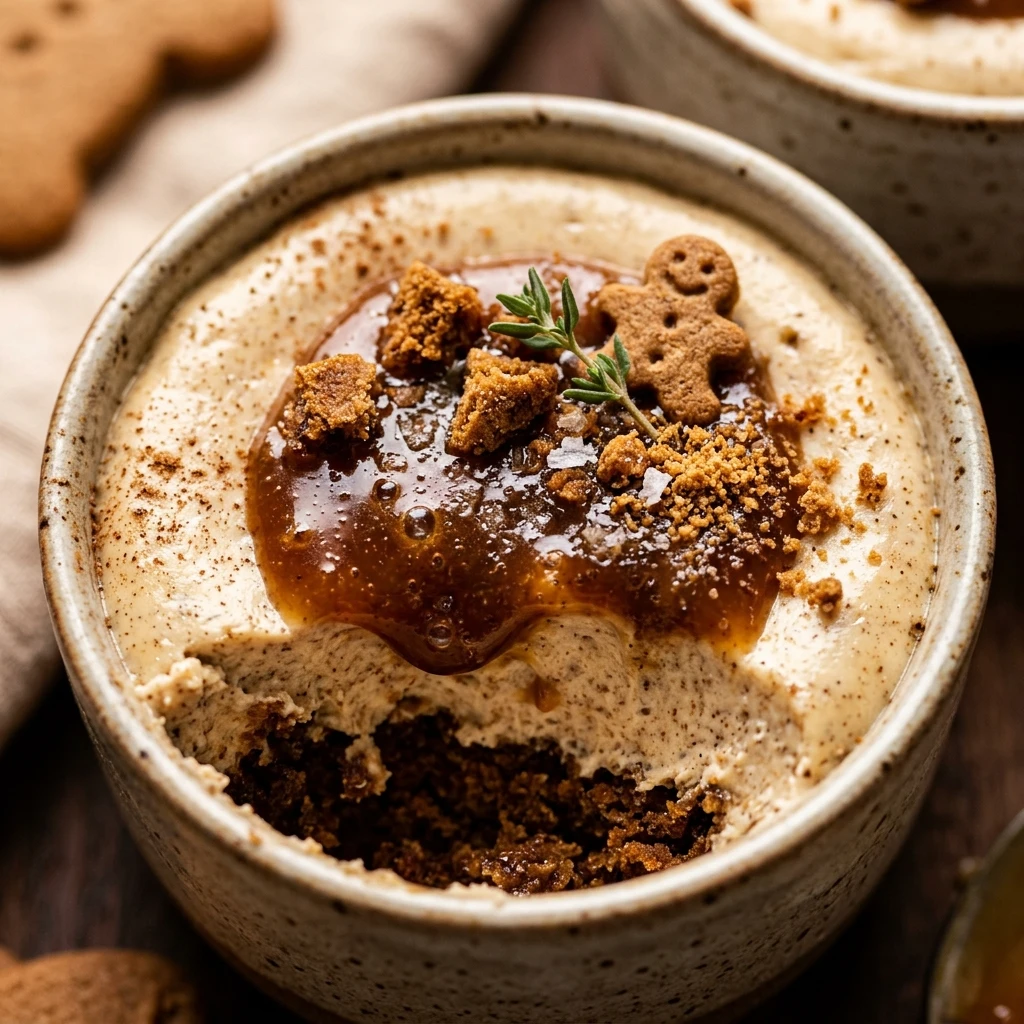

These High-Protein Gingerbread Cheesecake Cups are the ultimate holiday treat for fitness enthusiasts and dessert lovers alike. They perfectly capture the warm, spicy flavors of traditional gingerbread while providing a significant protein boost that keeps you feeling satisfied. Whether you are looking for a post-workout snack or a guilt-free dessert for your next festive gathering, these mini cheesecakes are the perfect solution.
Enjoying a seasonal treat doesn’t have to mean compromising your health goals. By swapping heavy creams for Greek yogurt and adding high-quality protein powder, we have transformed a classic holiday staple into a nutrient-dense powerhouse. The best part is that they are incredibly easy to make and even easier to enjoy!
Recipe Information
- Prep Time: 20 minutes
- Cook Time: 25 minutes
- Total Time: 45 minutes
- Servings: 12 cups
- Difficulty Level: Easy
Nutrition Information
- Calories per serving: 165 kcal
- Protein: 12g
- Carbohydrates: 15g
- Fat: 6g
- Fiber: 1g
- Sugar: 7g
- Sodium: 145mg
Why Make This High-Protein Gingerbread Cheesecake Cups
The main reason to make these cheesecake cups is the incredible balance of flavor and nutrition. Most holiday desserts are loaded with empty calories and high amounts of sugar, leading to energy crashes. These cups, however, use the natural sweetness of molasses and spices combined with the muscle-building benefits of protein, making them a functional snack that tastes like a luxury.
Furthermore, these are perfectly portion-controlled. Making individual cups instead of one large cheesecake makes it much easier to stay on track with your nutritional targets. They are also highly portable, meaning you can pack one in your lunchbox or bring a tray to a holiday party without any hassle.
How to Make High-Protein Gingerbread Cheesecake Cups
Getting these festive treats ready is a simple process that involves preparing a crunchy spiced base and a creamy, protein-packed filling. Follow these straightforward steps to achieve the perfect texture and flavor profile.
Ingredients
- 1.5 cups Graham cracker crumbs (or crushed ginger snaps)
- 3 tablespoons melted butter or coconut oil
- 1 teaspoon ground ginger (for the crust)
- 16 oz low-fat cream cheese, softened
- 1 cup plain non-fat Greek yogurt
- 2 scoops vanilla whey protein powder
- 1/4 cup blackstrap molasses
- 1 large egg
- 1 tablespoon ground ginger
- 1 teaspoon ground cinnamon
- 1/2 teaspoon ground cloves
- 1/2 teaspoon ground nutmeg
- 1/4 cup stevia or preferred granulated sweetener
Directions
Step 1: Prepare the Oven and Muffin Tin
Preheat your oven to 325°F (160°C). Line a standard 12-slot muffin tin with paper or silicone liners. If you are not using liners, make sure to grease the tin thoroughly with non-stick cooking spray to ensure easy removal.
Step 2: Create the Spiced Crust
In a small mixing bowl, combine the graham cracker crumbs, melted butter, and one teaspoon of ground ginger. Stir until the mixture looks like wet sand. Press about one tablespoon of the mixture into the bottom of each muffin liner, using the back of a spoon to pack it down firmly. Pre-bake the crusts for 5 minutes, then remove them from the oven.
Step 3: Mix the Protein Cheesecake Filling
In a large bowl, beat the softened cream cheese and sweetener together until smooth and fluffy. Add the Greek yogurt, molasses, protein powder, and all the spices. Mix until well combined. Finally, add the egg and mix on low speed just until it disappears into the batter. Do not overmix at this stage, as it can cause the cheesecakes to crack.
Step 4: Fill and Bake
Divide the cheesecake batter evenly among the 12 muffin slots, filling each one nearly to the top. Place the tin back in the oven and bake for 18 to 22 minutes. The edges should be set, but the centers should still have a slight jiggle when you gently shake the pan.
Step 5: Cool and Set
Remove the tin from the oven and let the cups cool to room temperature. Once cooled, place the tin in the refrigerator for at least 3 hours, or ideally overnight. This chilling process is essential for the cheesecake to reach its final creamy consistency and for the flavors to meld together.
How to Serve High-Protein Gingerbread Cheesecake Cups
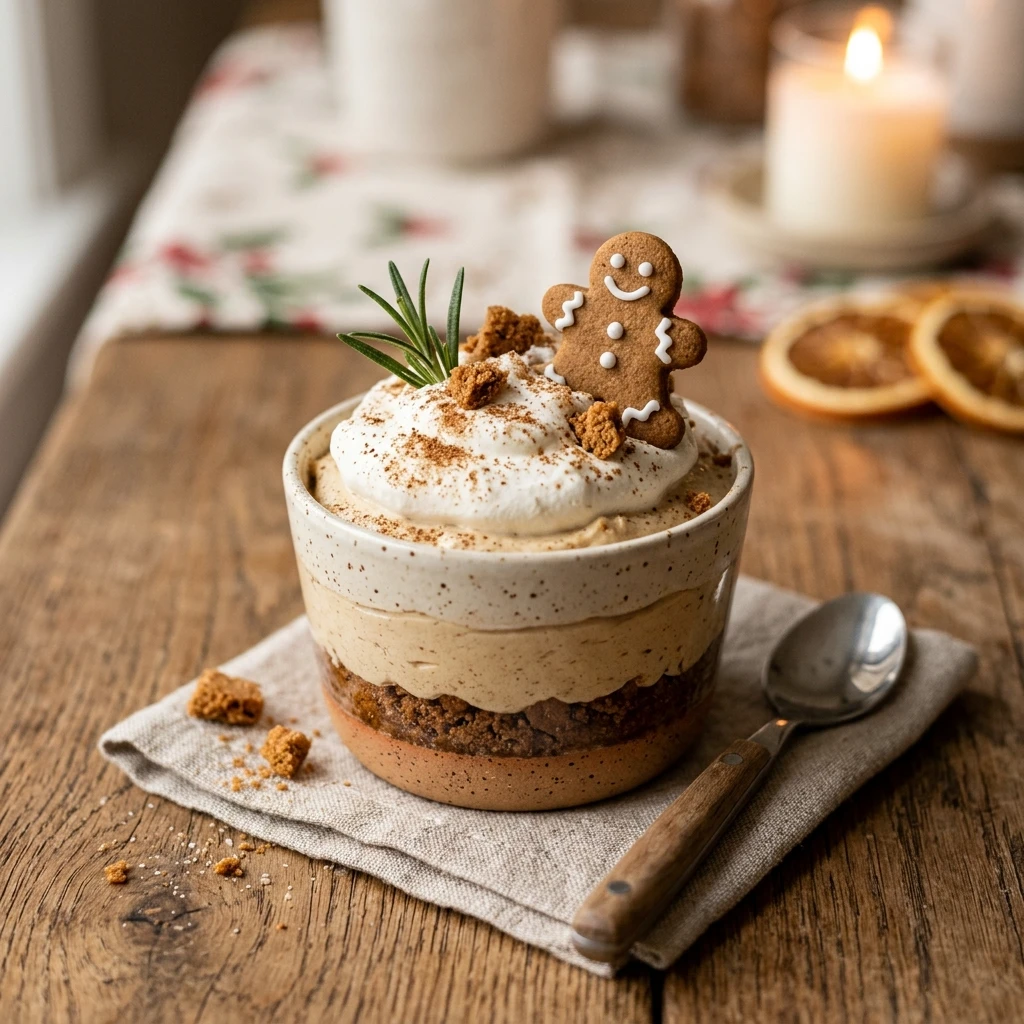
These cups are best served cold straight from the refrigerator. For a truly festive look, top each cup with a small dollop of Greek yogurt mixed with a bit of honey or a spray of light whipped cream. You can also sprinkle a tiny pinch of cinnamon or place a mini gingerbread man cookie on top for an extra touch of holiday magic. They pair wonderfully with a hot cup of coffee or a spicy chai tea.
How to Store High-Protein Gingerbread Cheesecake Cups
Keep your cheesecake cups in an airtight container in the refrigerator for up to 5 days. If you want to make them further in advance, they freeze beautifully! Simply wrap each cup individually in plastic wrap and store them in a freezer-safe bag for up to 3 months. To eat, thaw a cup in the refrigerator for a few hours before serving.
Expert Tips for Perfect High-Protein Gingerbread Cheesecake Cups
To ensure your cheesecakes come out perfectly every time, make sure your cream cheese and egg are at room temperature before you start mixing. This prevents lumps and ensures a silky-smooth texture. Also, avoid opening the oven door during the baking process, as the sudden drop in temperature can cause the cheesecakes to sink. Lastly, if your protein powder is very sweet, you may want to reduce the amount of added sweetener in the recipe.
Delicious Variations
If you want to try something different, consider adding a tablespoon of cocoa powder to the filling for a “Chocolate Gingerbread” flavor. For a vegan-friendly version, use a vegan cream cheese alternative, soy yogurt, and a plant-based protein powder, while replacing the egg with a flax egg. You can also swap the graham cracker crust for a crushed almond or pecan base if you want a gluten-free and lower-carb option.
Frequently Asked Questions
Q: Can I use casein protein instead of whey?
Casein protein absorbs more liquid than whey, which might make the cheesecake a bit denser. If you use casein, you may need to add a tablespoon or two of almond milk to reach the right batter consistency.
Q: My cheesecakes cracked on top, what happened?
Cracks usually happen because of overmixing the batter after adding the egg or because the oven temperature was too high. Don’t worry, they will still taste delicious, and you can easily hide the cracks with a little topping!
Q: Can I use honey instead of molasses?
While you can use honey, the molasses is what gives gingerbread its signature deep, smoky flavor. If you swap it out, the taste will be significantly different and less “gingerbread-like.”
Q: Are these suitable for a keto diet?
To make these keto-friendly, you would need to use a sugar-free molasses substitute, a nut-based crust, and an erythritol-based sweetener. As written, they contain moderate carbohydrates from the graham crackers and molasses.
Q: Why do I need to chill them for so long?
Chilling allows the proteins and fats to stabilize. If you eat them warm, the texture will be more like a custard than a firm, creamy cheesecake.
Conclusion
High-Protein Gingerbread Cheesecake Cups are a fantastic addition to your holiday baking list. They prove that you can enjoy the traditional flavors of the season while still prioritizing your health and fitness goals. Easy to make, perfectly spiced, and packed with protein, these little cups are sure to become a favorite in your household. Give them a try this winter and enjoy a guilt-free bite of holiday cheer!

High-Protein Gingerbread Cheesecake Cups
- Cook Time: 45 minutes
- Total Time: 45 minutes
- Diet: High-Protein
Ingredients
- 1.5 cups Graham cracker crumbs (or crushed ginger snaps)
- 3 tablespoons melted butter or coconut oil
- 1 teaspoon ground ginger (for the crust)
- 16 oz low-fat cream cheese, softened
- 1 cup plain non-fat Greek yogurt
- 2 scoops vanilla whey protein powder
- 1/4 cup blackstrap molasses
- 1 large egg
- 1 tablespoon ground ginger
- 1 teaspoon ground cinnamon
- 1/2 teaspoon ground cloves
- 1/2 teaspoon ground nutmeg
- 1/4 cup stevia or preferred granulated sweetener
Instructions
- Step 1: Prepare the Oven and Muffin Tin: Preheat your oven to 325°F (160°C). Line a standard 12-slot muffin tin with paper or silicone liners. If you are not using liners, make sure to grease the tin thoroughly with non-stick cooking spray to ensure easy removal.
- Step 2: Create the Spiced Crust: In a small mixing bowl, combine the graham cracker crumbs, melted butter, and one teaspoon of ground ginger. Stir until the mixture looks like wet sand. Press about one tablespoon of the mixture into the bottom of each muffin liner, using the back of a spoon to pack it down firmly. Pre-bake the crusts for 5 minutes, then remove them from the oven.
- Step 3: Mix the Protein Cheesecake Filling: In a large bowl, beat the softened cream cheese and sweetener together until smooth and fluffy. Add the Greek yogurt, molasses, protein powder, and all the spices. Mix until well combined. Finally, add the egg and mix on low speed just until it disappears into the batter. Do not overmix at this stage, as it can cause the cheesecakes to crack.
- Step 4: Fill and Bake: Divide the cheesecake batter evenly among the 12 muffin slots, filling each one nearly to the top. Place the tin back in the oven and bake for 18 to 22 minutes. The edges should be set, but the centers should still have a slight jiggle when you gently shake the pan.
- Step 5: Cool and Set: Remove the tin from the oven and let the cups cool to room temperature. Once cooled, place the tin in the refrigerator for at least 3 hours, or ideally overnight. This chilling process is essential for the cheesecake to reach its final creamy consistency and for the flavors to meld together.