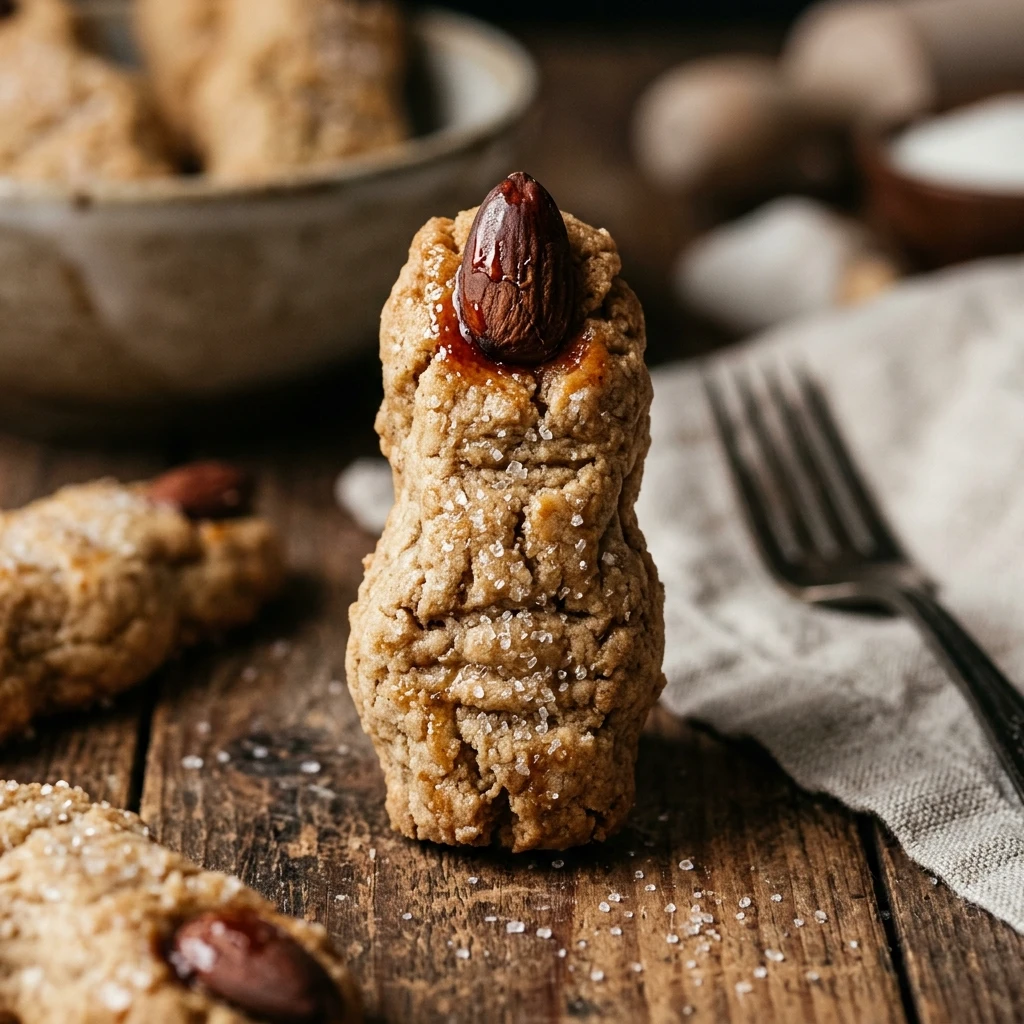

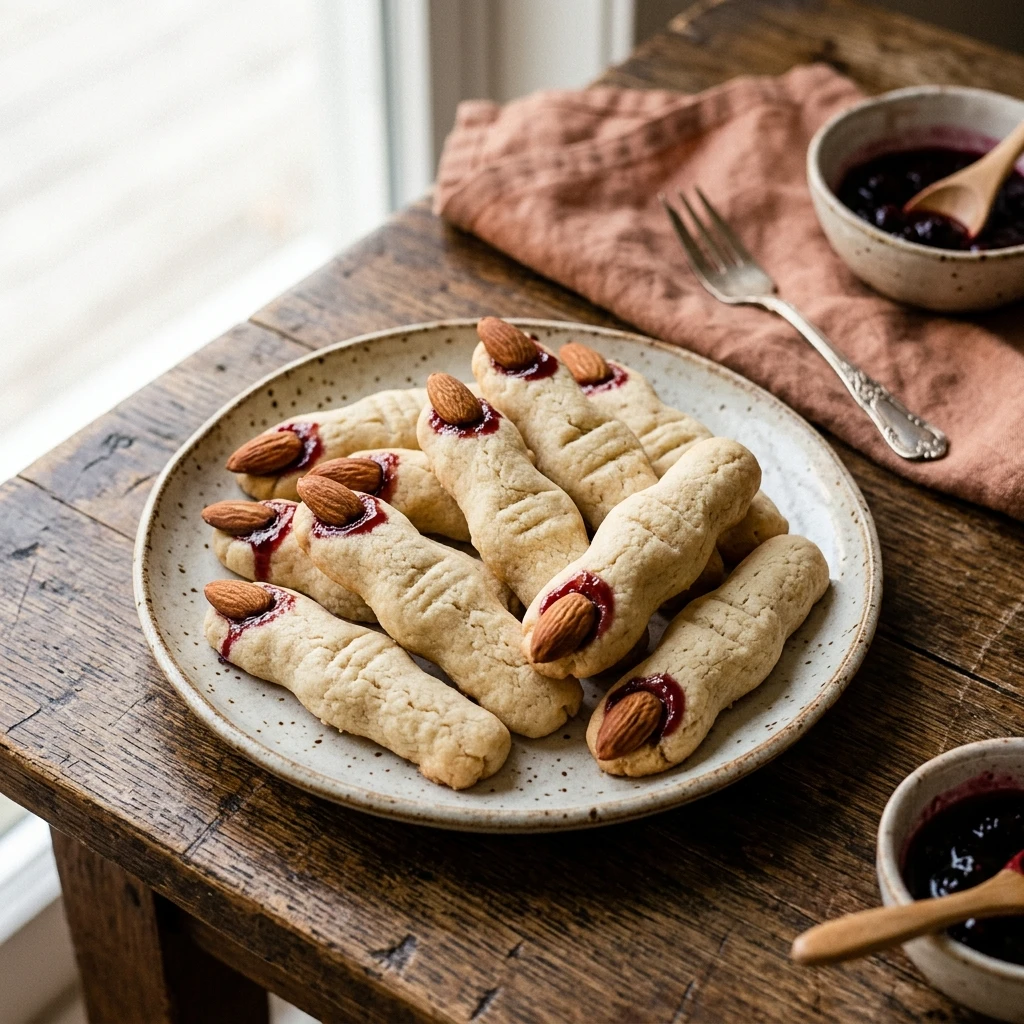
Halloween is the perfect time to get creative in the kitchen, and nothing says “spooky” quite like a batch of Witch Finger Sugar Cookies. These eerie treats are a staple for any October celebration, combining the buttery, sweet flavor of a classic sugar cookie with a macabre appearance that delights kids and adults alike. While they might look a bit gruesome with their almond “fingernails” and jam “blood,” they are absolutely delicious and surprisingly easy to make.
Whether you are hosting a haunted house party or just want a fun weekend project with the kids, these cookies are a guaranteed hit. The dough is sturdy enough to hold its shape while baking, ensuring your “fingers” don’t turn into blobs. With just a few pantry staples and a little bit of sculpting, you can transform ordinary cookie dough into a creepy masterpiece that tastes just like a professional bakery find.
Recipe Information
- Prep Time: 30 minutes
- Cook Time: 10 minutes
- Total Time: 40 minutes (plus 30 minutes chilling)
- Servings: 24 cookies
- Difficulty Level: Medium
Nutrition Information
- Calories per serving: 125 kcal
- Protein: 2g
- Carbohydrates: 16g
- Fat: 6g
- Fiber: 0.5g
- Sugar: 8g
- Sodium: 85mg
Why Make This Witch Finger Sugar Cookies Recipe
This recipe is the ultimate Halloween crowd-pleaser. Unlike complicated cakes that require hours of decorating, these cookies rely on simple shaping techniques to achieve a high-impact look. The contrast between the crunchy blanched almond and the soft sugar cookie creates a wonderful texture that keeps people coming back for more.
Beyond the aesthetics, the flavor is timeless. The hint of almond extract gives the cookies a sophisticated profile that pairs perfectly with the red fruit jam. It is an interactive baking experience that allows you to get messy and creative, making it a wonderful tradition for families who love the spooky season.
How to Make Witch Finger Sugar Cookies Recipe
Making these cookies is all about the details. You will start with a basic dough, but the real magic happens during the shaping process where you create the “knuckles” and add the “nails.” Follow these steps carefully to ensure your fingers look as realistic—and creepy—as possible!
Ingredients
- 1 cup unsalted butter, softened
- 1 cup granulated sugar
- 1 large egg
- 1 teaspoon vanilla extract
- 1 teaspoon almond extract
- 2 2/3 cups all-purpose flour
- 1 teaspoon baking powder
- 1 teaspoon salt
- 1/2 cup whole blanched almonds
- 1/4 cup red jam (raspberry or strawberry)
Directions
Step 1: Creaming the Butter and Sugar
In a large mixing bowl, beat together the softened butter and granulated sugar until the mixture is light and fluffy. This usually takes about 2 to 3 minutes using an electric mixer. Add the egg, vanilla extract, and almond extract, beating again until well combined.
Step 2: Mixing the Dry Ingredients
In a separate bowl, whisk together the all-purpose flour, baking powder, and salt. Gradually add the dry ingredients to the wet butter mixture, stirring until a stiff dough forms. Cover the dough and refrigerate it for at least 30 minutes to make it easier to handle.
Step 3: Shaping the Fingers
Preheat your oven to 325°F (165°C). Take a tablespoon of dough and roll it into a thin finger shape, about 3 to 4 inches long. Remember that the dough will expand slightly in the oven, so make the fingers a bit thinner than you want the final result to be.
Step 4: Creating the Knuckles and Nails
Press a whole blanched almond firmly into one end of each dough strip to create the “fingernail.” Use a butter knife to make small horizontal slashes in the middle of the finger to create the appearance of knuckles. Squeeze the dough slightly around the slashes to make the knuckle area look prominent.
Step 5: Baking the Cookies
Place the fingers on a baking sheet lined with parchment paper, leaving about 2 inches of space between each. Bake for 10 to 12 minutes, or until the cookies are a very pale golden color. Do not overbake; you want them to look “pale” like skin.
Step 6: Adding the Blood Effect
Let the cookies cool for a few minutes. Carefully lift the almond “nail” off each cookie. Smear a small amount of red jam into the indentation and press the almond back into place so the jam oozes out around the edges. For an extra creepy look, add more jam to the “severed” end of the finger.
How to Serve Witch Finger Sugar Cookies Recipe
To make the most of these spooky treats, serve them on a dark slate platter or a wooden cutting board to emphasize the colors. You can also place them in a glass jar so they look like “specimens” from a witch’s pantry. For a party, consider serving them alongside a bowl of “bloody” dipping sauce made from pureed raspberries or extra strawberry jam.
How to Store Witch Finger Sugar Cookies Recipe
Store these cookies in an airtight container at room temperature for up to 5 days. If you need to stack them, place a sheet of parchment paper between layers to prevent the jam from sticking to the other cookies. They also freeze well for up to 3 months; just wait to add the jam until you have thawed them and are ready to serve.
Expert Tips for Perfect Witch Finger Sugar Cookies Recipe
One of the best tips for this recipe is to keep the dough cold. If the dough gets too warm, the fingers will spread too much in the oven and lose their shape. If you notice the dough getting sticky while you are shaping it, pop it back in the fridge for 10 minutes. Also, try to use smaller almonds for a more realistic nail-to-finger ratio.
Delicious Variations
If you want to switch things up, try adding a few drops of green food coloring to the dough for “Wicked Witch” fingers. You can also use cocoa powder to make chocolate “Earth Mother” fingers. For the nails, if you don’t like almonds, you can use pumpkin seeds or even a piece of sliced bell pepper for a savory twist on the appearance.
Frequently Asked Questions
Q: Why did my cookies spread so much in the oven?
Usually, spreading happens if the butter was too soft or the dough wasn’t chilled long enough. Make sure to chill the dough for at least 30 minutes before shaping.
Q: Can I use store-bought sugar cookie dough?
Yes, but be careful as store-bought dough is often formulated to spread. You may need to mix in a little extra flour to make it stiff enough for sculpting.
Q: What if I can’t find blanched almonds?
You can use regular almonds with the skin on, or you can blanch them yourself by boiling them for 60 seconds and then slipping the skins off.
Q: Do I have to use almond extract?
While almond extract gives these cookies their signature flavor, you can replace it with extra vanilla extract or even lemon zest if you prefer.
Q: How do I make the “knuckles” look more realistic?
Use the back of a knife to make three shallow cuts near the center of the finger and three more near the “nail.” Pinch the dough slightly around these areas to make them bulge like real joints.
Conclusion
Witch Finger Sugar Cookies are the ultimate blend of fun, fright, and flavor. They are a fantastic way to celebrate Halloween and provide a memorable treat that everyone will be talking about long after the party is over. With their buttery base and spooky appearance, these cookies prove that you don’t need to be a professional pastry chef to create something truly magical in your own kitchen.
Witch Finger Sugar Cookies Recipe

- Cook Time: 40 minutes (plus 30 minutes chilling)
- Total Time: 40 minutes
- Diet: Vegetarian
Ingredients
- 1 cup unsalted butter, softened
- 1 cup granulated sugar
- 1 large egg
- 1 teaspoon vanilla extract
- 1 teaspoon almond extract
- 2 2/3 cups all-purpose flour
- 1 teaspoon baking powder
- 1 teaspoon salt
- 1/2 cup whole blanched almonds
- 1/4 cup red jam (raspberry or strawberry)
Instructions
- In a large mixing bowl, beat together the softened butter and granulated sugar until the mixture is light and fluffy. This usually takes about 2 to 3 minutes using an electric mixer. Add the egg, vanilla extract, and almond extract, beating again until well combined.
- In a separate bowl, whisk together the all-purpose flour, baking powder, and salt. Gradually add the dry ingredients to the wet butter mixture, stirring until a stiff dough forms. Cover the dough and refrigerate it for at least 30 minutes to make it easier to handle.
- Preheat your oven to 325°F (165°C). Take a tablespoon of dough and roll it into a thin finger shape, about 3 to 4 inches long. Remember that the dough will expand slightly in the oven, so make the fingers a bit thinner than you want the final result to be.
- Press a whole blanched almond firmly into one end of each dough strip to create the “fingernail.” Use a butter knife to make small horizontal slashes in the middle of the finger to create the appearance of knuckles. Squeeze the dough slightly around the slashes to make the knuckle area look prominent.
- Place the fingers on a baking sheet lined with parchment paper, leaving about 2 inches of space between each. Bake for 10 to 12 minutes, or until the cookies are a very pale golden color. Do not overbake; you want them to look “pale” like skin.
- Let the cookies cool for a few minutes. Carefully lift the almond “nail” off each cookie. Smear a small amount of red jam into the indentation and press the almond back into place so the jam oozes out around the edges. For an extra creepy look, add more jam to the “severed” end of the finger.