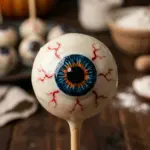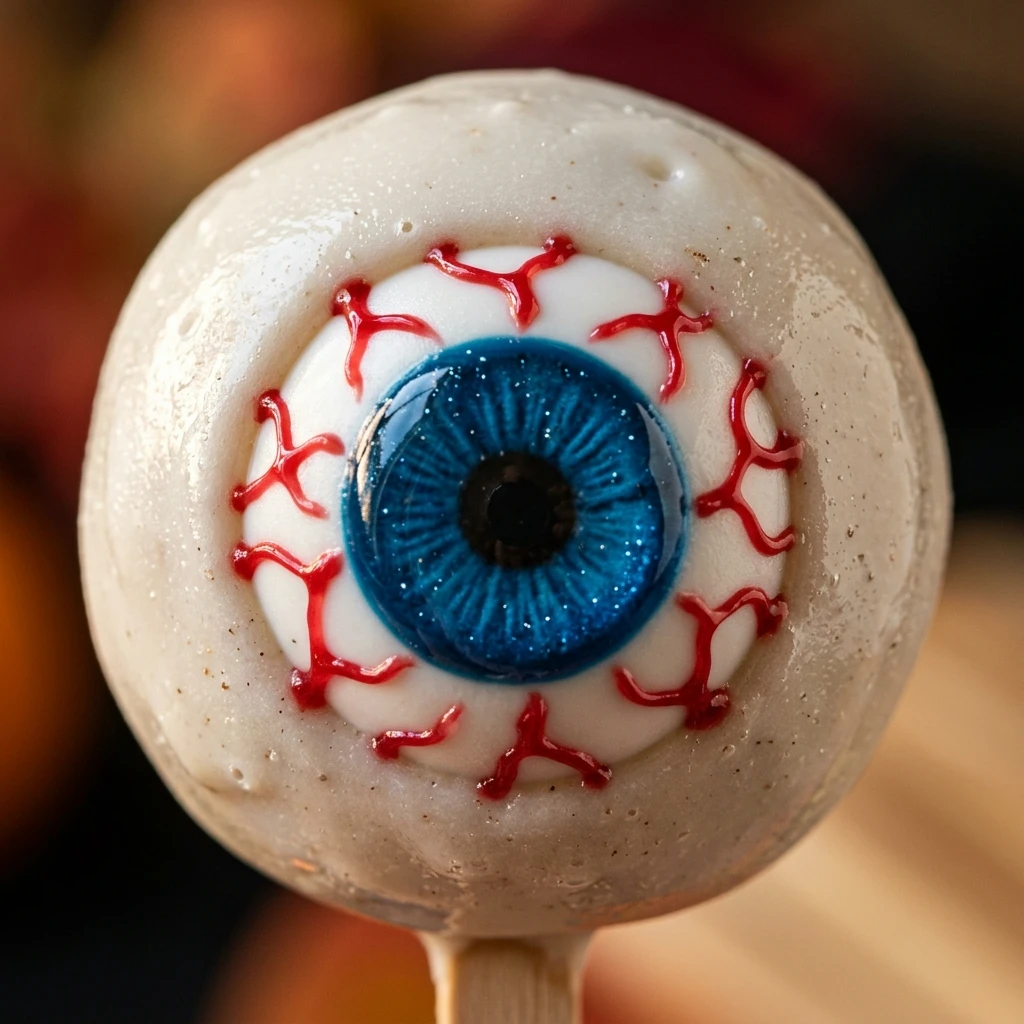

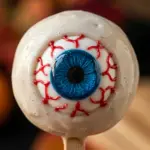
Get ready to add a creepy yet delicious touch to your next Halloween party with these Spooky Eyeball Cake Pops. These treats are not only eye-catching—literally—but they are also incredibly tasty, combining moist cake with a smooth chocolate coating.
Making cake pops might seem intimidating, but this recipe breaks it down into simple steps that anyone can follow. They are the perfect centerpiece for a dessert table and will definitely get your guests talking. Whether you are a seasoned baker or a beginner, these spooky eyes are as fun to create as they are to eat.
Recipe Information
- Prep Time: 45 minutes
- Cook Time: 30 minutes
- Total Time: 1 hour 15 minutes
- Servings: 24 pops
- Difficulty Level: Medium
Nutrition Information
- Calories per serving: 185 kcal
- Protein: 2g
- Carbohydrates: 26g
- Fat: 8g
- Fiber: 1g
- Sugar: 18g
- Sodium: 110mg
Why Make This Spooky Eyeball Cake Pops Recipe
These cake pops are the ultimate Halloween treat because they strike the perfect balance between spooky and cute. Kids love the “gross” factor of eating an eyeball, while adults appreciate the classic flavor of cake and chocolate. They are also highly customizable, allowing you to get creative with colors and expressions for each individual eye.
Furthermore, cake pops are a great way to use up leftover cake or even a store-bought cake if you are in a hurry. They are portable, mess-free once the chocolate has set, and can be prepared a day or two in advance, making your party planning much easier and more organized.
How to Make Spooky Eyeball Cake Pops Recipe
Creating these eerie treats involves baking a cake, crumbling it into fine pieces, and binding it with frosting before dipping it into melted candy. Follow these steps to ensure your eyeballs look professional and stay securely on their sticks!
Ingredients
- 1 box (15.25 oz) vanilla or chocolate cake mix (plus ingredients required on the box)
- 1/2 cup vanilla frosting
- 16 oz white candy melts or white chocolate
- 24 lollipop sticks
- Blue, green, or brown M&Ms or round candies (for the iris)
- Black edible ink marker or black decorating gel (for the pupil)
- Red decorating gel or red food coloring (for the veins)
- Styrofoam block or cake pop stand
Directions
Step 1: Bake the Cake
Bake the cake according to the instructions on the package in a standard baking pan. Once finished, let it cool completely. You can even bake the cake the day before to save time on the day of assembly.
Step 2: Crumble the Cake
Once cooled, remove the cake from the pan. In a large bowl, crumble the cake into very fine crumbs using your hands or a fork. Ensure there are no large chunks left, as this will make the pops lumpy.
Step 3: Mix with Frosting
Add the vanilla frosting to the cake crumbs. Use your hands or a sturdy spoon to mix until the dough reaches a consistency where it can be rolled into a ball and hold its shape without falling apart.
Step 4: Roll the Balls
Scoop about one tablespoon of the mixture and roll it between your palms into a smooth ball. Place the balls on a parchment-lined baking sheet and refrigerate for at least 30 minutes to firm them up.
Step 5: Prepare for Dipping
Melt a small amount of white candy melts in a microwave-safe bowl. Dip the tip of each lollipop stick into the melted chocolate and then insert it halfway into a chilled cake ball. This acts as glue to keep the cake from sliding off the stick.
Step 6: Dip the Cake Pops
Melt the remaining white candy melts in a deep, narrow bowl. Gently dip each cake pop into the chocolate until fully coated. Tap the stick lightly on the edge of the bowl to remove excess chocolate. Stand the pops upright in a styrofoam block to set.
Step 7: Decorate the Eyeballs
Before the white coating dries completely, press an M&M onto the front of the pop to create the iris. Once the white coating is fully set, use a black edible marker to draw a pupil in the center of the M&M. Finally, use red decorating gel to draw squiggly “bloodshot” veins coming from the back of the eyeball toward the front.
How to Serve Spooky Eyeball Cake Pops Recipe
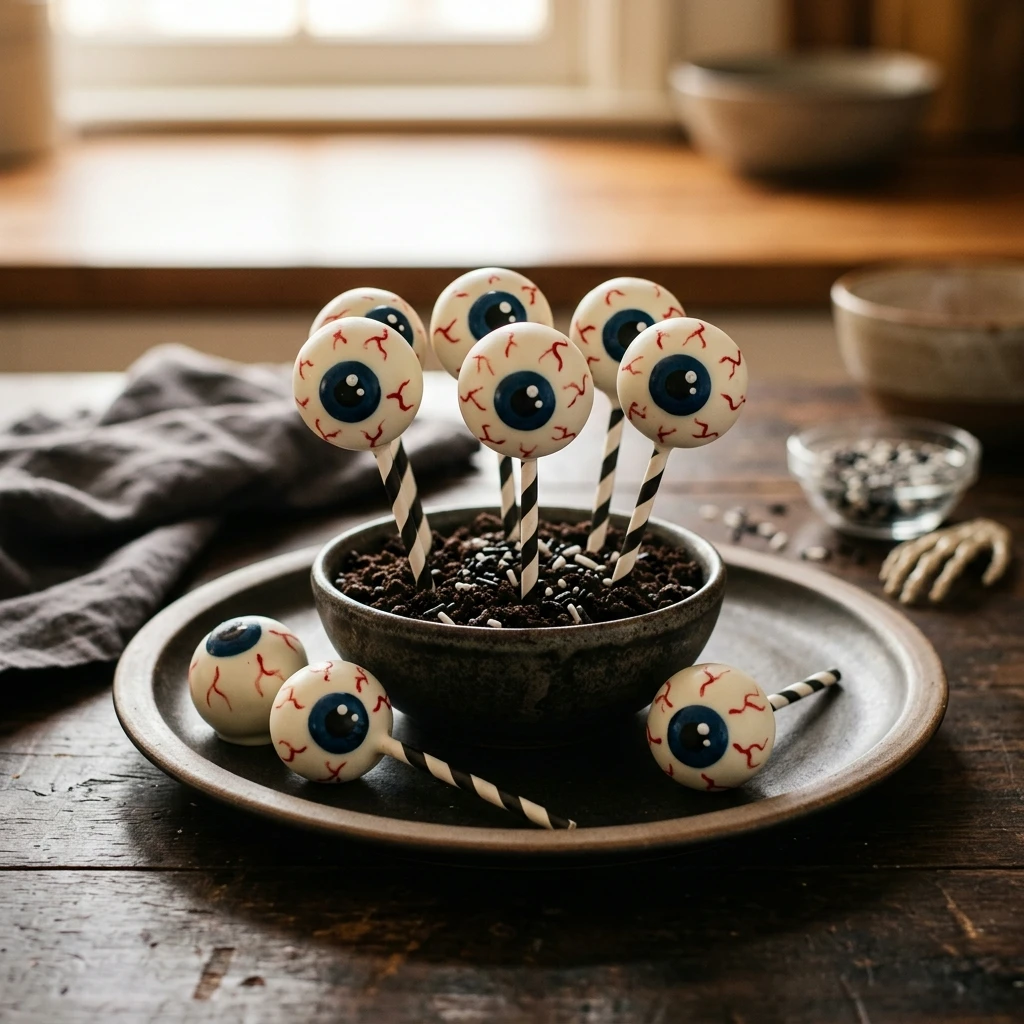
Serve these spooky treats by standing them upright in a decorated styrofoam block or a jar filled with black and orange jelly beans. They look fantastic as part of a Halloween dessert spread or as individual favors wrapped in clear cellophane bags with a festive ribbon. For a more dramatic look, you can place them on a platter with some dry ice for a foggy, ghostly effect.
How to Store Spooky Eyeball Cake Pops Recipe
Store your finished cake pops in an airtight container in the refrigerator for up to 5 days. If you need to stack them, place a layer of wax paper between them, though standing them up is preferred to avoid smudging the red gel decorations. You can also freeze the undipped cake balls for up to 6 weeks, but it is best to decorate them fresh for the best appearance.
Expert Tips for Perfect Spooky Eyeball Cake Pops Recipe
To get the smoothest finish, make sure your candy melts are fully melted but not too hot. If the chocolate is too thick, add a teaspoon of coconut oil or vegetable shortening to thin it out. Also, avoid over-mixing the frosting and cake; you want it to be moist but not greasy. Chilling the balls before dipping is the most important step to prevent them from falling off the stick during the dipping process.
Delicious Variations
For a “bleeding” effect, use a red velvet cake mix for the interior so it looks red when bitten into. You can also change the “eye color” by using different colored candy melts for the iris or using gummy rings for a more bug-eyed look. If you want a different flavor profile, try using lemon cake with white chocolate for a tart and sweet combination that surprises your guests.
Frequently Asked Questions
Q: Why did my cake pops fall off the stick?
This usually happens if the cake balls are too heavy, too warm, or if you didn’t dip the stick in chocolate before inserting it. Make sure they are properly chilled and the “glue” is set before the main dip.
Q: Can I use real white chocolate instead of candy melts?
Yes, but you will need to temper it so it snaps and doesn’t melt at room temperature. Candy melts are generally easier for beginners as they are designed to harden quickly and smoothly without tempering.
Q: My chocolate coating is cracking. What happened?
Cracking usually occurs when there is a large temperature difference between the cold cake ball and the warm chocolate. Let the cake balls sit out for a few minutes after taking them from the fridge before you begin dipping.
Q: How do I get the red veins to look realistic?
Use a very thin piping tip or a toothpick to drag the red gel in irregular, squiggly lines. Avoid making them too straight; real bloodshot eyes have messy, branching vessels!
Q: Can I make these without a styrofoam block?
Yes! You can use a tall glass or jar filled with uncooked rice, dried beans, or even sugar to hold the lollipop sticks upright while the chocolate sets.
Conclusion
These Spooky Eyeball Cake Pops are a guaranteed hit for the Halloween season. They are fun to make, even more fun to decorate, and absolutely delicious to eat. Whether you are hosting a big party or just looking for a festive weekend activity with the kids, these treats are the perfect way to celebrate. Happy haunting and happy baking!
Spooky Eyeball Cake Pops Recipe
- Cook Time: 1 hour 15 minutes
- Total Time: 1 hour 15 minutes
- Diet: Vegetarian
Ingredients
- 1 box (15.25 oz) vanilla or chocolate cake mix (plus ingredients required on the box)
- 1/2 cup vanilla frosting
- 16 oz white candy melts or white chocolate
- 24 lollipop sticks
- Blue, green, or brown M&Ms or round candies (for the iris)
- Black edible ink marker or black decorating gel (for the pupil)
- Red decorating gel or red food coloring (for the veins)
- Styrofoam block or cake pop stand
Instructions
- Step 1: Bake the Cake Bake the cake according to the instructions on the package in a standard baking pan. Once finished, let it cool completely. You can even bake the cake the day before to save time on the day of assembly.
- Step 2: Crumble the Cake Once cooled, remove the cake from the pan. In a large bowl, crumble the cake into very fine crumbs using your hands or a fork. Ensure there are no large chunks left, as this will make the pops lumpy.
- Step 3: Mix with Frosting Add the vanilla frosting to the cake crumbs. Use your hands or a sturdy spoon to mix until the dough reaches a consistency where it can be rolled into a ball and hold its shape without falling apart.
- Step 4: Roll the Balls Scoop about one tablespoon of the mixture and roll it between your palms into a smooth ball. Place the balls on a parchment-lined baking sheet and refrigerate for at least 30 minutes to firm them up.
- Step 5: Prepare for Dipping Melt a small amount of white candy melts in a microwave-safe bowl. Dip the tip of each lollipop stick into the melted chocolate and then insert it halfway into a chilled cake ball. This acts as glue to keep the cake from sliding off the stick.
- Step 6: Dip the Cake Pops Melt the remaining white candy melts in a deep, narrow bowl. Gently dip each cake pop into the chocolate until fully coated. Tap the stick lightly on the edge of the bowl to remove excess chocolate. Stand the pops upright in a styrofoam block to set.
- Step 7: Decorate the Eyeballs Before the white coating dries completely, press an M&M onto the front of the pop to create the iris. Once the white coating is fully set, use a black edible marker to draw a pupil in the center of the M&M. Finally, use red decorating gel to draw squiggly “bloodshot” veins coming from the back of the eyeball toward the front.