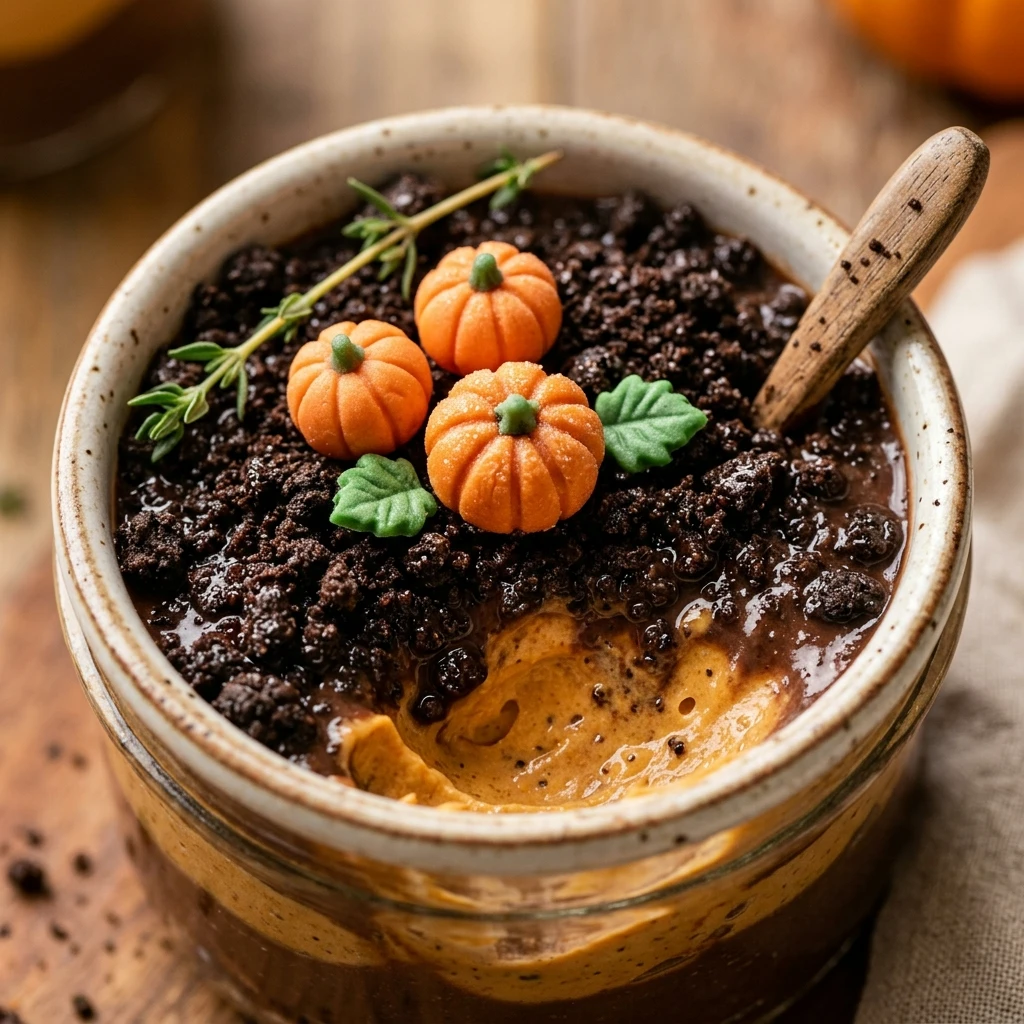

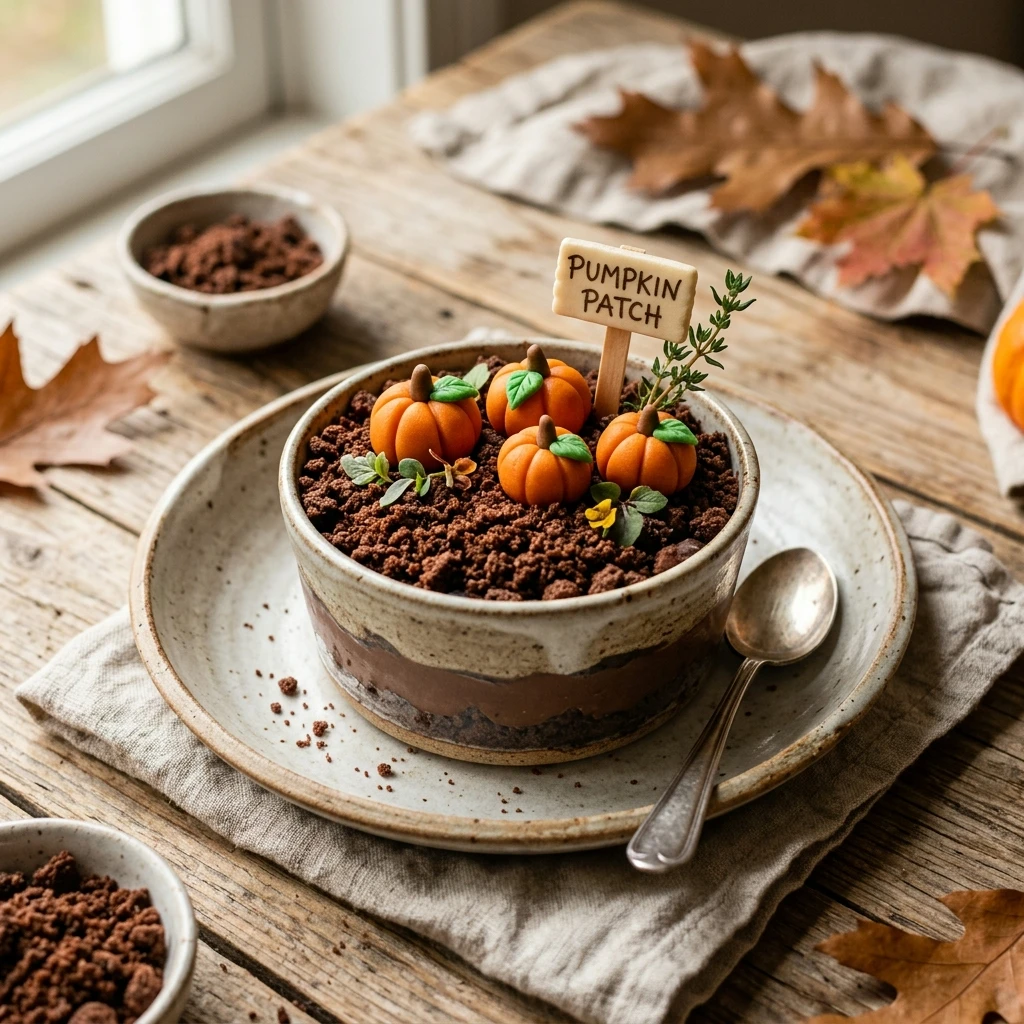
Pumpkin Patch Dirt Cups are the ultimate festive treat for the autumn season. This classic dessert gets a seasonal makeover, transforming traditional dirt pudding into a charming little garden scene. Whether you are hosting a Halloween party, a school event, or just want a fun weekend activity with the kids, these cups are always a crowd-pleaser. They combine the rich flavors of chocolate pudding and cream with the satisfying crunch of crushed cookies.
The best part about this recipe is its simplicity. You do not need an oven, and the assembly is quick and easy. Each cup serves as an individual portion, making them perfect for gatherings where guests can just grab and go. The visual appeal of the bright orange pumpkin candies sitting atop dark “soil” makes these a standout on any dessert table. Let’s dive into how you can create these whimsical treats at home.
Recipe Information
- Prep Time: 20 minutes
- Cook Time: 0 minutes
- Total Time: 20 minutes
- Servings: 6 cups
- Difficulty Level: Easy
Nutrition Information
- Calories per serving: 315 kcal
- Protein: 4g
- Carbohydrates: 54g
- Fat: 11g
- Fiber: 1g
- Sugar: 39g
- Sodium: 440mg
Why Make This Pumpkin Patch Dirt Cups Recipe
This recipe is a fantastic choice for busy families because it requires absolutely no baking. It is a “no-fail” dessert that even the most novice of cooks can master. The combination of textures—the smooth pudding and the crumbly cookies—creates a delightful eating experience that appeals to both children and adults. It is also highly customizable, allowing you to get creative with your decorations.
Beyond the taste, making these dirt cups is a wonderful way to involve children in the kitchen. Kids love crushing the cookies and “planting” the pumpkins in the chocolate soil. It serves as both a delicious snack and a fun craft project. Plus, because they are served in individual cups, cleanup is a breeze and portion control is built right in.
How to Make Pumpkin Patch Dirt Cups Recipe
Creating these festive cups is a simple process of layering and decorating. Follow these straightforward steps to assemble your very own edible pumpkin patch in under half an hour.
Ingredients
- 1 package (3.9 oz) instant chocolate pudding mix
- 2 cups cold whole milk
- 1 container (8 oz) whipped topping, thawed
- 1 package (14.3 oz) chocolate sandwich cookies (such as Oreos)
- 12–18 candy pumpkins (mellowcreme pumpkins)
- 1 tube of green decorating icing
- 6 clear plastic cups (8 or 10 oz size)
Directions
Step 1: Prepare the Cookie Crumbs
Place the chocolate sandwich cookies into a large resealable plastic bag. Use a rolling pin or a heavy spoon to crush the cookies until they resemble fine dirt or soil. You can leave a few larger chunks for texture if desired. Set these aside in a small bowl.
Step 2: Mix the Pudding Base
In a large mixing bowl, whisk together the instant chocolate pudding mix and the cold milk. Continue whisking for about 2 minutes until the mixture begins to thicken. Let it sit for another 5 minutes to fully set.
Step 3: Fold in the Whipped Topping
Gently fold the thawed whipped topping into the prepared chocolate pudding. Use a spatula to combine them until the mixture is light, fluffy, and uniform in color. This creates a mousse-like consistency that is much lighter than plain pudding.
Step 4: Layer the Cups
Begin the assembly by placing a spoonful of the crushed cookie “dirt” at the bottom of each clear plastic cup. Follow this with a generous layer of the pudding mixture. Continue alternating layers of cookies and pudding until the cups are nearly full, ending with a thick layer of cookie crumbs on top.
Step 5: Decorate the Pumpkin Patch
Place two or three candy pumpkins on top of the cookie crumbs in each cup. Using the green decorating icing, pipe small “vines” and “leaves” around the pumpkins to make them look like they are growing in a real patch. Serve immediately or chill until ready to eat.
How to Serve Pumpkin Patch Dirt Cups Recipe
Serve these treats in clear plastic or glass cups so guests can see the layers of “soil” and pudding. They look best when displayed together on a rustic wooden tray or a festive autumn-themed tablecloth. For a party, you can even add a small plastic shovel to each cup as a whimsical spoon. If you are serving them at a large event, keep them chilled in a cooler or refrigerator until the moment they are needed to maintain the consistency of the pudding.
How to Store Pumpkin Patch Dirt Cups Recipe
If you have leftovers or want to make these ahead of time, store the cups in the refrigerator. Cover each cup with plastic wrap to keep the pudding from drying out and to prevent the cookies from absorbing too much moisture from the fridge air. They will stay fresh and delicious for up to 3 days. Note that the cookie crumbs will soften the longer they sit against the pudding, but many people actually prefer the softer texture.
Expert Tips for Perfect Pumpkin Patch Dirt Cups Recipe
For the best “dirt” appearance, ensure you crush the cookies thoroughly; a food processor works great if you want a very fine, uniform soil. Always use cold milk for the pudding to ensure it sets quickly and firmly. If you want a richer flavor, you can use dark chocolate pudding mix instead of regular chocolate. Also, try to add the candy pumpkins and icing right before serving if possible, as the moisture from the pudding can eventually cause the candies to soften or the icing to run.
Delicious Variations
You can easily switch things up by using different cookies, such as chocolate chip cookies or golden sandwich cookies for a “sand” look. If you want a more “haunted” look, add gummy worms or gravestone-shaped cookies. For a lighter version, use sugar-free pudding mix and low-fat whipped topping. You can also add a layer of orange-colored vanilla pudding in the middle to represent autumn colors.
Frequently Asked Questions
Q: Can I make these dirt cups a day in advance?
Yes, you can assemble the pudding and cookie layers a day early. However, wait to add the candy pumpkins and green icing until you are ready to serve to keep the decorations looking fresh.
Q: Can I use homemade whipped cream instead of store-bought whipped topping?
Absolutely! Homemade stabilized whipped cream works well. Just ensure it is whipped to stiff peaks before folding it into the pudding so the dessert maintains its structure.
Q: What if I can’t find candy pumpkins?
If candy pumpkins are out of stock, you can use orange jelly beans or even small dollops of orange frosting shaped like pumpkins.
Q: Are these dirt cups gluten-free?
The standard recipe is not gluten-free, but you can easily make it so by using gluten-free chocolate sandwich cookies. Most instant pudding mixes are naturally gluten-free, but always check the label.
Q: Can I freeze these for a frozen treat?
While you can freeze them, the texture of the pudding and the candy pumpkins will change significantly upon thawing. It is best enjoyed chilled from the refrigerator.
Conclusion
Pumpkin Patch Dirt Cups are a delightful, nostalgic treat that brings a touch of magic to the fall season. They are simple to prepare, visually charming, and packed with the classic chocolate flavors everyone loves. By following this easy recipe, you can create a memorable dessert that will have both kids and adults asking for seconds. Enjoy your harvest-themed creation!

Pumpkin Patch Dirt Cups Recipe

- Cook Time: 20 minutes
- Total Time: 20 minutes
- Diet: Vegetarian
Ingredients
- 1 package (3.9 oz) instant chocolate pudding mix
- 2 cups cold whole milk
- 1 container (8 oz) whipped topping, thawed
- 1 package (14.3 oz) chocolate sandwich cookies (such as Oreos)
- 12–18 candy pumpkins (mellowcreme pumpkins)
- 1 tube of green decorating icing
- 6 clear plastic cups (8 or 10 oz size)
Instructions
- Prepare the Cookie Crumbs: Place the chocolate sandwich cookies into a large resealable plastic bag. Use a rolling pin or a heavy spoon to crush the cookies until they resemble fine dirt or soil. You can leave a few larger chunks for texture if desired. Set these aside in a small bowl.
- Mix the Pudding Base: In a large mixing bowl, whisk together the instant chocolate pudding mix and the cold milk. Continue whisking for about 2 minutes until the mixture begins to thicken. Let it sit for another 5 minutes to fully set.
- Fold in the Whipped Topping: Gently fold the thawed whipped topping into the prepared chocolate pudding. Use a spatula to combine them until the mixture is light, fluffy, and uniform in color. This creates a mousse-like consistency that is much lighter than plain pudding.
- Layer the Cups: Begin the assembly by placing a spoonful of the crushed cookie “dirt” at the bottom of each clear plastic cup. Follow this with a generous layer of the pudding mixture. Continue alternating layers of cookies and pudding until the cups are nearly full, ending with a thick layer of cookie crumbs on top.
- Decorate the Pumpkin Patch: Place two or three candy pumpkins on top of the cookie crumbs in each cup. Using the green decorating icing, pipe small “vines” and “leaves” around the pumpkins to make them look like they are growing in a real patch. Serve immediately or chill until ready to eat.