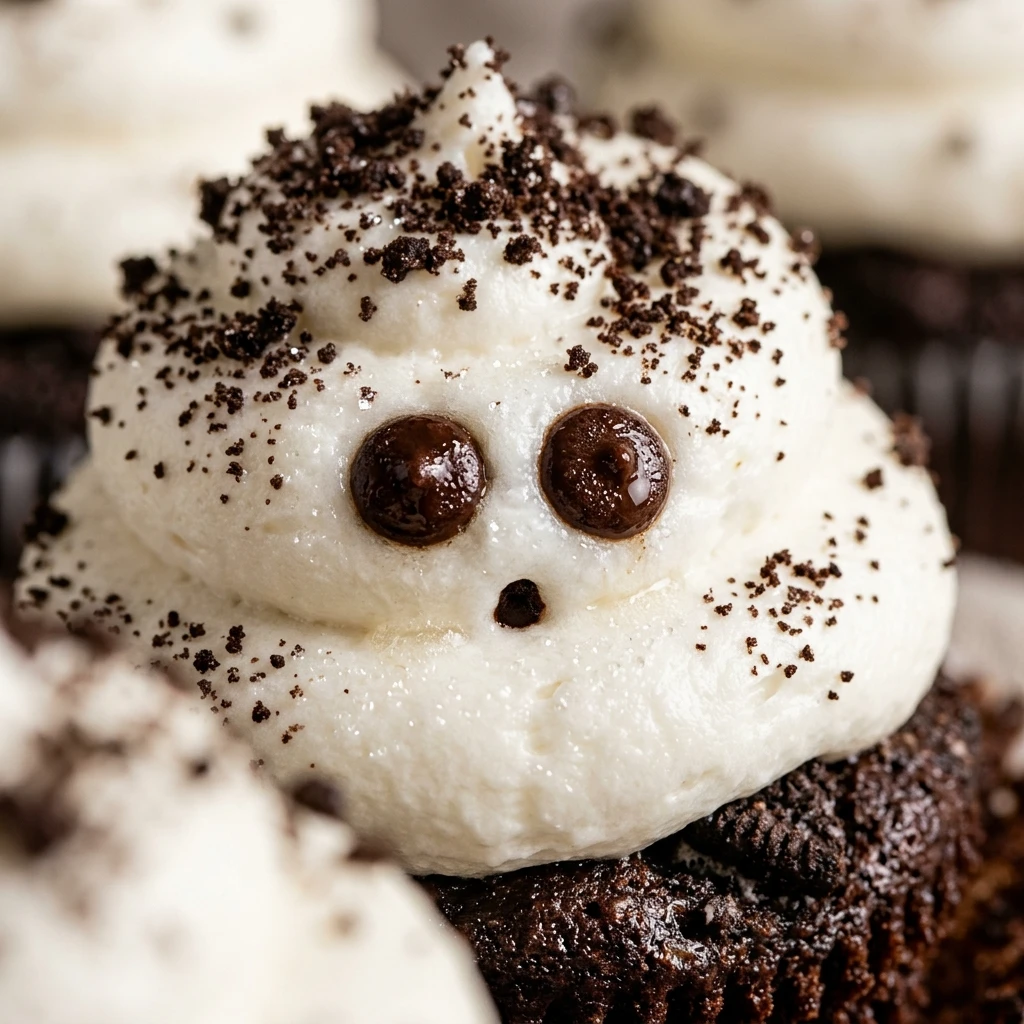

Halloween is the perfect time to get creative in the kitchen, and nothing says spooky fun quite like these Oreo Ghost Cupcakes. These treats combine the rich, chocolatey crunch of an Oreo cookie with fluffy cake and a whimsical frosting ghost on top. They are visually striking, incredibly delicious, and guaranteed to be the star of any October party or school bake sale.
The best part about this recipe is how simple it is to put together. Whether you are a seasoned baker or looking for a fun project to do with the kids, these cupcakes offer a high-impact look without the stress of complicated decorating techniques. Let’s dive into how you can create these adorable spectral sweets right at home.
Recipe Information
- Prep Time: 20 minutes
- Cook Time: 20 minutes
- Total Time: 40 minutes
- Servings: 12 cupcakes
- Difficulty Level: Easy
Nutrition Information
- Calories per serving: 310 kcal
- Protein: 3g
- Carbohydrates: 44g
- Fat: 14g
- Fiber: 1g
- Sugar: 32g
- Sodium: 240mg
Why Make This Oreo Ghost Cupcakes Recipe
This recipe is a must-try because it offers a delightful surprise in every bite. Placing an Oreo cookie at the bottom of each cupcake liner creates a “crust” that adds a wonderful texture contrast to the soft cake. It is a simple hack that makes a standard cupcake feel much more gourmet and exciting for guests.
Additionally, the “ghost” topping is one of the easiest decorating styles to master. You do not need professional piping skills to make a cute ghost; a simple tall swirl of white frosting does all the work. It is a low-stress way to celebrate the holiday while still producing something that looks like it came from a professional bakery.
How to Make Oreo Ghost Cupcakes Recipe
Making these cupcakes is a fun process that involves layering flavors and textures. We will start with a solid Oreo base, add a moist chocolate batter, and finish with a towering swirl of vanilla buttercream to bring our ghosts to life.
Ingredients
- 12 Oreo cookies (plus more for crushing, optional)
- 1 box chocolate cake mix (plus required eggs, oil, and water)
- 2 cups white vanilla buttercream frosting (store-bought or homemade)
- 24 mini chocolate chips or black decorating gel (for the eyes)
- 1 teaspoon vanilla extract (optional for extra flavor)
Directions
Step 1: Preparation and Oven Setup
Preheat your oven to 350°F (175°C). Line a standard 12-cup muffin tin with paper liners. Place one whole Oreo cookie at the bottom of each liner, pressing it down so it sits flat. This creates the hidden cookie base.
Step 2: Mix the Cupcake Batter
In a large mixing bowl, prepare the chocolate cake mix according to the package instructions, typically adding water, oil, and eggs. Whisk until the batter is smooth and no large lumps remain. If you want a richer flavor, you can stir in a teaspoon of vanilla extract at this stage.
Step 3: Fill and Bake
Pour the batter into the prepared muffin tin, filling each liner about 2/3 of the way full over the Oreo cookie. Place the tin in the oven and bake for 18 to 20 minutes, or until a toothpick inserted into the center comes out clean. Avoid overbaking to keep the cupcakes moist.
Step 4: Cooling Process
Remove the cupcakes from the oven and let them cool in the tin for about 5 minutes. Then, transfer them to a wire rack to cool completely. It is vital that the cupcakes are entirely cold before you start frosting, otherwise, your ghosts will melt and slide off!
Step 5: Pipe the Frosting Ghosts
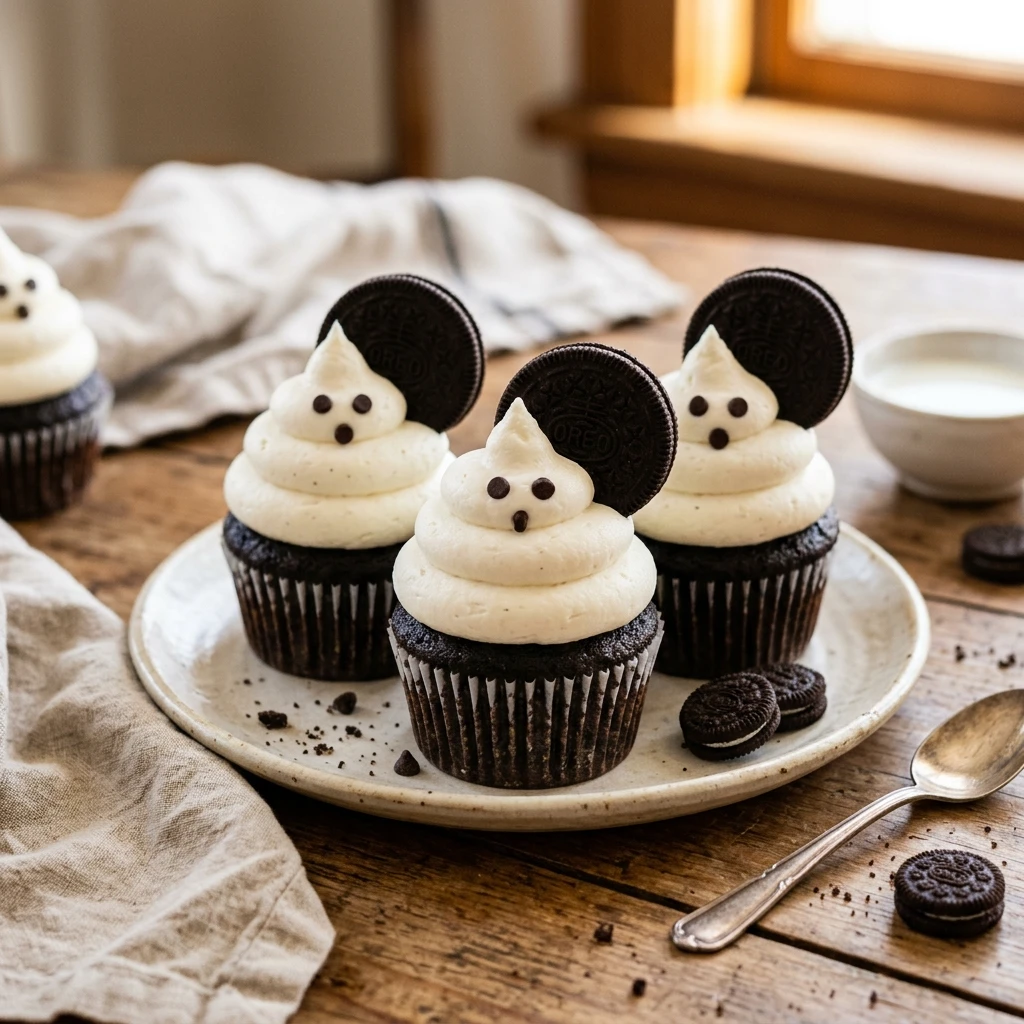
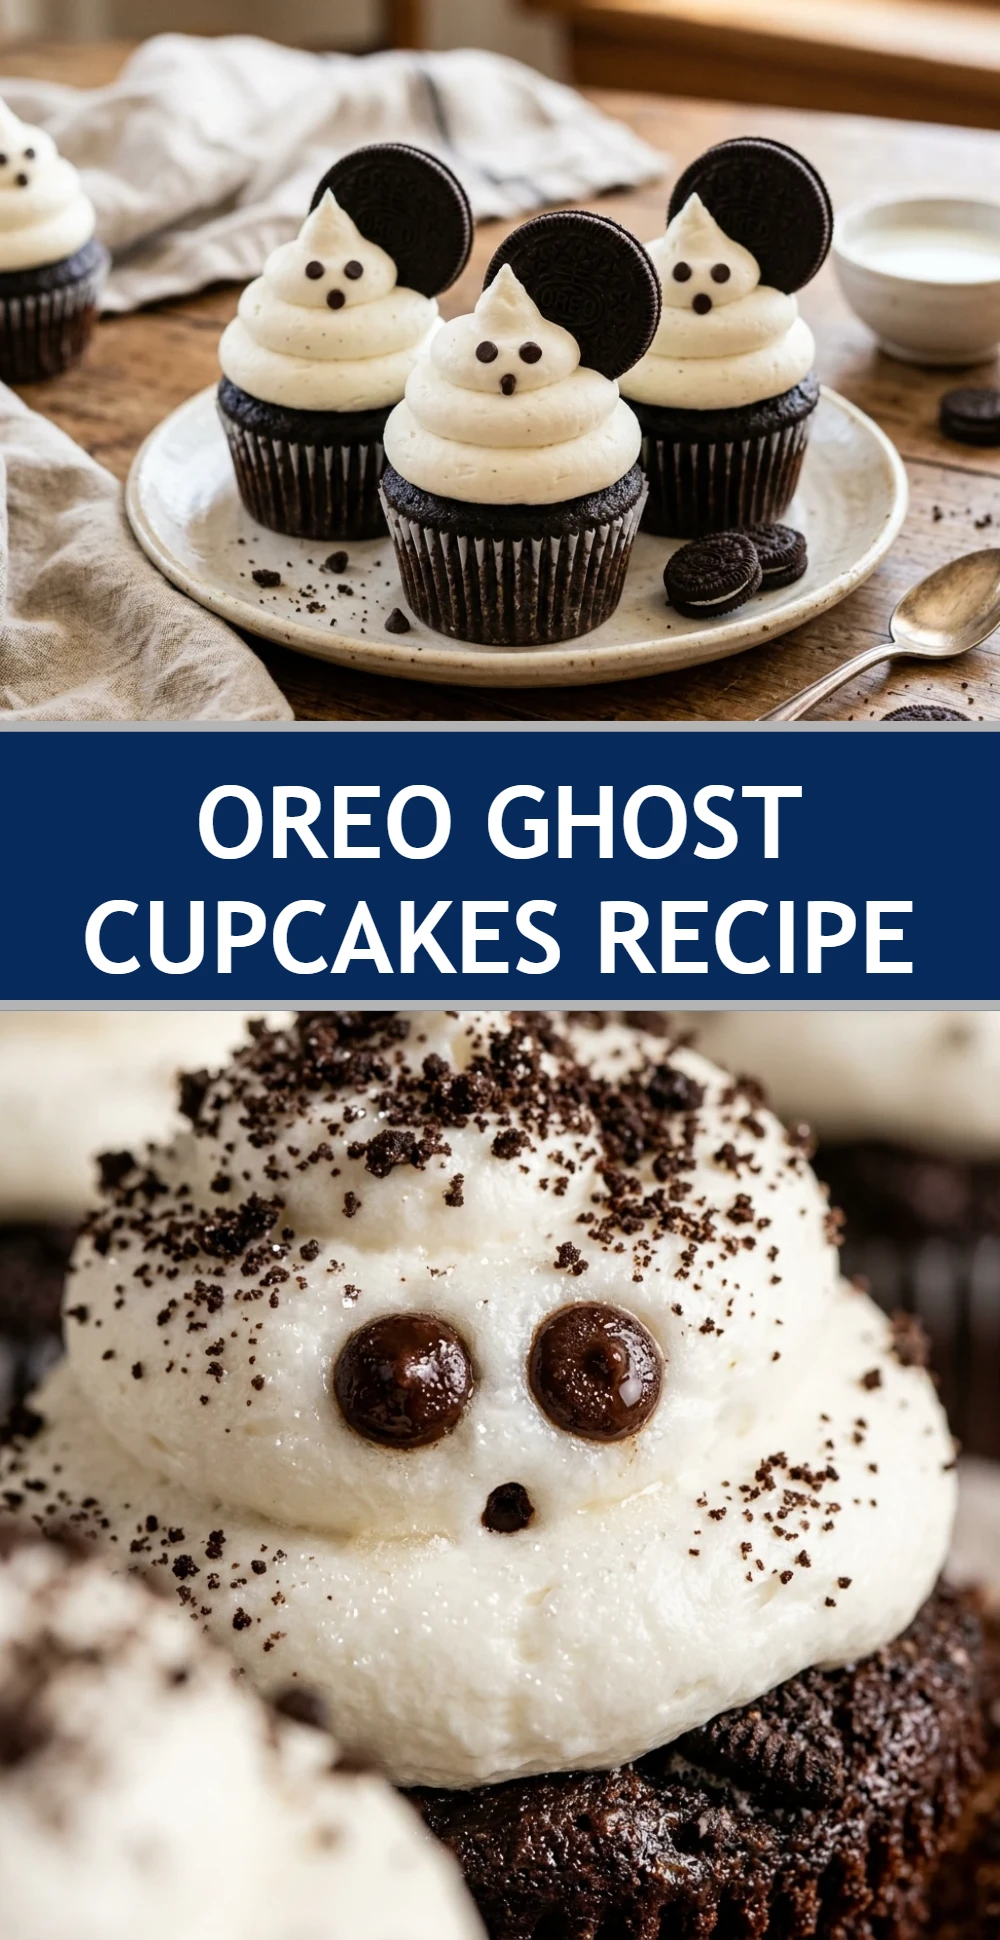
Fit a piping bag with a large round tip and fill it with the white buttercream frosting. Hold the bag vertically over the center of a cupcake and squeeze to create a large, tall swirl, pulling upward as you finish to create a “peak” for the ghost’s head. Repeat for all cupcakes.
Step 6: Adding the Face
Place two mini chocolate chips near the top of the frosting swirl to act as eyes. If you prefer a more expressive look, use black decorating gel to draw small mouths or different eye shapes. Your Oreo Ghost Cupcakes are now ready to haunt your dessert table!
How to Serve Oreo Ghost Cupcakes Recipe
To make these cupcakes look their best, serve them on a dark platter or a wooden board to make the white “ghosts” pop. You can scatter extra Oreo crumbs around the base of the cupcakes to look like “dirt” or add some festive Halloween sprinkles. They are best served at room temperature so the frosting stays soft and creamy.
How to Store Oreo Ghost Cupcakes Recipe
You can store these cupcakes in an airtight container at room temperature for up to 2 days. If your kitchen is very warm, it is better to keep them in the refrigerator for up to 4 days. If you do refrigerate them, let them sit out for about 20 minutes before serving to let the buttercream soften back to its ideal texture.
Expert Tips for Perfect Oreo Ghost Cupcakes Recipe
For the best results, use a high-quality “Double Stuf” Oreo if you want a thicker base. When piping the frosting, try to keep the pressure consistent to ensure the ghosts look uniform. If your frosting is too soft to hold its shape, chill it in the fridge for 10 minutes before piping. Also, make sure to use a large round piping tip rather than a star tip to get that smooth, ghostly look.
Delicious Variations
If you want to switch things up, try using Golden Oreos or Mint Oreos for a different flavor profile at the bottom. You can also add a surprise filling like marshmallow fluff inside the cupcake to make it even more decadent. For a “bloody” ghost effect, you could drizzle a small amount of strawberry syrup over the frosting before adding the eyes!
Frequently Asked Questions
Q: Can I use homemade chocolate cake instead of a box mix?
Absolutely! Any standard chocolate cupcake recipe will work perfectly with the Oreo base. Just follow your recipe’s specific baking instructions.
Q: How do I make the frosting stand up so tall?
The key is using a stiff buttercream. If your frosting is too runny, add more powdered sugar. Using a large round piping tip and piping in a circular motion while lifting up helps create the height.
Q: Can I make these a day in advance?
Yes, you can bake and frost these a day ahead. Just store them in a cool place in an airtight container so the cake doesn’t dry out and the frosting stays fresh.
Q: What if I don’t have a piping bag?
You can use a heavy-duty Ziploc bag and snip off one corner. It won’t be quite as precise as a piping tip, but it will still create a great ghost shape.
Q: Can I freeze these cupcakes?
You can freeze the baked cupcakes (without frosting) for up to 3 months. Once they are frosted, freezing is not recommended as the decorations may get damaged when thawing.
Conclusion
Oreo Ghost Cupcakes are a whimsical and delicious way to celebrate the spooky season. With their hidden cookie crunch and adorable frosting faces, they appeal to kids and adults alike. This recipe proves that you don’t need a lot of time or fancy equipment to make something memorable. Happy baking, and have a wonderfully haunted Halloween!
Oreo Ghost Cupcakes Recipe
- Cook Time: 40 minutes
- Total Time: 40 minutes
- Diet: Vegetarian
Ingredients
- 12 Oreo cookies (plus more for crushing, optional)
- 1 box chocolate cake mix (plus required eggs, oil, and water)
- 2 cups white vanilla buttercream frosting (store-bought or homemade)
- 24 mini chocolate chips or black decorating gel (for the eyes)
- 1 teaspoon vanilla extract (optional for extra flavor)
Instructions
- Step 1: Preparation and Oven Setup
Preheat your oven to 350°F (175°C). Line a standard 12-cup muffin tin with paper liners. Place one whole Oreo cookie at the bottom of each liner, pressing it down so it sits flat. This creates the hidden cookie base. - Step 2: Mix the Cupcake Batter
In a large mixing bowl, prepare the chocolate cake mix according to the package instructions, typically adding water, oil, and eggs. Whisk until the batter is smooth and no large lumps remain. If you want a richer flavor, you can stir in a teaspoon of vanilla extract at this stage. - Step 3: Fill and Bake
Pour the batter into the prepared muffin tin, filling each liner about 2/3 of the way full over the Oreo cookie. Place the tin in the oven and bake for 18 to 20 minutes, or until a toothpick inserted into the center comes out clean. Avoid overbaking to keep the cupcakes moist. - Step 4: Cooling Process
Remove the cupcakes from the oven and let them cool in the tin for about 5 minutes. Then, transfer them to a wire rack to cool completely. It is vital that the cupcakes are entirely cold before you start frosting, otherwise, your ghosts will melt and slide off! - Step 5: Pipe the Frosting Ghosts
Fit a piping bag with a large round tip and fill it with the white buttercream frosting. Hold the bag vertically over the center of a cupcake and squeeze to create a large, tall swirl, pulling upward as you finish to create a “peak” for the ghost’s head. Repeat for all cupcakes. - Step 6: Adding the Face
Place two mini chocolate chips near the top of the frosting swirl to act as eyes. If you prefer a more expressive look, use black decorating gel to draw small mouths or different eye shapes. Your Oreo Ghost Cupcakes are now ready to haunt your dessert table!