
Fall is officially here, and there is no better way to celebrate the season than with a creamy, spiced dessert that requires absolutely no oven time. These No Bake Pumpkin Cheesecake Jars are the ultimate autumn treat. They offer all the rich flavor of a traditional pumpkin cheesecake but in a convenient, portable, and perfectly portioned format. Whether you are hosting a Thanksgiving dinner or just want a cozy weeknight snack, these jars are sure to impress everyone at the table.
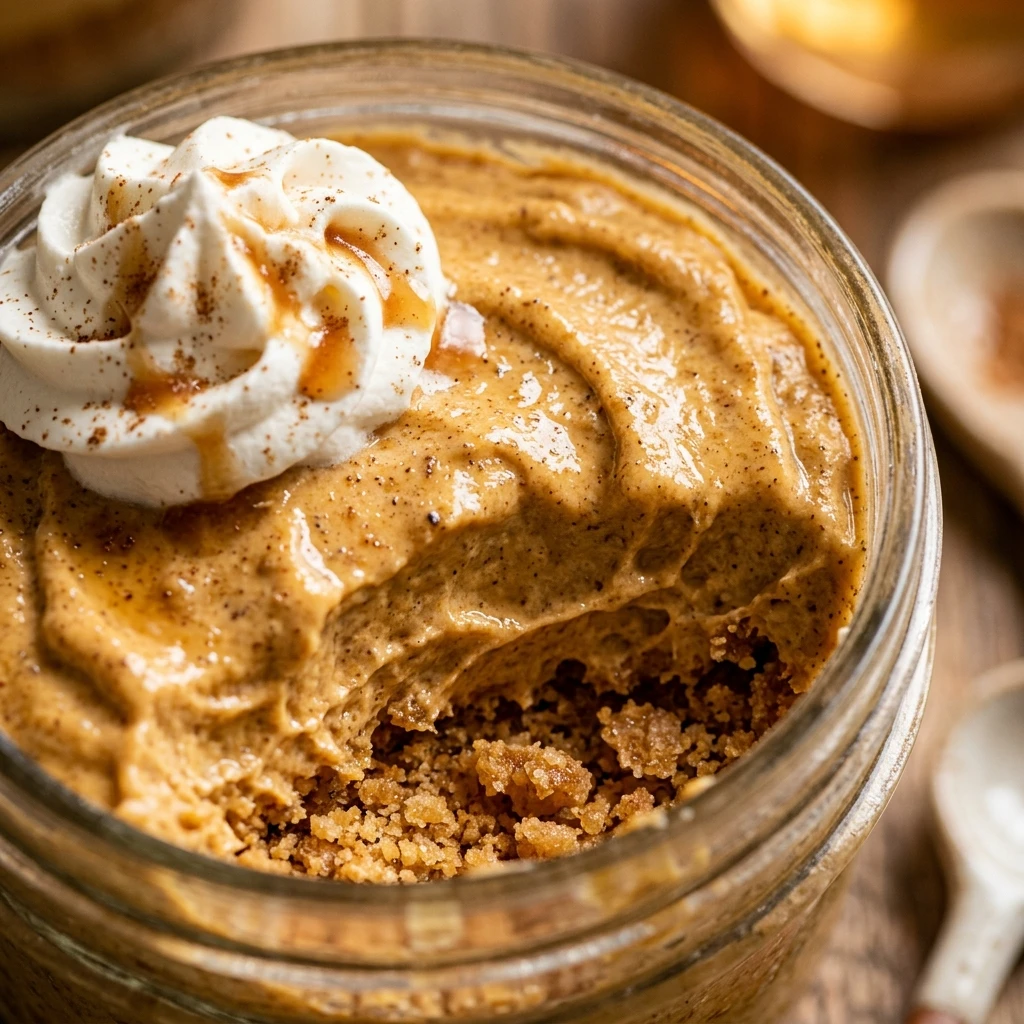
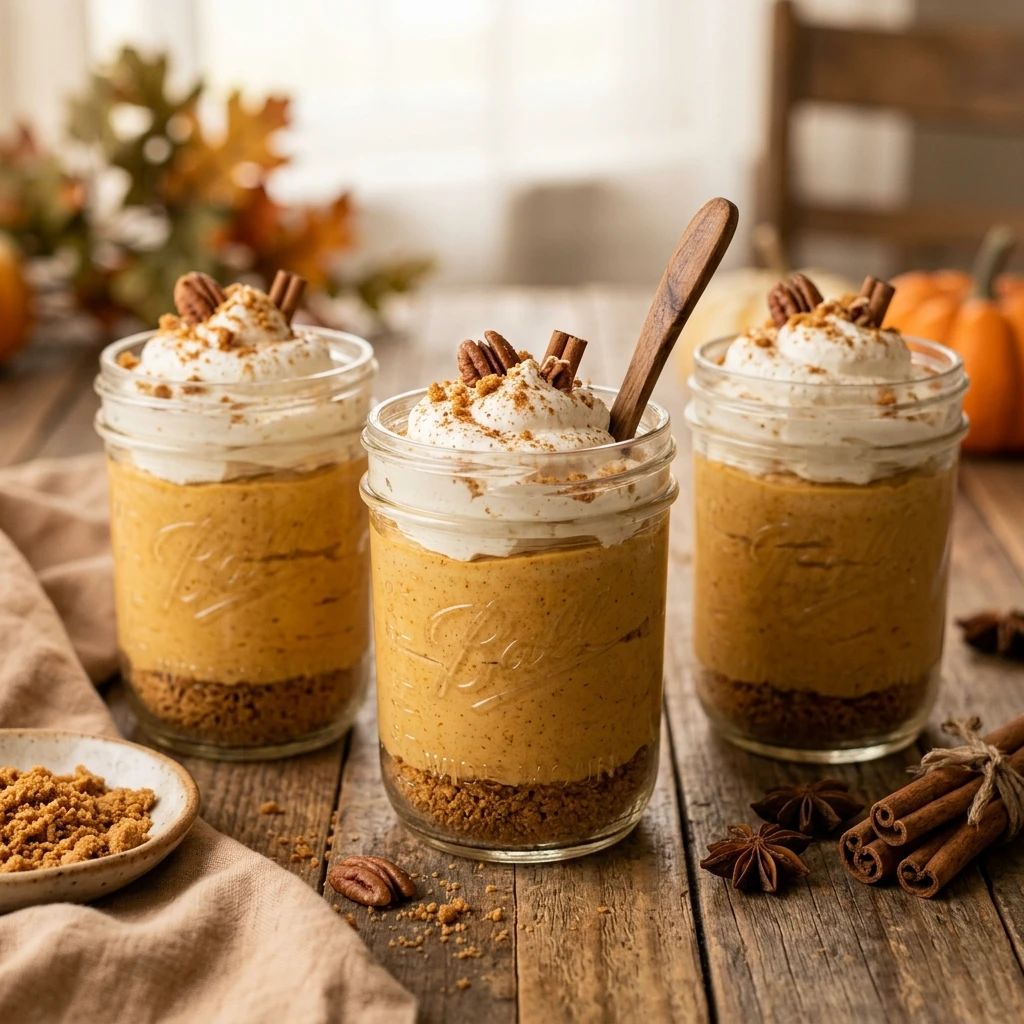
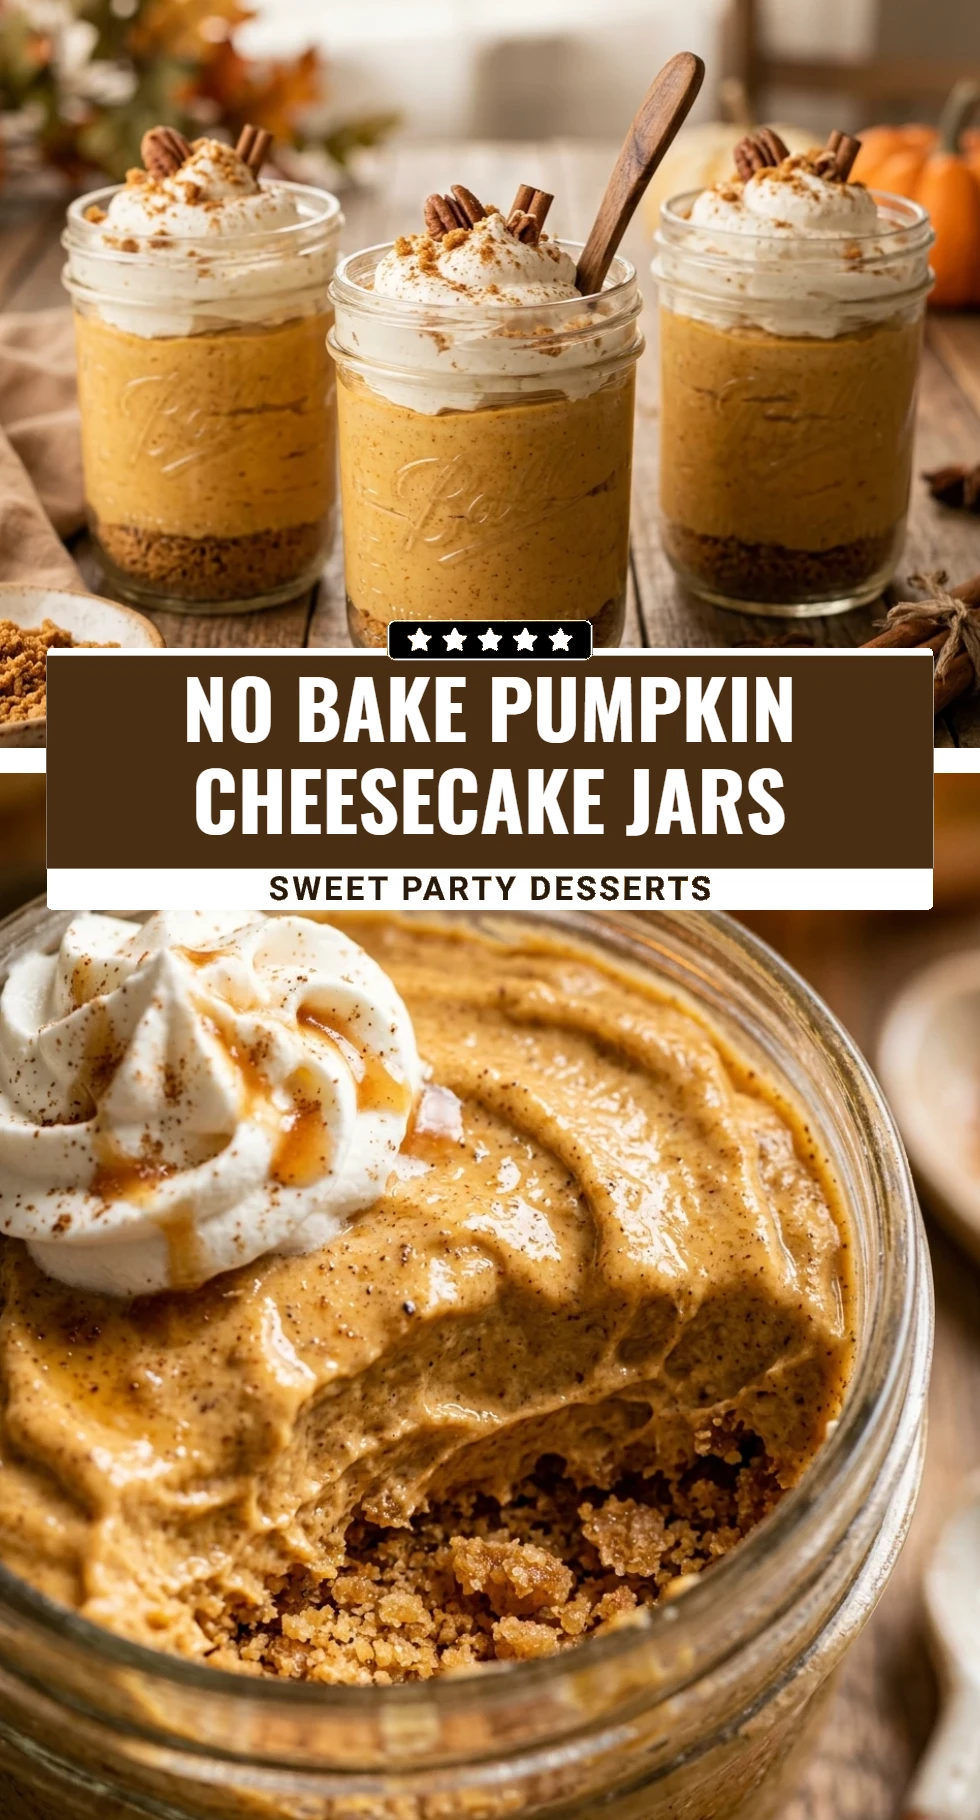
The beauty of this dessert lies in its simplicity. By skipping the baking process, you avoid the common pitfalls of cheesecake, like cracks or overcooking. Instead, you get a light, mousse-like texture that melts in your mouth. Plus, the layers of buttery graham cracker crumbs and spiced pumpkin filling look stunning through the glass of a mason jar, making them as beautiful as they are delicious.
Recipe Information
- Prep Time: 20 minutes
- Cook Time: 0 minutes
- Total Time: 20 minutes
- Servings: 6 servings
- Difficulty Level: Easy
Nutrition Information
- Calories per serving: 345 kcal
- Protein: 4g
- Carbohydrates: 38g
- Fat: 21g
- Fiber: 2g
- Sugar: 24g
- Sodium: 290mg
Why Make This No Bake Pumpkin Cheesecake Jars
These No Bake Pumpkin Cheesecake Jars are a lifesaver during the busy holiday season. Because they are individual servings, you do not have to worry about slicing and serving a messy cake. They are also incredibly versatile; you can make them a day in advance, which frees up your time for other cooking tasks. The balance of warm spices like cinnamon and nutmeg with the tanginess of the cream cheese creates a classic flavor profile that everyone loves.
Another reason to love this recipe is that it is kid-friendly and customizable. Children love helping to press the crust into the jars or layering the pumpkin mixture. Since there is no heat involved, it is a safe and fun kitchen project for the whole family. If you are looking for a dessert that looks gourmet but takes minimal effort, this is the recipe for you.
How to Make No Bake Pumpkin Cheesecake Jars
Making these cheesecake jars is a straightforward process of preparing the crust, whipping the filling, and layering them together for a beautiful presentation.
Ingredients
- 1 1/2 cups graham cracker crumbs
- 4 tablespoons unsalted butter, melted
- 2 tablespoons brown sugar
- 8 ounces cream cheese, softened to room temperature
- 1 cup pumpkin puree (not pumpkin pie filling)
- 1/2 cup powdered sugar
- 1 teaspoon vanilla extract
- 1 1/2 teaspoons pumpkin pie spice
- 1 1/2 cups whipped topping (like Cool Whip) or stiffly whipped heavy cream
- Extra whipped topping and cinnamon for garnish
Directions
Step 1: Prepare the Graham Cracker Crust
In a small mixing bowl, combine the graham cracker crumbs, melted butter, and brown sugar. Stir the mixture until it resembles wet sand. Evenly distribute the mixture among six small jars, pressing down gently with a spoon or a small pestle to form a solid base.
Step 2: Beat the Cream Cheese
In a large mixing bowl, use a hand mixer or stand mixer to beat the softened cream cheese until it is smooth and creamy. Ensure there are no lumps remaining before moving to the next step, as this ensures a velvety texture for your cheesecake.
Step 3: Mix in Pumpkin and Spices
Add the pumpkin puree, powdered sugar, vanilla extract, and pumpkin pie spice to the cream cheese. Beat on medium speed until the ingredients are fully incorporated and the color is a uniform, vibrant orange.
Step 4: Fold in the Whipped Topping
Using a rubber spatula, gently fold in the whipped topping. Be careful not to over-mix; you want to maintain the airiness of the whipped cream to keep the filling light and fluffy.
Step 5: Assemble the Jars
Spoon the pumpkin cheesecake mixture into the jars over the graham cracker crust. You can also use a piping bag for a cleaner look. Smooth the tops with a spoon or leave them with a rustic swirl.
Step 6: Chill and Set
Place the jars in the refrigerator for at least 2 hours to allow the filling to set. This chilling time is essential for the flavors to meld and the texture to firm up properly.
How to Serve No Bake Pumpkin Cheesecake Jars
When you are ready to serve, take the jars out of the refrigerator and add a fresh dollop of whipped cream on top. A light dusting of cinnamon or pumpkin pie spice adds a professional touch. For extra flair, you can garnish with a small ginger snap cookie, a sprinkle of toasted pecans, or even a drizzle of caramel sauce. Serve these chilled with a small spoon so your guests can get a bit of crust and filling in every bite.
How to Store No Bake Pumpkin Cheesecake Jars
These jars should always be stored in the refrigerator. If your jars have lids, screw them on tight to keep the cheesecake fresh and prevent it from absorbing other fridge odors. If they do not have lids, wrap the tops tightly with plastic wrap. They will stay fresh and delicious for up to 3 to 4 days. Note that the graham cracker crust may soften slightly over time, but the flavor will remain excellent.
Expert Tips for Perfect No Bake Pumpkin Cheesecake Jars
To get the best results, always use room temperature cream cheese. Cold cream cheese will result in a lumpy filling that is difficult to smooth out. Additionally, make sure you are using 100% pure pumpkin puree rather than pumpkin pie filling, which already contains sugar and spices that could throw off the balance of this recipe. If you want a more “homemade” feel, you can substitute the whipped topping with fresh heavy cream whipped with a tablespoon of sugar until stiff peaks form.
Delicious Variations
You can easily customize these jars to suit your taste. Instead of graham crackers, try using crushed Gingersnaps or Oreo cookies for the crust. For a “turtle” version, add a layer of chocolate chips and pecans between the crust and the filling. If you want a deeper flavor, swap the white powdered sugar for maple syrup or honey. You can even add a layer of cheesecake pudding or vanilla Greek yogurt for a different texture and flavor profile.
Frequently Asked Questions
Q: Can I freeze these cheesecake jars?
Yes, you can freeze them for up to one month. Just make sure to leave a little space at the top for expansion and thaw them in the refrigerator overnight before serving.
Q: Is there a gluten-free option for this recipe?
Absolutely! Simply replace the regular graham cracker crumbs with gluten-free graham cracker crumbs or crushed gluten-free ginger cookies.
Q: Can I use pumpkin pie filling instead of pumpkin puree?
It is not recommended. Pumpkin pie filling has added sugars and spices that will make the jars overly sweet and may change the consistency of the filling.
Q: How long do these need to chill?
They need at least 2 hours to set, but for the best flavor and texture, chilling them for 4 hours or even overnight is ideal.
Q: What size jars should I use?
Standard 4-ounce or 8-ounce mason jars work perfectly for this recipe. If you use 8-ounce jars, you might get fewer servings, but larger portions!
Conclusion
No Bake Pumpkin Cheesecake Jars are the perfect solution for anyone who loves the flavors of fall but wants an easy, stress-free dessert. They are creamy, spiced, and visually appealing, making them a hit at any gathering. With just a few simple ingredients and no time spent near a hot oven, you can create a professional-looking dessert that tastes like it came from a high-end bakery. Give this recipe a try today and enjoy the cozy flavors of autumn in every spoonful!
No Bake Pumpkin Cheesecake Jars
- Cook Time: 20 minutes
- Total Time: 20 minutes
- Diet: Vegetarian
Ingredients
- 1 1/2 cups graham cracker crumbs
- 4 tablespoons unsalted butter, melted
- 2 tablespoons brown sugar
- 8 ounces cream cheese, softened to room temperature
- 1 cup pumpkin puree (not pumpkin pie filling)
- 1/2 cup powdered sugar
- 1 teaspoon vanilla extract
- 1 1/2 teaspoons pumpkin pie spice
- 1 1/2 cups whipped topping (like Cool Whip) or stiffly whipped heavy cream
- Extra whipped topping and cinnamon for garnish
Instructions
- Step 1: Prepare the Graham Cracker Crust. In a small mixing bowl, combine the graham cracker crumbs, melted butter, and brown sugar. Stir the mixture until it resembles wet sand. Evenly distribute the mixture among six small jars, pressing down gently with a spoon or a small pestle to form a solid base.
- Step 2: Beat the Cream Cheese. In a large mixing bowl, use a hand mixer or stand mixer to beat the softened cream cheese until it is smooth and creamy. Ensure there are no lumps remaining before moving to the next step, as this ensures a velvety texture for your cheesecake.
- Step 3: Mix in Pumpkin and Spices. Add the pumpkin puree, powdered sugar, vanilla extract, and pumpkin pie spice to the cream cheese. Beat on medium speed until the ingredients are fully incorporated and the color is a uniform, vibrant orange.
- Step 4: Fold in the Whipped Topping. Using a rubber spatula, gently fold in the whipped topping. Be careful not to over-mix; you want to maintain the airiness of the whipped cream to keep the filling light and fluffy.
- Step 5: Assemble the Jars. Spoon the pumpkin cheesecake mixture into the jars over the graham cracker crust. You can also use a piping bag for a cleaner look. Smooth the tops with a spoon or leave them with a rustic swirl.
- Step 6: Chill and Set. Place the jars in the refrigerator for at least 2 hours to allow the filling to set. This chilling time is essential for the flavors to meld and the texture to firm up properly.