


The holiday season often brings a whirlwind of activity in the kitchen, leaving little room for complex desserts that require hours of baking. That is where the No-Bake Peppermint Pie comes in as a true lifesaver. This dessert is light, airy, and bursting with the cool, refreshing taste of peppermint, making it the perfect palate cleanser after a heavy holiday meal.
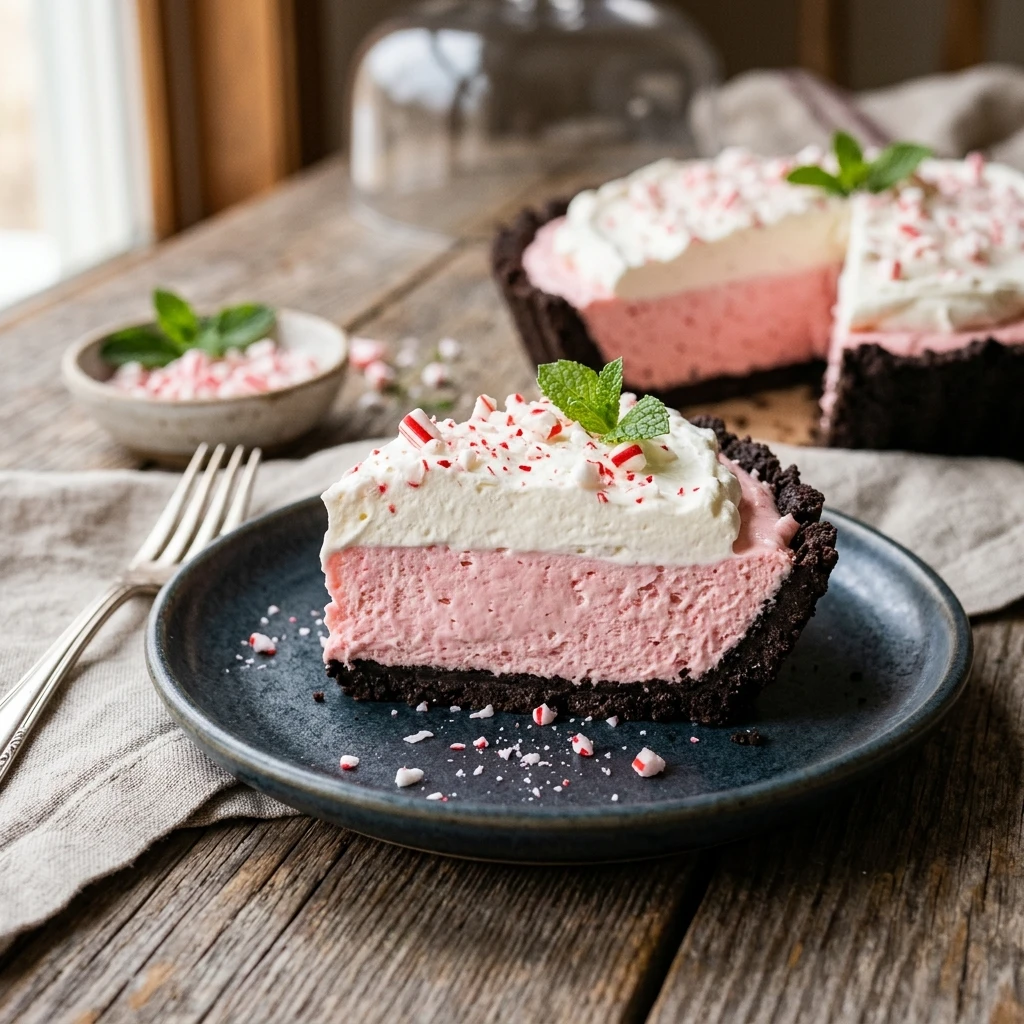
With its vibrant pink hue and crunchy candy cane topping, this pie looks as festive as it tastes. Whether you are hosting a large gathering or just want a sweet treat to enjoy by the fireplace, this recipe delivers maximum flavor with minimal effort. It is a crowd-pleasing classic that proves you do not need an oven to create something truly spectacular.
Recipe Information
- Prep Time: 15 minutes
- Cook Time: 0 minutes
- Total Time: 4 hours 15 minutes
- Servings: 8
- Difficulty Level: Easy
Nutrition Information
- Calories per serving: 345 kcal
- Protein: 3g
- Carbohydrates: 42g
- Fat: 19g
- Fiber: 1g
- Sugar: 30g
- Sodium: 210mg
Why Make This No-Bake Peppermint Pie
One of the best reasons to make this pie is the convenience. During the holidays, oven space is at a premium with turkeys, hams, and side dishes taking up all the room. This no-bake option frees up your stove and allows you to prepare dessert well in advance, reducing your stress on the big day.
Beyond convenience, the texture and flavor profile are unbeatable. The combination of creamy cream cheese and fluffy whipped topping creates a mousse-like filling that melts in your mouth. When paired with a crunchy chocolate crust, you get a beautiful contrast that feels much more sophisticated than the simple preparation suggests.
How to Make No-Bake Peppermint Pie
Creating this masterpiece is a straightforward process that involves simple mixing and folding techniques. Follow these easy steps to ensure a smooth, creamy filling and a perfectly set pie every time.
Ingredients
- 1 (9-inch) prepared chocolate cookie crust (Oreo style)
- 8 oz cream cheese, softened to room temperature
- 1 cup powdered sugar
- 1 teaspoon peppermint extract
- 2-3 drops red food coloring (optional for pink color)
- 1 container (8 oz) frozen whipped topping, thawed
- 1/2 cup crushed candy canes or peppermint candies
- Extra whipped cream for garnish
Directions
Step 1: Beat the Base
In a large mixing bowl, beat the softened cream cheese and powdered sugar together using an electric hand mixer. Continue mixing until the texture is completely smooth and no lumps remain.
Step 2: Add Peppermint Flavor
Stir in the peppermint extract and the red food coloring. If you prefer a more natural look, you can skip the food coloring, but a few drops will give the pie a lovely festive pink tint. Mix until the color is evenly distributed.
Step 3: Fold in the Fluff
Gently fold in the thawed whipped topping using a rubber spatula. Do not use the electric mixer for this step, as you want to keep the air in the whipped topping to ensure the pie stays light and fluffy. Continue until no white streaks are visible.
Step 4: Fill the Crust
Spoon the peppermint mixture into the prepared chocolate cookie crust. Use the back of a spoon or an offset spatula to smooth the top into an even layer or a slight mound in the center.
Step 5: Chill and Set
Place the pie in the refrigerator and let it chill for at least 4 hours, though overnight is best. This allows the filling to firm up so you can cut clean, beautiful slices.
Step 6: Garnish and Decorate
Just before serving, sprinkle the crushed candy canes over the top of the pie. You can also add dollops of extra whipped cream around the edges for a professional look.
How to Serve No-Bake Peppermint Pie
For the best presentation, serve this pie chilled directly from the refrigerator. Use a sharp knife dipped in warm water to get clean slices through the creamy filling and the chocolate crust. It pairs wonderfully with a hot cup of cocoa or a strong cup of coffee to balance the sweetness. For an extra touch of decadence, drizzle a little chocolate syrup over each slice before serving.
How to Store No-Bake Peppermint Pie
Store any leftover pie in the refrigerator, covered loosely with plastic wrap or a pie dome. It will stay fresh and delicious for up to 3 to 4 days. If you need to store it longer, this pie actually freezes quite well. Wrap it tightly in plastic wrap and then foil; it can be frozen for up to one month. To serve from the freezer, let it sit on the counter for 10-15 minutes to slightly soften before slicing.
Expert Tips for Perfect No-Bake Peppermint Pie
The most important tip is to make sure your cream cheese is truly at room temperature before you start. If it is too cold, you will end up with tiny lumps of cheese in your filling that are impossible to smooth out later. Additionally, wait to add the crushed candy canes until right before you serve the pie. If they sit on the pie in the fridge for too long, the moisture will cause the candy to melt and “bleed” red streaks into the filling.
Delicious Variations
You can easily customize this recipe to suit your preferences. If you aren’t a fan of chocolate, try using a graham cracker crust or a shortbread crust instead. For a “Grasshopper” style pie, swap the peppermint extract for crème de menthe and use green food coloring. You can also fold in half a cup of mini chocolate chips to the filling for a Peppermint Bark inspired version that adds a nice bit of crunch.
Frequently Asked Questions
Q: Can I use homemade whipped cream instead of whipped topping?
A: Yes, you can use stabilized whipped cream (made with gelatin or extra powdered sugar), but standard whipped cream may not hold its shape as long as a whipped topping like Cool Whip.
Q: How do I crush the candy canes easily?
A: Place the candy canes in a heavy-duty zip-top bag and gently tap them with a rolling pin or a meat mallet until they reach the desired consistency.
Q: Is peppermint extract the same as mint extract?
A: Not exactly. Peppermint extract is pure peppermint, while “mint” extract is often a blend of spearmint and peppermint. For this recipe, pure peppermint extract provides the most authentic holiday flavor.
Q: Can I make this pie dairy-free?
A: You can use vegan cream cheese and a dairy-free whipped topping (like coco-whip) along with a dairy-free chocolate crust to make a delicious vegan version.
Q: Why is my pie filling too soft?
A: This usually happens if the filling wasn’t chilled long enough or if the whipped topping was over-mixed. Ensure it chills for at least 4 hours to reach the proper consistency.
Conclusion
No-Bake Peppermint Pie is a stress-free, delightful dessert that captures the essence of the holidays in every bite. Its cool minty flavor and creamy texture make it a standout choice for any winter celebration. Simple to prepare and beautiful to behold, this pie is sure to become a new favorite tradition in your household. Enjoy the ease of a no-bake treat and the joy of sharing something homemade with those you love.

No-Bake Peppermint Pie

- Cook Time: 4 hours 15 minutes
- Total Time: 4 hours 15 minutes
- Diet: Vegetarian
Ingredients
- 1 (9-inch) prepared chocolate cookie crust (Oreo style)
- 8 oz cream cheese, softened to room temperature
- 1 cup powdered sugar
- 1 teaspoon peppermint extract
- 2–3 drops red food coloring (optional for pink color)
- 1 container (8 oz) frozen whipped topping, thawed
- 1/2 cup crushed candy canes or peppermint candies
- Extra whipped cream for garnish
Instructions
- In a large mixing bowl, beat the softened cream cheese and powdered sugar together using an electric hand mixer. Continue mixing until the texture is completely smooth and no lumps remain.
- Stir in the peppermint extract and the red food coloring. If you prefer a more natural look, you can skip the food coloring, but a few drops will give the pie a lovely festive pink tint. Mix until the color is evenly distributed.
- Gently fold in the thawed whipped topping using a rubber spatula. Do not use the electric mixer for this step, as you want to keep the air in the whipped topping to ensure the pie stays light and fluffy. Continue until no white streaks are visible.
- Spoon the peppermint mixture into the prepared chocolate cookie crust. Use the back of a spoon or an offset spatula to smooth the top into an even layer or a slight mound in the center.
- Place the pie in the refrigerator and let it chill for at least 4 hours, though overnight is best. This allows the filling to firm up so you can cut clean, beautiful slices.
- Just before serving, sprinkle the crushed candy canes over the top of the pie. You can also add dollops of extra whipped cream around the edges for a professional look.