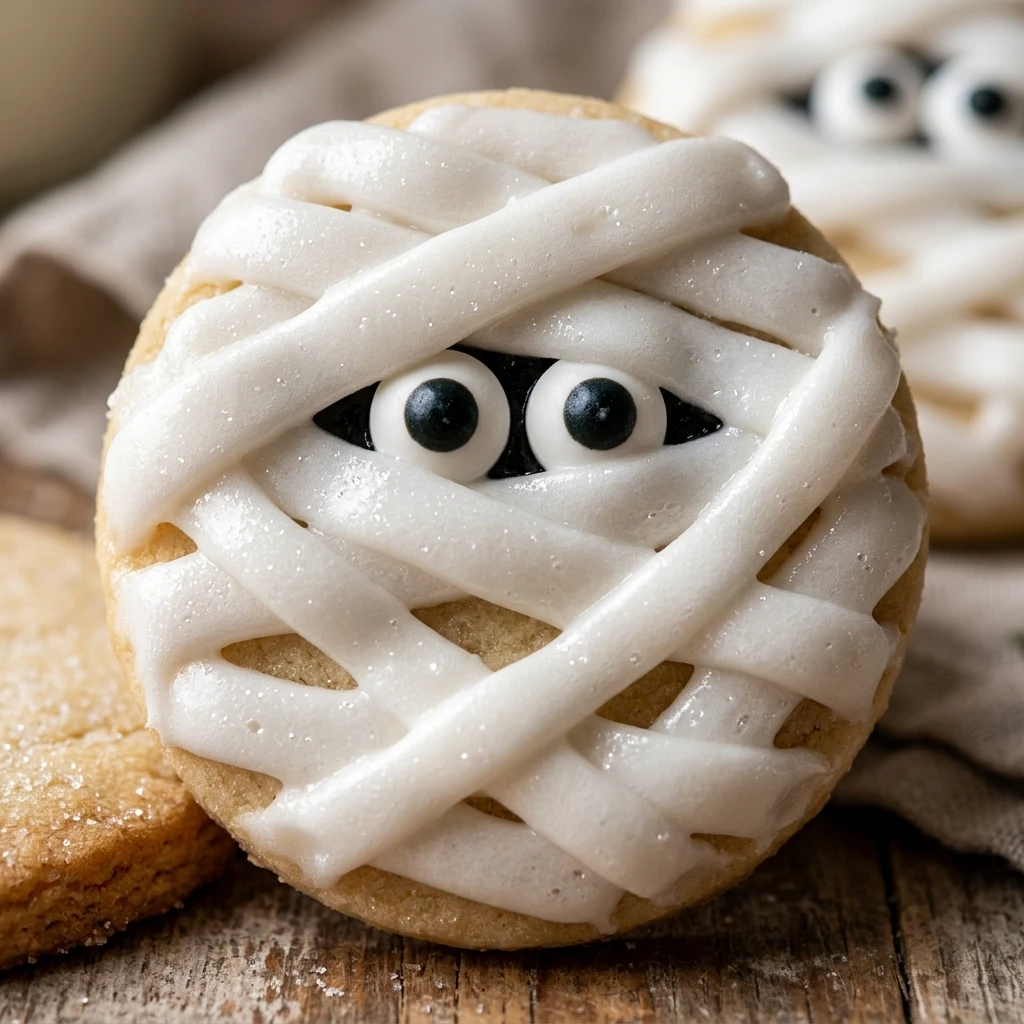

Get ready for a spooktacular treat that is as adorable as it is delicious! These Mummy Sugar Cookies are a Halloween classic, combining a buttery, soft sugar cookie base with a fun, wrapped mummy design. They are perfect for school parties, trick-or-treat events, or just a cozy night in watching scary movies with the family.
Making these cookies is a wonderful way to get the kids involved in the kitchen. With just a few simple steps and some creative piping, you can transform a standard cookie into a festive masterpiece. Whether you are a baking pro or a beginner, these mummies are guaranteed to bring smiles to everyone’s faces this October.
Recipe Information
- Prep Time: 20 minutes
- Cook Time: 10 minutes
- Total Time: 30 minutes
- Servings: 24 cookies
- Difficulty Level: Easy
Nutrition Information
- Calories per serving: 165 kcal
- Protein: 1.8g
- Carbohydrates: 23g
- Fat: 7.5g
- Fiber: 0.4g
- Sugar: 15g
- Sodium: 90mg
Why Make This Mummy Sugar Cookies Recipe
These cookies are the ultimate holiday crowd-pleaser because they strike the perfect balance between cute and creepy. Unlike complex tiered cakes or intricate pastries, the “mummy” look is incredibly forgiving. Even if your lines aren’t perfectly straight, the “bandages” still look authentic and charming.
Beyond their appearance, the flavor is a timeless favorite. The soft, chewy center and crisp edges of the sugar cookie provide the perfect canvas for the sweet vanilla frosting or white chocolate drizzle. It is a reliable recipe that uses pantry staples you likely already have on hand.
How to Make Mummy Sugar Cookies Recipe
Creating these festive treats is a fun and straightforward process. We will start by baking a batch of classic, circular sugar cookies and then use a piping technique to wrap them up like ancient mummies. Follow these simple steps to ensure your cookies come out perfectly every time.
Ingredients
- 2 ¾ cups all-purpose flour
- 1 teaspoon baking soda
- ½ teaspoon baking powder
- 1 cup unsalted butter, softened
- 1 ½ cups granulated sugar
- 1 large egg
- 1 teaspoon vanilla extract
- 1 cup white chocolate chips or vanilla buttercream frosting
- 48 candy eyeballs (small)
Directions
Step 1: Preparation and Preheating
Preheat your oven to 375°F (190°C). Line two large baking sheets with parchment paper or silicone baking mats to prevent the cookies from sticking and ensure even browning.
Step 2: Mixing Dry Ingredients
In a medium-sized bowl, whisk together the all-purpose flour, baking soda, and baking powder. Setting the dry mixture aside helps ensure the leavening agents are evenly distributed throughout the dough.
Step 3: Creaming Butter and Sugar
In a large mixing bowl, beat the softened butter and granulated sugar together until the mixture is light and fluffy. This usually takes about 2-3 minutes using an electric mixer. Add the egg and vanilla extract, beating until fully combined.
Step 4: Combining and Shaping
Gradually add the dry ingredients to the wet ingredients, mixing on low speed until a dough forms. Roll the dough into 1-inch balls and place them on the prepared baking sheets, spaced about 2 inches apart. Lightly press each ball down with the bottom of a glass to flatten it slightly.
Step 5: Baking the Cookies
Bake in the preheated oven for 8 to 10 minutes, or until the edges are just barely golden. Do not overbake; the cookies should remain soft. Let them cool on the baking sheet for 5 minutes before transferring them to a wire rack to cool completely.
Step 6: Decorating the Mummies
Melt the white chocolate chips in the microwave in 30-second intervals or prepare your buttercream. Place the frosting/chocolate in a piping bag fitted with a small flat petal tip or a round tip. Pipe “bandage” lines back and forth across the cookie, leaving a small gap for the eyes. Place two candy eyeballs in the gap while the frosting is still wet.
How to Serve Mummy Sugar Cookies Recipe
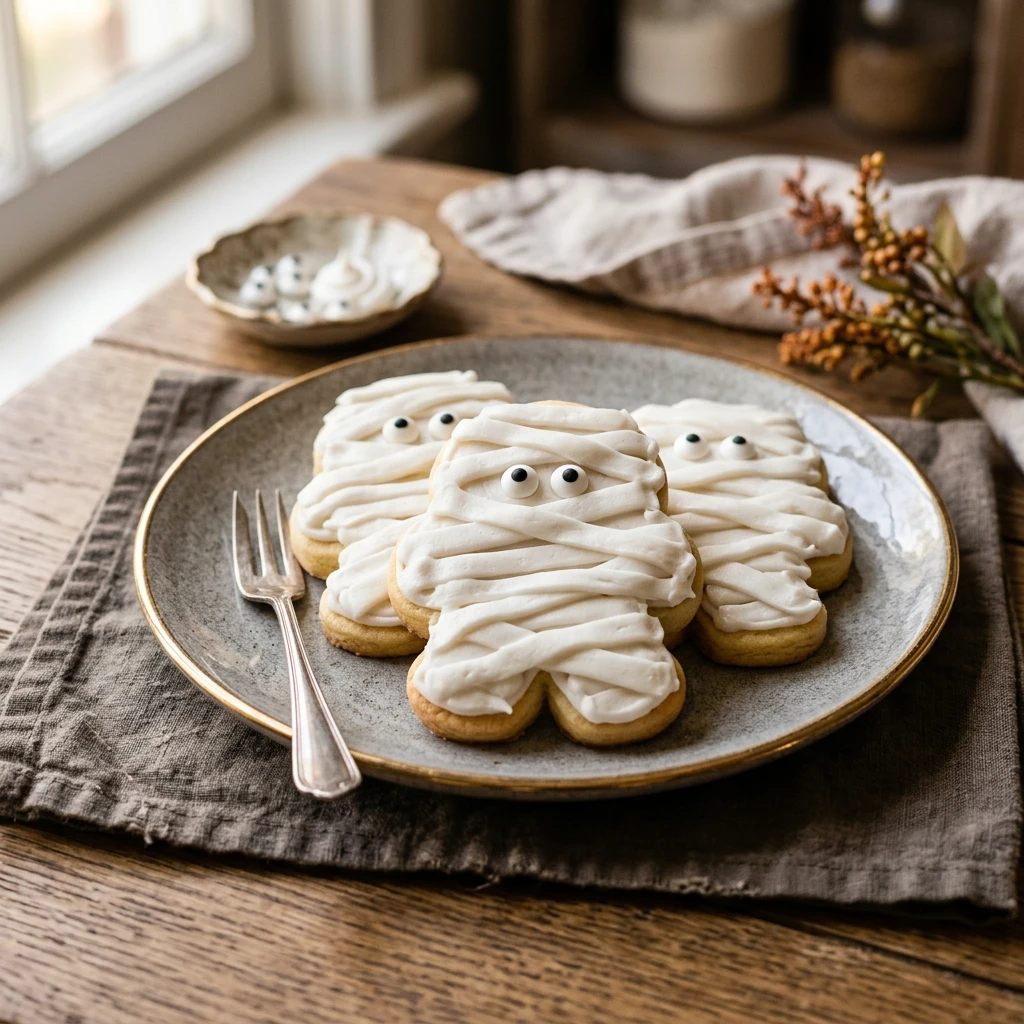
Serve these cookies on a dark-colored platter to make the white “bandages” pop. They look fantastic when arranged alongside other Halloween treats like candy corn or chocolate spiders. For a spooky party touch, serve them with a glass of milk or a “witch’s brew” fruit punch.
How to Store Mummy Sugar Cookies Recipe
Store your Mummy Sugar Cookies in an airtight container at room temperature for up to 3 days. If you need to stack them, place a sheet of parchment paper between layers to prevent the mummies from sticking together. For longer storage, you can freeze the undecorated baked cookies for up to 3 months and decorate them after thawing.
Expert Tips for Perfect Mummy Sugar Cookies Recipe
To get the best results, make sure your butter is truly at room temperature but not melted. This ensures the cookies have the right texture. When decorating, if the white chocolate starts to harden in the bag, simply give it a quick warm-up in your hands or a very brief 5-second microwave burst. Also, wait until the cookies are completely cool before frosting, otherwise, your mummy bandages will melt and run off the sides!
Delicious Variations
You can easily customize this recipe by changing the cookie base. Try using a dark chocolate cocoa cookie for a “mummy in the dark” look. You can also use different colored candy eyes—like red or green—to give each mummy a unique personality. If you don’t have candy eyes, two small dots of dark chocolate frosting work just as well.
Frequently Asked Questions
Q: Can I use store-bought cookie dough?
Yes, you can use a roll of refrigerated sugar cookie dough to save time. Just follow the package instructions for baking and then proceed with the decorating steps.
Q: Why did my cookies spread too much?
Cookies often spread too much if the butter was too soft or if the dough wasn’t chilled. If you have time, chilling the dough for 30 minutes before rolling can help them hold their shape.
Q: Can I use royal icing instead of white chocolate?
Absolutely! Royal icing dries very hard and flat, which makes these cookies excellent for gifting or transporting in lunchboxes.
Q: How do I keep the candy eyes from falling off?
Make sure to place the eyes onto the frosting or melted chocolate while it is still wet. As the frosting sets, it will act like glue to hold the eyes in place.
Q: Can these cookies be made gluten-free?
Yes, simply swap the all-purpose flour for a 1:1 gluten-free baking flour blend. Most blends work perfectly with this sugar cookie base.
Conclusion
Mummy Sugar Cookies are a delightful addition to any Halloween celebration. They are easy to make, fun to decorate, and taste like a nostalgic childhood favorite. By following these simple steps, you will have a batch of adorable, spooky treats that are sure to be the highlight of your holiday spread. Happy baking!
Mummy Sugar Cookies Recipe
- Cook Time: 30 minutes
- Total Time: 30 minutes
- Diet: Vegetarian
Ingredients
- 2 ¾ cups all-purpose flour
- 1 teaspoon baking soda
- ½ teaspoon baking powder
- 1 cup unsalted butter, softened
- 1 ½ cups granulated sugar
- 1 large egg
- 1 teaspoon vanilla extract
- 1 cup white chocolate chips or vanilla buttercream frosting
- 48 candy eyeballs (small)
Instructions
- Step 1: Preparation and Preheating: Preheat your oven to 375°F (190°C). Line two large baking sheets with parchment paper or silicone baking mats to prevent the cookies from sticking and ensure even browning.
- Step 2: Mixing Dry Ingredients: In a medium-sized bowl, whisk together the all-purpose flour, baking soda, and baking powder. Setting the dry mixture aside helps ensure the leavening agents are evenly distributed throughout the dough.
- Step 3: Creaming Butter and Sugar: In a large mixing bowl, beat the softened butter and granulated sugar together until the mixture is light and fluffy. This usually takes about 2-3 minutes using an electric mixer. Add the egg and vanilla extract, beating until fully combined.
- Step 4: Combining and Shaping: Gradually add the dry ingredients to the wet ingredients, mixing on low speed until a dough forms. Roll the dough into 1-inch balls and place them on the prepared baking sheets, spaced about 2 inches apart. Lightly press each ball down with the bottom of a glass to flatten it slightly.
- Step 5: Baking the Cookies: Bake in the preheated oven for 8 to 10 minutes, or until the edges are just barely golden. Do not overbake; the cookies should remain soft. Let them cool on the baking sheet for 5 minutes before transferring them to a wire rack to cool completely.
- Step 6: Decorating the Mummies: Melt the white chocolate chips in the microwave in 30-second intervals or prepare your buttercream. Place the frosting/chocolate in a piping bag fitted with a small flat petal tip or a round tip. Pipe “bandage” lines back and forth across the cookie, leaving a small gap for the eyes. Place two candy eyeballs in the gap while the frosting is still wet.