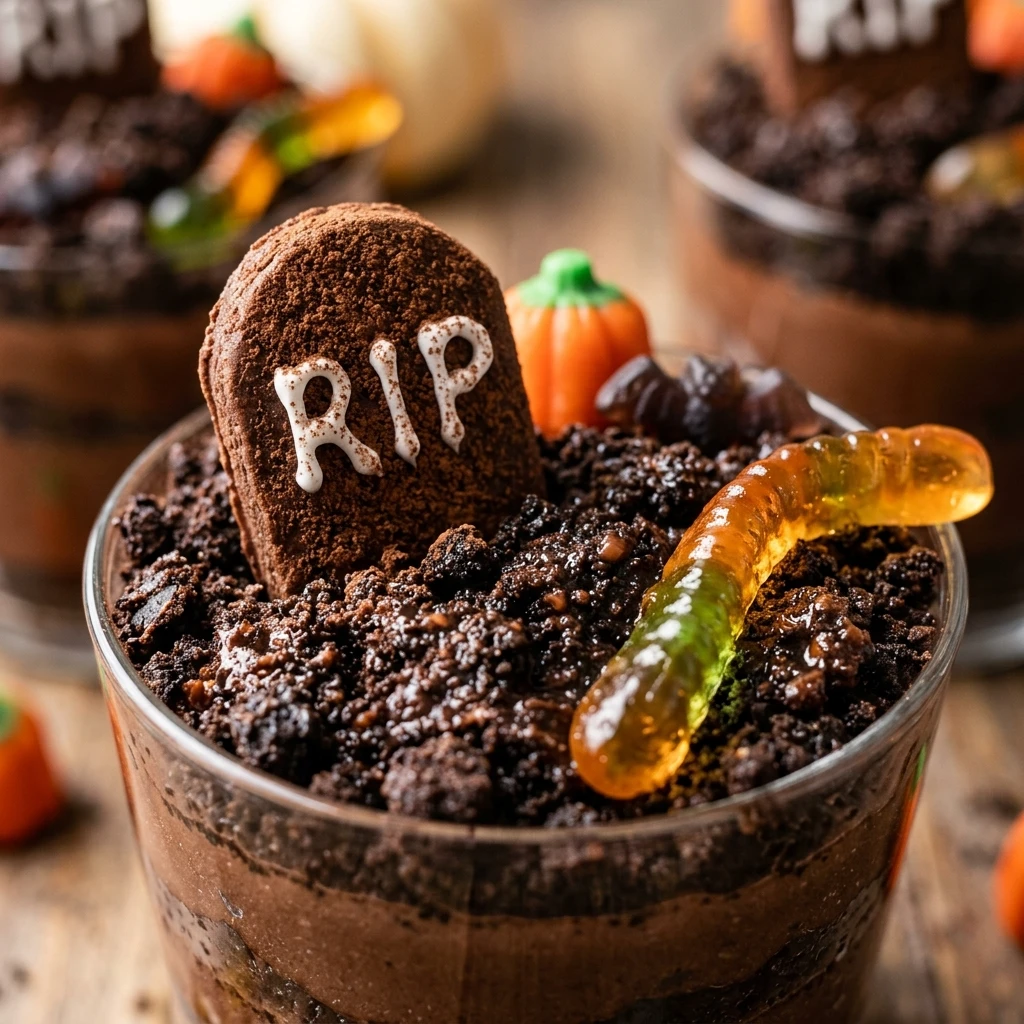

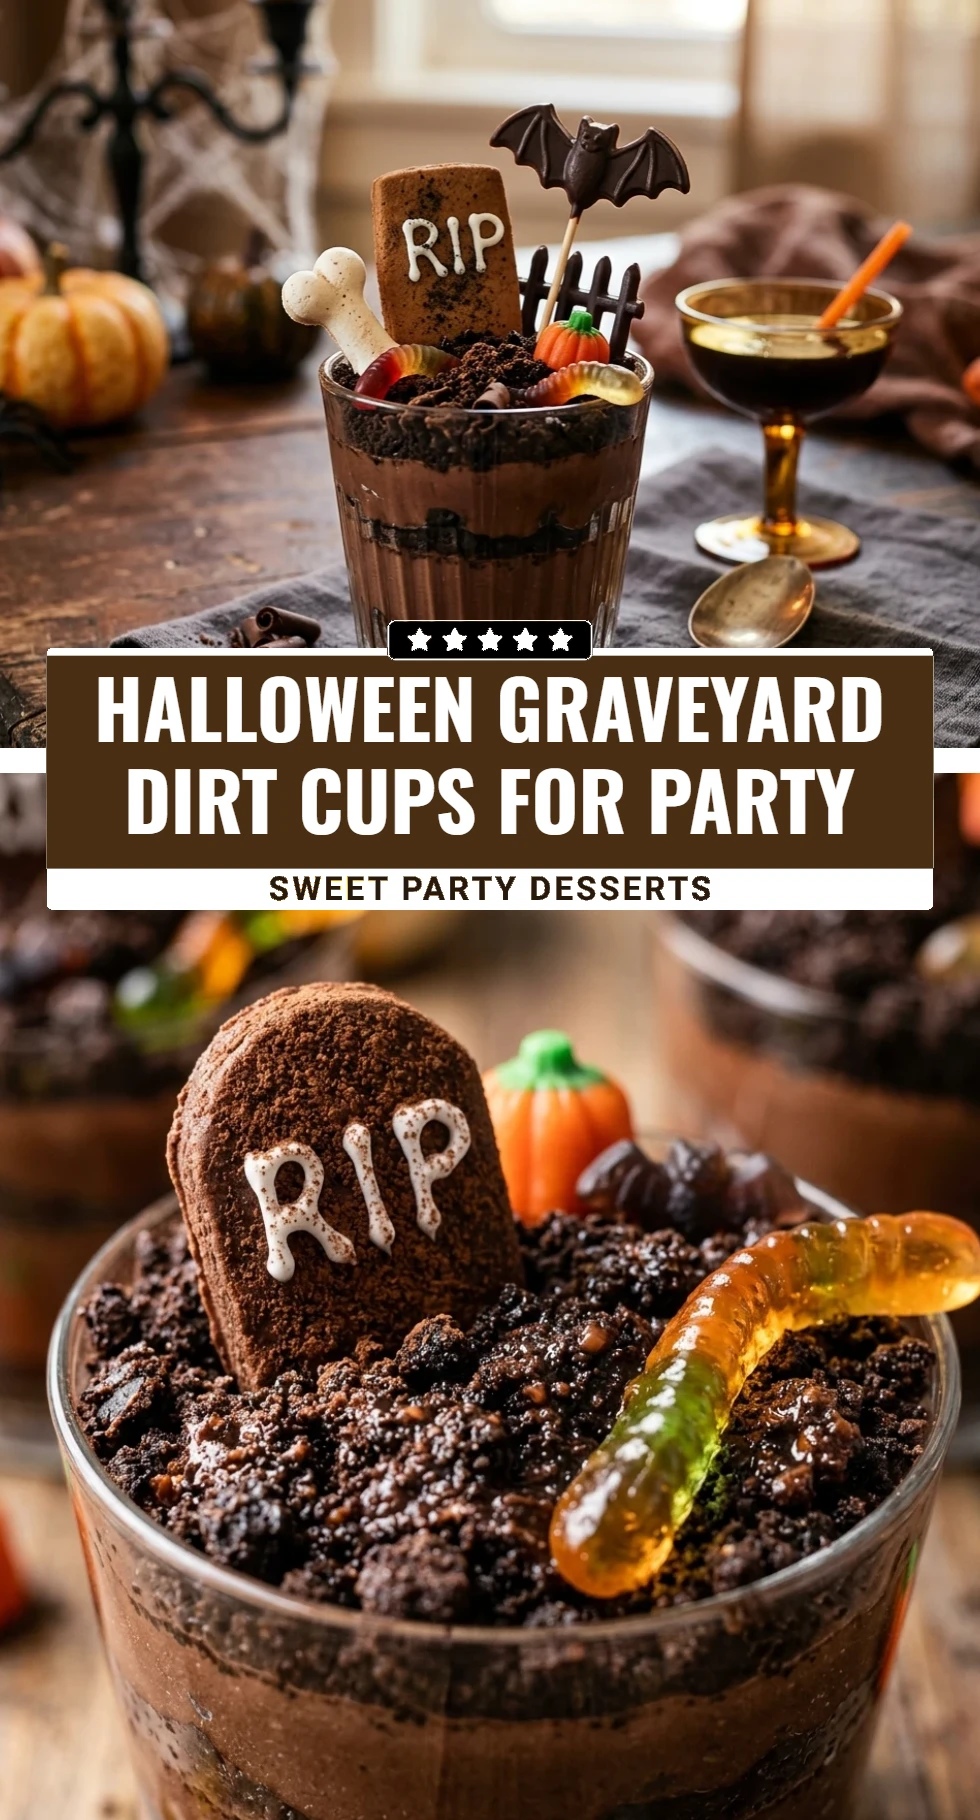
Halloween is the perfect time to get creative in the kitchen, and nothing says spooky fun quite like a tray of Halloween Graveyard Dirt Cups. This classic treat is a favorite for both kids and adults, combining creamy chocolate pudding with crunchy cookie “dirt” for a dessert that looks just as good as it tastes. Whether you are hosting a large neighborhood bash or just looking for a festive after-school snack, these cups are guaranteed to be the star of the show.
The beauty of this recipe lies in its simplicity. You do not need to be a professional baker to create a masterpiece. With just a few store-bought ingredients and a little imagination, you can transform a simple pudding cup into a miniature haunted scene. It is a wonderful way to involve the little ones in the holiday preparations without the mess of heavy baking.
Recipe Information
- Prep Time: 20 minutes
- Cook Time: 0 minutes
- Total Time: 20 minutes
- Servings: 8
- Difficulty Level: Easy
Nutrition Information
- Calories per serving: 345 kcal
- Protein: 4g
- Carbohydrates: 52g
- Fat: 14g
- Fiber: 2g
- Sugar: 38g
- Sodium: 410mg
Why Make This Halloween Graveyard Dirt Cups For Party
These dirt cups are the ultimate party food because they are individual servings, making them easy for guests to grab and enjoy while mingling. They require no oven time, which is a huge plus when your kitchen is already busy with other party preparations. Plus, the visual appeal of a “graveyard” set on your dessert table adds instant decor to your Halloween theme.
Beyond being convenient, they are incredibly delicious. The contrast between the smooth, velvety chocolate pudding and the gritty, cocoa-rich cookie crumbs creates a satisfying texture in every bite. You can also easily customize them with different candies to match your specific spooky vision, making each cup a unique piece of edible art.
How to Make Halloween Graveyard Dirt Cups For Party
Making these spooky treats is a straightforward process of layering and decorating that feels more like a craft project than a chore. Follow these simple steps to bring your edible graveyard to life.
Ingredients
- 2 cups cold whole milk
- 1 package (3.9 oz) instant chocolate pudding mix
- 1 container (8 oz) whipped topping, thawed
- 1 package (14.3 oz) chocolate sandwich cookies (like Oreos)
- 8 oval-shaped butter cookies or Milano cookies (for tombstones)
- Black edible decorating gel
- Gummy worms
- Candy pumpkins or candy corn
- 8 clear plastic cups (9 oz size)
Directions
Step 1: Prepare the Cookie Dirt
Place the chocolate sandwich cookies into a large gallon-sized resealable plastic bag. Use a rolling pin or a heavy spoon to crush the cookies until they look like fine potting soil. A few larger chunks are fine, as they look like rocks in the dirt. Set these aside in a bowl.
Step 2: Mix the Pudding Base
In a large mixing bowl, whisk together the cold milk and the instant chocolate pudding mix for about two minutes. Once the pudding has thickened slightly, gently fold in the thawed whipped topping using a spatula until the mixture is uniform in color and no white streaks remain.
Step 3: Layer the Cups
Place about a tablespoon of the crushed cookie crumbs into the bottom of each clear plastic cup. Spoon the chocolate pudding mixture over the crumbs until the cups are about three-quarters full. Top each cup with a generous layer of the remaining cookie crumbs to create the top layer of “soil.”
Step 4: Decorate the Tombstones
Take your oval-shaped cookies and use the black edible gel to write “R.I.P.” or draw small crosses on the top half of each cookie. Let the gel sit for a minute to set so it doesn’t smudge during the next step.
Step 5: Assemble the Graveyard
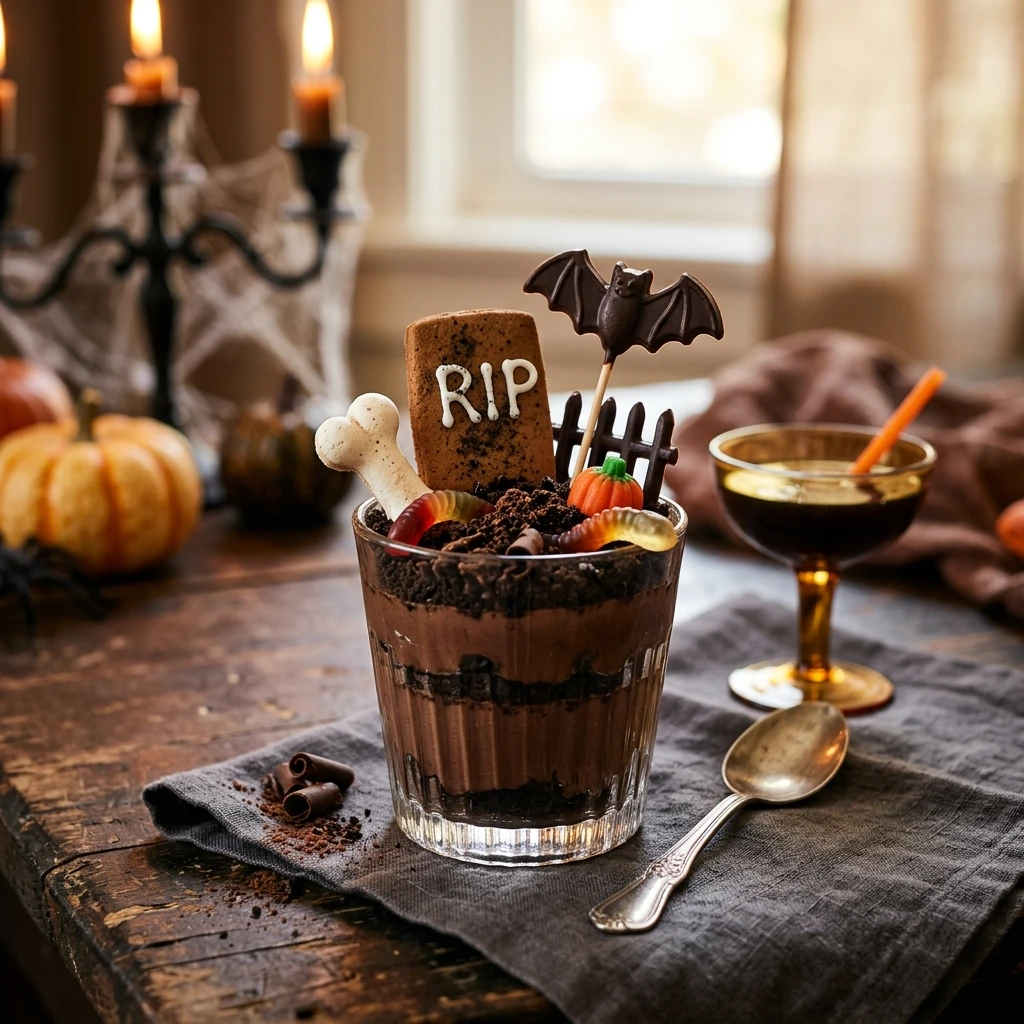
Press one tombstone cookie into the back of each pudding cup so it stands upright. Arrange gummy worms so they appear to be crawling out of the dirt, and place a candy pumpkin or some candy corn near the tombstone for extra color and festive flair.
How to Serve Halloween Graveyard Dirt Cups For Party
Serve these cups chilled for the best experience. Arrange them on a large platter or a tiered dessert stand to create a “cemetery” effect. You can even sprinkle some extra cookie crumbs around the base of the cups on the serving tray to make the scene look even more immersive. Provide small plastic spoons so guests can dig right in!
How to Store Halloween Graveyard Dirt Cups For Party
If you have leftovers, cover each cup with plastic wrap and store them in the refrigerator. They will stay fresh for up to 3 days. Note that the cookie “tombstones” and the top layer of dirt may soften slightly over time due to the moisture in the pudding, so it is best to add the decorations right before serving if possible.
Expert Tips for Perfect Halloween Graveyard Dirt Cups For Party
To get the best results, make sure your milk is very cold when mixing the pudding; this ensures it sets properly and has a thick consistency. If you want a more “organic” look for your dirt, mix in some chocolate wafer crumbs with your crushed Oreos for different shades of brown. For a cleaner look when filling the cups, use a piping bag or a plastic bag with the corner snipped off to dispense the pudding without smearing the sides of the glass.
Delicious Variations
You can easily swap the chocolate pudding for vanilla pudding tinted with green food coloring to create a “grassy” graveyard instead. For a more adult-friendly version, consider adding a splash of Irish cream or coffee liqueur to the pudding mix. You can also use different cookie varieties, like Nutter Butters, to create different shapes for your graveyard inhabitants, such as ghosts or skeletons.
Frequently Asked Questions
Q: Can I make these dirt cups a day in advance?
Yes, you can prepare the pudding and “dirt” layers a day ahead. However, I recommend waiting to add the cookie tombstones and gummy worms until just before the party so they don’t get soggy.
Q: Do I have to use instant pudding?
Instant pudding is recommended because it sets quickly and holds its shape well when mixed with whipped topping. If you use cook-and-serve pudding, ensure it is completely chilled before layering.
Q: How can I make this recipe dairy-free?
You can use dairy-free chocolate pudding cups or make your own using almond or soy milk, along with a dairy-free whipped topping and vegan chocolate sandwich cookies.
Q: What if I don’t have a rolling pin to crush the cookies?
You can use a food processor for a very fine crumb, or simply use the bottom of a heavy glass or a meat mallet to crush the cookies in the bag.
Q: Can I use homemade whipped cream instead of whipped topping?
You certainly can, but keep in mind that stabilized whipped topping (like Cool Whip) holds its structure longer at room temperature during a party than fresh whipped cream does.
Conclusion
Halloween Graveyard Dirt Cups are the ultimate festive treat that combines ease, flavor, and creativity. They are a fantastic way to bring a little spooky magic to your table without spending hours in the kitchen. Whether you follow the recipe exactly or add your own ghostly twists, these cups are sure to be a hit. Happy Halloween and happy snacking!
Halloween Graveyard Dirt Cups For Party

- Cook Time: 20 minutes
- Total Time: 20 minutes
- Diet: Vegetarian
Ingredients
- 2 cups cold whole milk
- 1 package (3.9 oz) instant chocolate pudding mix
- 1 container (8 oz) whipped topping, thawed
- 1 package (14.3 oz) chocolate sandwich cookies (like Oreos)
- 8 oval-shaped butter cookies or Milano cookies (for tombstones)
- Black edible decorating gel
- Gummy worms
- Candy pumpkins or candy corn
- 8 clear plastic cups (9 oz size)
Instructions
- Place the chocolate sandwich cookies into a large gallon-sized resealable plastic bag. Use a rolling pin or a heavy spoon to crush the cookies until they look like fine potting soil. A few larger chunks are fine, as they look like rocks in the dirt. Set these aside in a bowl.
- In a large mixing bowl, whisk together the cold milk and the instant chocolate pudding mix for about two minutes. Once the pudding has thickened slightly, gently fold in the thawed whipped topping using a spatula until the mixture is uniform in color and no white streaks remain.
- Place about a tablespoon of the crushed cookie crumbs into the bottom of each clear plastic cup. Spoon the chocolate pudding mixture over the crumbs until the cups are about three-quarters full. Top each cup with a generous layer of the remaining cookie crumbs to create the top layer of “soil.”
- Take your oval-shaped cookies and use the black edible gel to write “R.I.P.” or draw small crosses on the top half of each cookie. Let the gel sit for a minute to set so it doesn’t smudge during the next step.
- Press one tombstone cookie into the back of each pudding cup so it stands upright. Arrange gummy worms so they appear to be crawling out of the dirt, and place a candy pumpkin or some candy corn near the tombstone for extra color and festive flair.