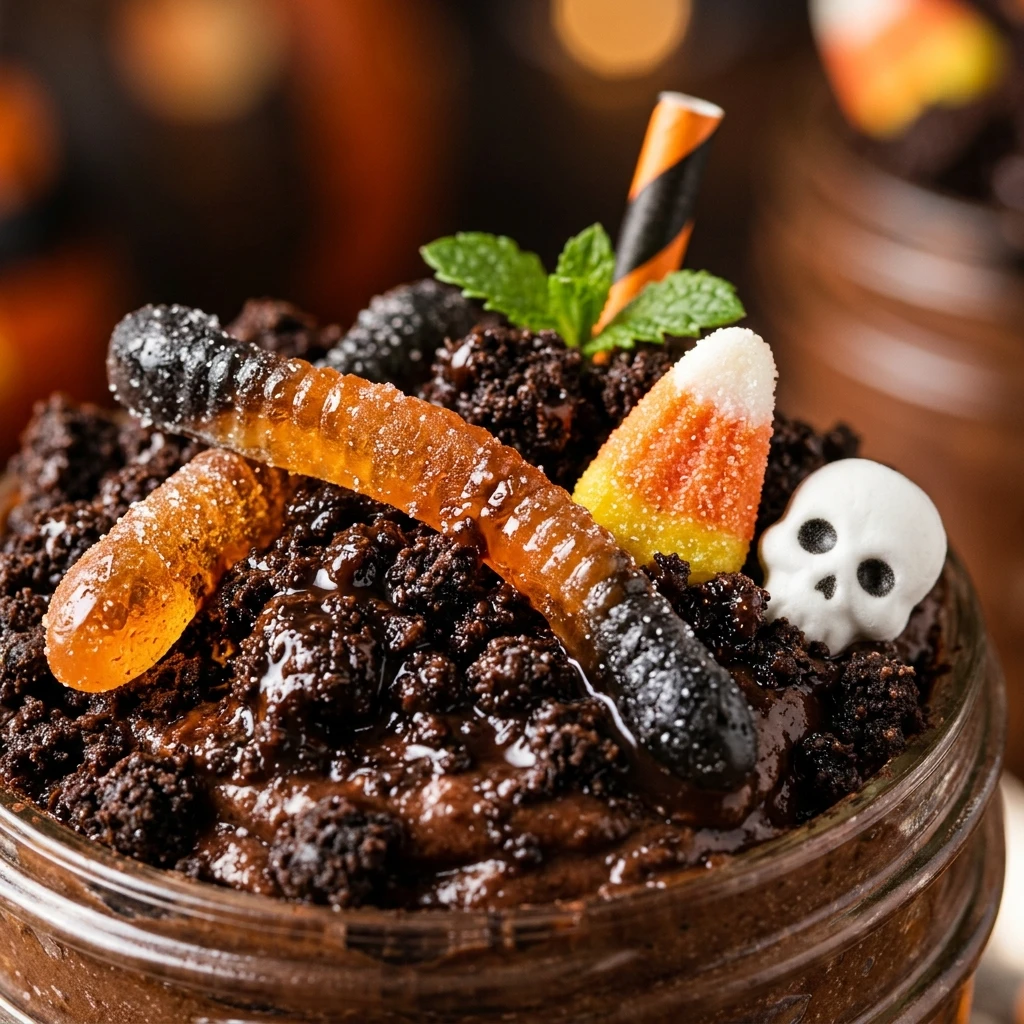

Halloween is the perfect time to get creative in the kitchen, and nothing says spooky fun quite like a classic Halloween Dirt Cups Recipe. This nostalgic dessert is a hit with kids and adults alike, combining creamy chocolate pudding with crunchy cookie “dirt” and whimsical gummy treats. It is a no-bake masterpiece that looks like it took hours to prepare but actually comes together in just a few minutes. Whether you are hosting a haunted house party or looking for a festive after-school snack, these cups are guaranteed to bring out the smiles.
The beauty of this recipe lies in its simplicity. With just a handful of pantry staples, you can create a dessert that is both visually appealing and delicious. It is the ultimate interactive treat where little ones can help “plant” the gummy worms and decorate the edible soil. Let’s dive into how you can make these spooky, chocolatey delights for your next October celebration.
Recipe Information
- Prep Time: 20 minutes
- Cook Time: 0 minutes
- Total Time: 20 minutes
- Servings: 6
- Difficulty Level: Easy
Nutrition Information
- Calories per serving: 340 kcal
- Protein: 4g
- Carbohydrates: 52g
- Fat: 14g
- Fiber: 2g
- Sugar: 38g
- Sodium: 410mg
Why Make This Halloween Dirt Cups Recipe
This recipe is a must-have for your Halloween repertoire because it is completely stress-free. Since there is no baking involved, you do not have to worry about the oven or complicated techniques. It is a fantastic “make-ahead” dessert that stays fresh in the fridge, allowing you to focus on your costume or other party preparations. Plus, the combination of smooth pudding and textured cookie crumbs is a crowd-pleasing flavor profile that never goes out of style.
Another reason to love these dirt cups is their versatility. You can easily adapt them to fit any spooky theme. From “graveyards” with tombstone cookies to “swamps” with green gummy frogs, the possibilities for customization are endless. It is a budget-friendly way to serve a large group without sacrificing the festive spirit of the holiday.
How to Make Halloween Dirt Cups Recipe
Making these spooky treats is as simple as layering and decorating. Follow these easy steps to build the perfect individual desserts for your Halloween bash.
Ingredients
- 2 cups cold whole milk
- 1 package (3.9 oz) instant chocolate pudding mix
- 1 container (8 oz) whipped topping, thawed
- 1 package (14.3 oz) chocolate sandwich cookies (like Oreos)
- 1 pack gummy worms
- Candy pumpkins or spooky sprinkles for garnish
Directions
Step 1: Prepare the Cookie Dirt
Place the chocolate sandwich cookies into a large resealable plastic bag. Use a rolling pin or the back of a large spoon to crush the cookies until they look like fine soil. You can leave a few larger chunks for “rocks” if you prefer a more realistic look. Set these aside in a bowl.
Step 2: Mix the Chocolate Pudding
In a medium mixing bowl, whisk together the cold milk and the instant chocolate pudding mix. Whisk vigorously for about 2 minutes until the mixture begins to thicken. Let it sit for another 5 minutes to fully set.
Step 3: Fold in the Whipped Topping
Gently fold the thawed whipped topping into the set pudding using a spatula. Mix until the color is uniform and the texture is light and fluffy. This creates a “mousse-like” consistency that is much lighter than plain pudding.
Step 4: Assemble the Layers
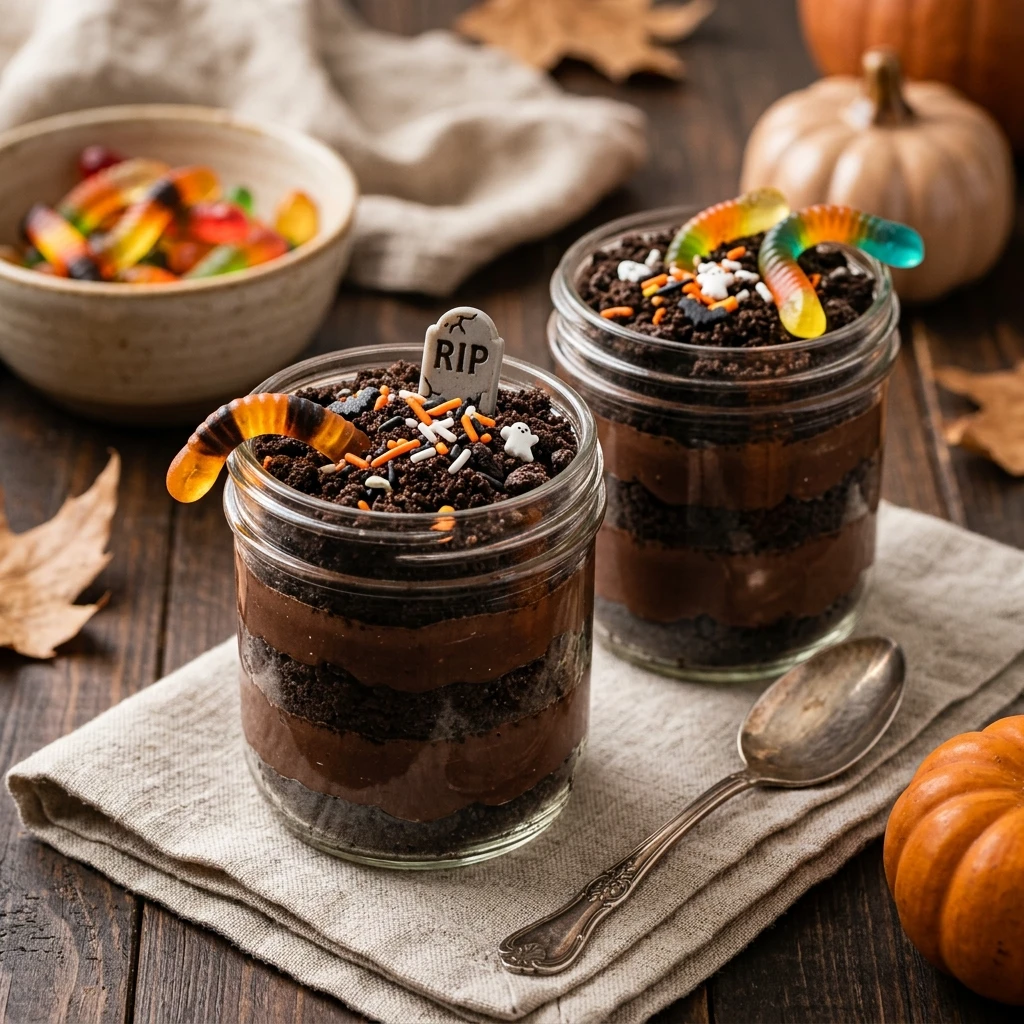
Take six individual clear plastic cups or glass jars. Place a tablespoon of cookie crumbs at the bottom of each cup. Add a layer of the pudding mixture on top. Repeat the layers until the cups are nearly full, ending with a thick layer of cookie “dirt” on top.
Step 5: Add Spooky Decorations
Push two gummy worms into the “dirt” of each cup, leaving half of the worm hanging over the edge. Add a candy pumpkin or a few Halloween sprinkles to complete the look. Refrigerate the cups for at least 30 minutes before serving to let the flavors meld.
How to Serve Halloween Dirt Cups Recipe
Serve these cups cold, straight from the refrigerator. For a party setting, you can place them on a dark tray surrounded by fake spider webs or plastic spiders to enhance the spooky vibe. If you want a more rustic look, you can even serve the entire batch in a large “cauldron” bowl or a clean plastic flower pot with a toy shovel as the serving spoon. Always provide small spoons for guests to dig through the layers.
How to Store Halloween Dirt Cups Recipe
If you have leftovers, cover each cup tightly with plastic wrap and store them in the refrigerator. They will stay fresh for up to 3 days. Note that the cookie crumbs will soften slightly the longer they sit in the fridge, but they still taste delicious. It is not recommended to freeze these cups, as the texture of the pudding and whipped topping can change significantly when thawed.
Expert Tips for Perfect Halloween Dirt Cups Recipe
To get the best results, make sure your milk is very cold before mixing the pudding; this helps it set faster and firmer. If you want a deeper “soil” color, ensure you use the dark chocolate variety of sandwich cookies. For a cleaner look when filling the cups, use a piping bag or a plastic bag with the corner snipped off to squeeze the pudding mixture into the cups without smearing the sides.
Delicious Variations
You can easily put a twist on this recipe. Try using vanilla pudding with orange food coloring for a “pumpkin patch” look. You can also add a layer of cream cheese mixed with powdered sugar and butter for a richer, “cheesecake-style” dirt cup. For a “graveyard” version, use rectangular butter cookies as tombstones and write “RIP” on them with edible markers or melted chocolate.
Frequently Asked Questions
Q: Can I use cooked pudding instead of instant?
Yes, you can use cooked pudding, but ensure it is completely cooled to room temperature before folding in the whipped topping, otherwise the topping will melt.
Q: How do I make this recipe dairy-free?
You can use dairy-free chocolate pudding cups and a dairy-free whipped topping (like coco-whip). Ensure your chocolate cookies are also dairy-free, as many popular brands are accidentally vegan.
Q: Can I make these a day in advance?
Absolutely! These are great for making ahead. Just wait to add the gummy worms until shortly before serving, as the moisture from the pudding can sometimes make the gummies sticky or slippery.
Q: What is the best way to crush the cookies?
A food processor is the fastest way to get a uniform “dirt” texture. However, using a plastic bag and a rolling pin is a fun way to get kids involved in the process.
Q: Can I use homemade whipped cream instead of whipped topping?
Yes, you can use homemade stabilized whipped cream. Just be aware that it may not hold its structure as long as store-bought whipped topping in the refrigerator.
Conclusion
The Halloween Dirt Cups Recipe is a timeless tradition that brings a touch of whimsy to any October gathering. It is easy, affordable, and incredibly fun to assemble. By following these simple steps, you will create a treat that looks impressive and tastes even better. Happy Halloween and enjoy digging into your delicious chocolate dirt!
Halloween Dirt Cups Recipe

- Cook Time: 20 minutes
- Total Time: 20 minutes
- Diet: Vegetarian
Ingredients
- 2 cups cold whole milk
- 1 package (3.9 oz) instant chocolate pudding mix
- 1 container (8 oz) whipped topping, thawed
- 1 package (14.3 oz) chocolate sandwich cookies (like Oreos)
- 1 pack gummy worms
- Candy pumpkins or spooky sprinkles for garnish
Instructions
- Step 1: Prepare the Cookie Dirt. Place the chocolate sandwich cookies into a large resealable plastic bag. Use a rolling pin or the back of a large spoon to crush the cookies until they look like fine soil. You can leave a few larger chunks for “rocks” if you prefer a more realistic look. Set these aside in a bowl.
- Step 2: Mix the Chocolate Pudding. In a medium mixing bowl, whisk together the cold milk and the instant chocolate pudding mix. Whisk vigorously for about 2 minutes until the mixture begins to thicken. Let it sit for another 5 minutes to fully set.
- Step 3: Fold in the Whipped Topping. Gently fold the thawed whipped topping into the set pudding using a spatula. Mix until the color is uniform and the texture is light and fluffy. This creates a “mousse-like” consistency that is much lighter than plain pudding.
- Step 4: Assemble the Layers. Take six individual clear plastic cups or glass jars. Place a tablespoon of cookie crumbs at the bottom of each cup. Add a layer of the pudding mixture on top. Repeat the layers until the cups are nearly full, ending with a thick layer of cookie “dirt” on top.
- Step 5: Add Spooky Decorations. Push two gummy worms into the “dirt” of each cup, leaving half of the worm hanging over the edge. Add a candy pumpkin or a few Halloween sprinkles to complete the look. Refrigerate the cups for at least 30 minutes before serving to let the flavors meld.