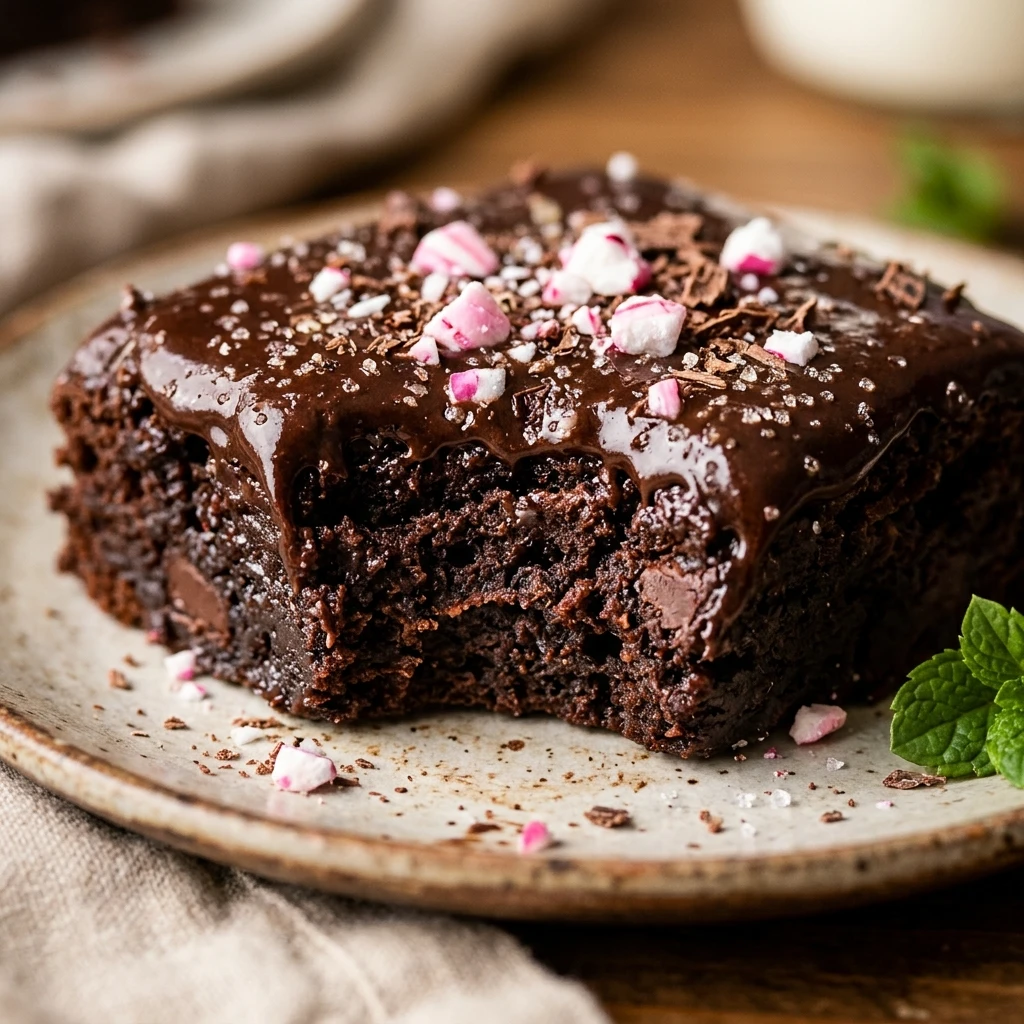


There is nothing quite like the smell of chocolate and peppermint wafting through the house during the holiday season. However, the holiday rush often leaves little time for measuring, mixing, and cleaning up a messy kitchen every time a craving strikes. That is where this freezer-friendly chocolate peppermint cookie dough comes to the rescue. By preparing a big batch ahead of time, you can enjoy warm, gooey, bakery-style cookies in minutes, whether you are hosting guests or just treating yourself after a long day.
This recipe combines a rich, cocoa-infused base with the cool, refreshing crunch of peppermint and melty chocolate chips. The best part is that the dough is specifically designed to be frozen in individual portions. You do not even have to thaw the dough before baking; simply pop a few frozen dough balls into the oven, and you will have a perfect snack ready in no time. It is the ultimate kitchen hack for busy families and cookie lovers alike.
Recipe Information
- Prep Time: 20 minutes
- Cook Time: 10 minutes
- Total Time: 30 minutes
- Servings: 24 cookies
- Difficulty Level: Easy
Nutrition Information
- Calories per serving: 165 kcal
- Protein: 2g
- Carbohydrates: 21g
- Fat: 9g
- Fiber: 1g
- Sugar: 14g
- Sodium: 115mg
Why Make This Freezer-Friendly Chocolate Peppermint Cookie Dough
The main reason to love this recipe is the incredible convenience it offers. Instead of committing to baking two dozen cookies at once, you can bake exactly as many as you need. This helps with portion control and ensures that every cookie you eat is fresh and warm. It is also a fantastic way to get ahead of your holiday baking schedule so you can spend more time enjoying the festivities and less time stressed in the kitchen.
Beyond the convenience, the flavor profile is a classic winner. The deep chocolate flavor pairs perfectly with the festive zing of peppermint. These cookies have a soft, chewy center with slightly crisp edges, providing a satisfying texture in every bite. They also make wonderful homemade gifts; simply fill a decorative jar with frozen dough balls and include baking instructions for a thoughtful, “bake-whenever” present.
How to Make Freezer-Friendly Chocolate Peppermint Cookie Dough
Preparing this dough is a straightforward process that follows the traditional creaming method, but with a few extra steps to ensure the cookies freeze and bake perfectly every time.
Ingredients
- 1 ½ cups all-purpose flour
- ½ cup unsweetened cocoa powder
- 1 teaspoon baking soda
- ½ teaspoon salt
- ½ cup unsalted butter, softened
- ½ cup granulated sugar
- ½ cup packed light brown sugar
- 1 large egg, room temperature
- 1 teaspoon peppermint extract
- 1 cup semi-sweet chocolate chips
- ½ cup crushed peppermint candies or candy canes
Directions
Step 1: Whisk the Dry Ingredients
In a medium-sized mixing bowl, sift together the all-purpose flour and cocoa powder to remove any lumps. Add the baking soda and salt, then whisk until the mixture is uniform in color. Setting these aside now ensures an even distribution of leavening agents later.
Step 2: Cream the Butter and Sugars
In a large bowl using a hand mixer or a stand mixer, beat the softened butter with the granulated sugar and brown sugar. Mix on medium-high speed for about 2 to 3 minutes until the mixture looks light, fluffy, and pale. This step is crucial for achieving the right cookie texture.
Step 3: Add the Egg and Flavoring
Add the egg and the peppermint extract to the butter mixture. Beat again on medium speed until fully incorporated. Be sure to scrape down the sides of the bowl with a spatula so everything is mixed evenly.
Step 4: Combine Wet and Dry Ingredients
Turn the mixer to low speed and gradually add the flour and cocoa mixture. Mix just until the white streaks of flour disappear. Over-mixing at this stage can lead to tough cookies, so keep it brief.
Step 5: Fold in the Mix-ins
Using a sturdy spatula, gently fold in the semi-sweet chocolate chips and the crushed peppermint candies. Distribute them evenly throughout the dough so every cookie gets a bit of crunch and extra chocolate.
Step 6: Portion the Dough
Line a baking sheet with parchment paper. Use a cookie scoop or a tablespoon to portion the dough into balls about 1.5 inches in diameter. Place them close together on the tray (they won’t be baking yet, so they don’t need much space).
Step 7: Flash Freeze the Dough
Place the baking sheet with the dough balls into the freezer for at least 1 to 2 hours. This “flash freeze” prevents the dough balls from sticking together once you transfer them to a storage container.
Step 8: Storage and Baking
Once frozen solid, move the dough balls into a freezer-safe zip-top bag or airtight container. To bake, preheat your oven to 350°F (175°C). Place frozen dough balls on a lined baking sheet and bake for 11-13 minutes. Allow them to cool on the pan for 5 minutes before moving to a wire rack.
How to Serve Freezer-Friendly Chocolate Peppermint Cookie Dough
These cookies are best served slightly warm while the chocolate chips are still melty. For a festive touch, serve them alongside a mug of hot cocoa or a cold glass of milk. If you want to elevate the dessert, crumble a warm cookie over a scoop of vanilla or peppermint bark ice cream. They also look beautiful on a holiday cookie platter, especially if you sprinkle a few extra bits of crushed candy cane on top immediately after they come out of the oven.
How to Store Freezer-Friendly Chocolate Peppermint Cookie Dough
Proper storage is key to maintaining the flavor of the peppermint and the texture of the dough. Keep the frozen dough balls in a high-quality, freezer-safe bag with as much air squeezed out as possible. This prevents freezer burn. The dough will stay fresh and delicious for up to 3 months. If you have already baked the cookies, store them in an airtight container at room temperature for up to 5 days.

Expert Tips for Perfect Freezer-Friendly Chocolate Peppermint Cookie Dough
Always use room temperature eggs to ensure they emulsify properly with the butter. If you forget to take your egg out of the fridge, place it in a bowl of warm water for 5 minutes. Another tip is to use high-quality cocoa powder; since it is the base of the cookie, a premium Dutch-processed cocoa will provide a much deeper, richer chocolate flavor. Lastly, do not over-bake! The cookies might look a bit soft when you pull them out, but they will firm up as they cool on the hot baking sheet.
Delicious Variations
If you want to change things up, try using white chocolate chips instead of semi-sweet for a “White Chocolate Peppermint” twist. You can also add a half-cup of chopped walnuts or pecans if you enjoy a nutty crunch. For an extra decadent version, press a small piece of a chocolate peppermint patty into the center of the dough ball before freezing. This creates a gooey, molten mint center when baked.
Frequently Asked Questions
Q: Do I need to thaw the dough before baking?
No, you can bake them straight from the freezer! Just add 1 or 2 minutes to the total baking time compared to fresh dough.
Q: Can I use peppermint oil instead of extract?
Peppermint oil is much stronger than extract. If using oil, only use a few drops, or the flavor will be overwhelming.
Q: Why did my peppermint candies melt into holes in the oven?
Some hard candies melt faster than others. If this happens, try folding in the crushed peppermint gently or pressing them onto the top of the cookie halfway through baking instead.
Q: How long does the dough stay good in the freezer?
For the best flavor and texture, we recommend using the dough within 3 months.
Q: Can I make this recipe vegan?
Yes, you can substitute the butter with a vegan butter stick and the egg with a flax egg (1 tablespoon ground flaxseed meal + 3 tablespoons water).
Conclusion
Having a stash of Freezer-Friendly Chocolate Peppermint Cookie Dough in your freezer is like a gift to your future self. It takes the stress out of holiday baking and ensures you are always ready for unexpected guests or late-night cravings. With its rich chocolate base and festive peppermint kick, this recipe is sure to become a seasonal staple in your home. Happy baking!

Freezer-Friendly Chocolate Peppermint Cookie Dough

- Cook Time: 30 minutes
- Total Time: 30 minutes
- Diet: Vegetarian
Ingredients
- 1 ½ cups all-purpose flour
- ½ cup unsweetened cocoa powder
- 1 teaspoon baking soda
- ½ teaspoon salt
- ½ cup unsalted butter, softened
- ½ cup granulated sugar
- ½ cup packed light brown sugar
- 1 large egg, room temperature
- 1 teaspoon peppermint extract
- 1 cup semi-sweet chocolate chips
- ½ cup crushed peppermint candies or candy canes
Instructions
- In a medium-sized mixing bowl, sift together the all-purpose flour and cocoa powder to remove any lumps. Add the baking soda and salt, then whisk until the mixture is uniform in color. Setting these aside now ensures an even distribution of leavening agents later.
- In a large bowl using a hand mixer or a stand mixer, beat the softened butter with the granulated sugar and brown sugar. Mix on medium-high speed for about 2 to 3 minutes until the mixture looks light, fluffy, and pale. This step is crucial for achieving the right cookie texture.
- Add the egg and the peppermint extract to the butter mixture. Beat again on medium speed until fully incorporated. Be sure to scrape down the sides of the bowl with a spatula so everything is mixed evenly.
- Turn the mixer to low speed and gradually add the flour and cocoa mixture. Mix just until the white streaks of flour disappear. Over-mixing at this stage can lead to tough cookies, so keep it brief.
- Using a sturdy spatula, gently fold in the semi-sweet chocolate chips and the crushed peppermint candies. Distribute them evenly throughout the dough so every cookie gets a bit of crunch and extra chocolate.
- Line a baking sheet with parchment paper. Use a cookie scoop or a tablespoon to portion the dough into balls about 1.5 inches in diameter. Place them close together on the tray (they won’t be baking yet, so they don’t need much space).
- Place the baking sheet with the dough balls into the freezer for at least 1 to 2 hours. This “flash freeze” prevents the dough balls from sticking together once you transfer them to a storage container.
- Once frozen solid, move the dough balls into a freezer-safe zip-top bag or airtight container. To bake, preheat your oven to 350°F (175°C). Place frozen dough balls on a lined baking sheet and bake for 11-13 minutes. Allow them to cool on the pan for 5 minutes before moving to a wire rack.