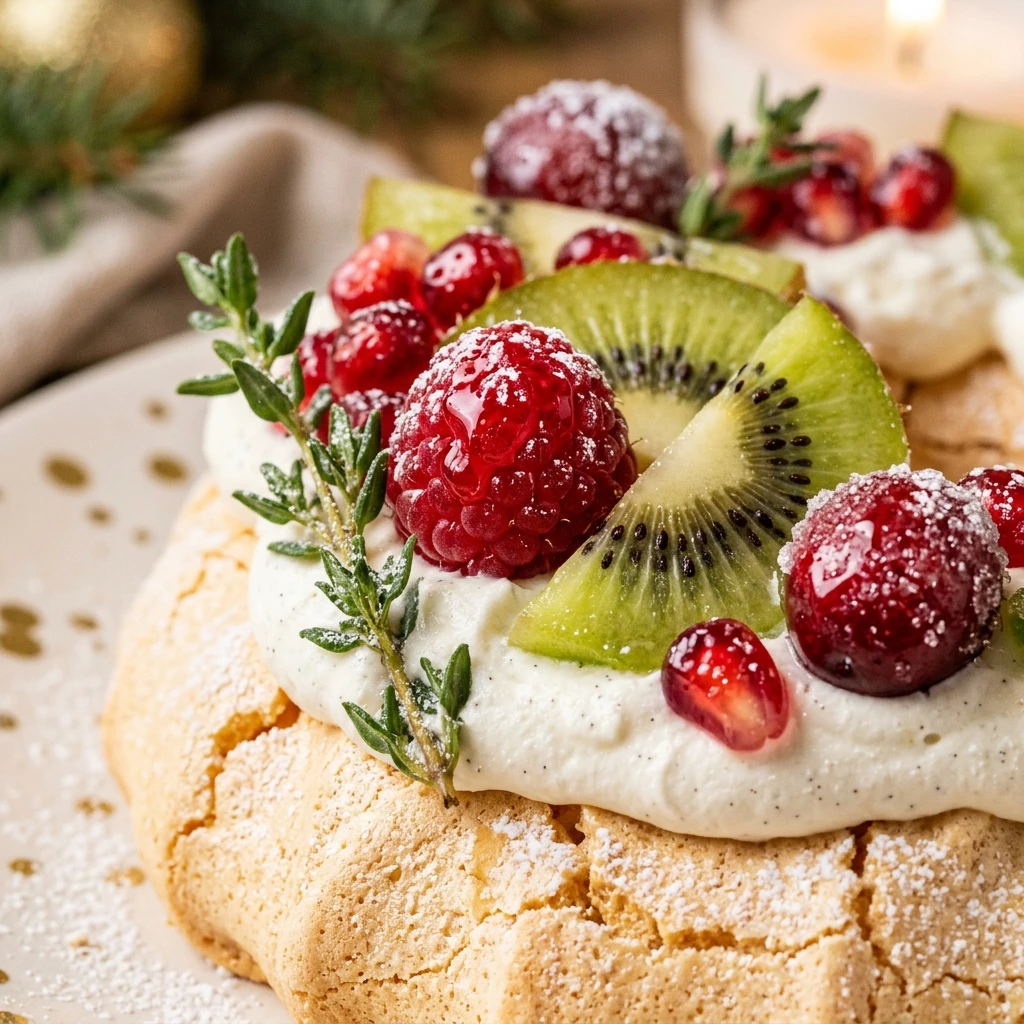

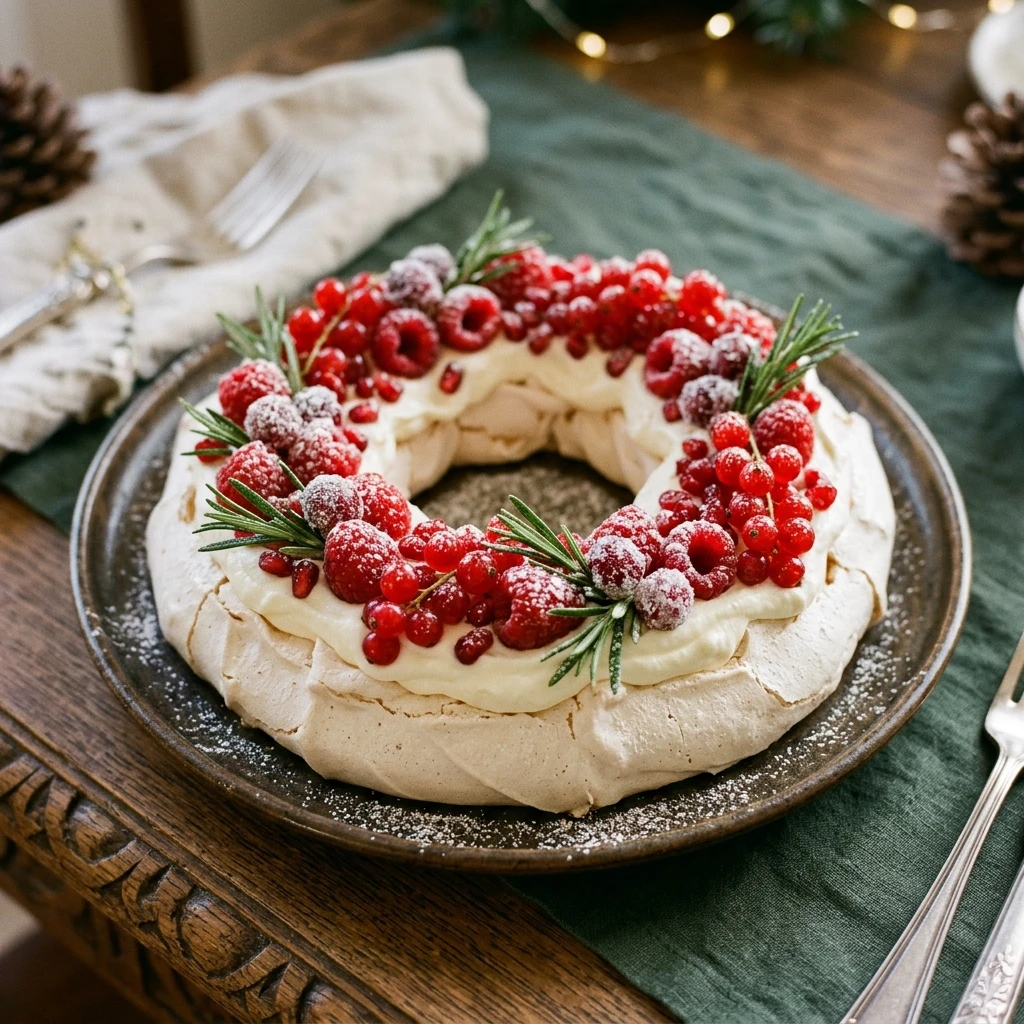
Nothing says a beautiful Australian or Kiwi-inspired Christmas quite like a pavlova. This Festive Christmas Pavlova Wreath takes the traditional dessert and turns it into a stunning centerpiece for your holiday table. With its crisp outer shell, marshmallow-like center, and a vibrant topping of fresh berries and cream, it is as delicious as it is eye-catching.
The beauty of the wreath shape is that it creates natural pockets for the whipped cream and fruit to sit in. It is surprisingly easy to make if you follow a few simple rules for meringue. This light and airy dessert is the perfect way to end a heavy holiday meal, providing a refreshing burst of sweetness that everyone will love.
Recipe Information
- Prep Time: 30 minutes
- Cook Time: 90 minutes
- Total Time: 120 minutes
- Servings: 10
- Difficulty Level: Medium
Nutrition Information
- Calories per serving: 245 kcal
- Protein: 3g
- Carbohydrates: 36g
- Fat: 11g
- Fiber: 2g
- Sugar: 32g
- Sodium: 42mg
Why Make This Festive Christmas Pavlova Wreath
Making a pavlova wreath is a fantastic way to impress your guests without needing professional decorating skills. The wreath shape inherently looks festive and elegant, especially when adorned with red and green garnishes like raspberries and mint leaves. It is a gluten-free dessert option that doesn’t feel like a compromise, making it inclusive for many dietary needs.
Beyond its looks, the texture is the real winner. You get a satisfying crunch from the meringue followed by a soft, melt-in-your-mouth interior. Because you can prepare the meringue base ahead of time, it takes the stress out of Christmas Day entertaining. Just whip the cream and pile on the fruit right before you are ready to serve.
How to Make Festive Christmas Pavlova Wreath
Creating the perfect pavlova requires a bit of patience and a clean bowl, but the process is very straightforward once you understand the steps for achieving a stable meringue.
Ingredients
- 6 large egg whites (room temperature)
- 1.5 cups caster sugar (superfine sugar)
- 2 teaspoons cornstarch
- 1 teaspoon white vinegar
- 1 teaspoon vanilla extract
- 1.5 cups heavy whipping cream, chilled
- 2 tablespoons powdered sugar
- 2 cups mixed fresh berries (strawberries, raspberries, blueberries, pomegranate seeds)
- Fresh mint leaves for garnish
Directions
Step 1: Preheat and Prepare the Baking Sheet
Preheat your oven to 300°F (150°C). Line a large baking sheet with parchment paper. Use a dinner plate to trace a circle (about 9 inches) onto the paper, then use a smaller glass to trace a circle in the middle to create a wreath template. Flip the paper over so the pencil marks don’t touch the food.
Step 2: Beat the Egg Whites
In a very clean glass or metal bowl, beat the egg whites on medium speed until soft peaks form. Ensure there is no trace of yolk or grease in the bowl, as this will prevent the whites from stiffening.
Step 3: Gradually Add the Sugar
Increase the mixer speed to high and add the caster sugar one tablespoon at a time. Continue beating for about 5-8 minutes until the meringue is thick, glossy, and you can no longer feel any sugar granules when you rub a little of the mixture between your fingers.
Step 4: Fold in Stabilizers
Gently fold in the cornstarch, white vinegar, and vanilla extract using a spatula. These ingredients help create that classic marshmallow center and keep the meringue stable during the baking process.
Step 5: Shape the Meringue Wreath
Spoon the meringue onto the prepared parchment paper, following the wreath shape you traced. Use the back of a spoon to create a “trough” or a hollow path around the center of the ring; this is where your cream will sit later.
Step 6: Bake and Cool
Place the tray in the oven and immediately reduce the temperature to 250°F (120°C). Bake for 90 minutes. Once finished, turn the oven off and leave the pavlova inside with the door slightly ajar until it is completely cool. This prevents the meringue from cracking due to sudden temperature changes.
Step 7: Prepare the Topping
In a cold bowl, whip the heavy cream and powdered sugar until stiff peaks form. Be careful not to over-beat the cream, or it will become grainy and buttery.
Step 8: Assemble and Decorate
Place the cooled meringue wreath on a serving platter. Fill the center trough with the whipped cream. Top generously with fresh berries, pomegranate seeds, and mint leaves to complete the festive look.
How to Serve Festive Christmas Pavlova Wreath
Serve the pavlova immediately after decorating. Because the meringue is sugar-based, it will begin to soften once it comes into contact with the moisture from the cream and fruit. Use a sharp serrated knife to gently saw through the crust to ensure clean slices without crushing the entire wreath.
How to Store Festive Christmas Pavlova Wreath
The undressed meringue base can be stored in an airtight container in a cool, dry place for up to 2 days. However, once the pavlova is assembled with cream and fruit, it does not store well. If you have leftovers, keep them in the refrigerator for up to 24 hours, but be aware that the meringue will lose its crunch and become chewy.
Expert Tips for Perfect Festive Christmas Pavlova Wreath
Always use room temperature eggs, as they volume up much better than cold eggs. Ensure your mixing bowl is completely free of fat or oil; you can wipe it with a little lemon juice or vinegar before starting to be safe. Do not open the oven door while the pavlova is baking, as the draft can cause it to collapse. Lastly, avoid making pavlova on a very humid day, as the sugar in the meringue absorbs moisture from the air, which can make it soft and sticky.
Delicious Variations
While the berry and mint combo is traditional for Christmas, you can get creative. Try a tropical version with mango, passionfruit, and toasted coconut flakes. For a more decadent dessert, drizzle the wreath with dark chocolate ganache or salted caramel sauce before adding the fruit. You can also add a hint of rosewater to the meringue for a floral holiday twist.
Frequently Asked Questions
Q: Can I make the meringue base a day in advance?
Yes, you can bake the meringue the night before. Simply leave it in the turned-off oven overnight to cool and dry out completely. Store it in a dry, airtight spot until you are ready to decorate.
Q: Why did my pavlova crack?
Small cracks are normal and add to the rustic charm! Large cracks usually happen because the meringue cooled too quickly. Always let it cool down gradually inside the oven.
Q: Can I use liquid food coloring to make it red or green?
It is best to avoid liquid coloring as it changes the consistency of the meringue. If you want a colored wreath, use a tiny amount of gel food coloring.
Q: What is the difference between meringue and pavlova?
Meringue is typically dry and crisp all the way through. Pavlova includes cornstarch and vinegar, which results in a crispy shell but a soft, marshmallow-like interior.
Q: Why is my meringue “weeping” or leaking syrup?
This usually happens if the sugar wasn’t fully dissolved or if it was baked on a very humid day. Make sure to add the sugar slowly and beat it until the mixture is no longer gritty.
Conclusion
The Festive Christmas Pavlova Wreath is a show-stopping dessert that captures the joy of the holiday season. It is light, airy, and beautifully balanced by the tartness of fresh berries. While it requires some attention to detail, the result is a sophisticated treat that your friends and family will remember for years to come. Happy holidays and happy baking!

Festive Christmas Pavlova Wreath
- Cook Time: 120 minutes
- Total Time: 2 hours
- Diet: Gluten-Free
Ingredients
- 6 large egg whites (room temperature)
- 1.5 cups caster sugar (superfine sugar)
- 2 teaspoons cornstarch
- 1 teaspoon white vinegar
- 1 teaspoon vanilla extract
- 1.5 cups heavy whipping cream, chilled
- 2 tablespoons powdered sugar
- 2 cups mixed fresh berries (strawberries, raspberries, blueberries, pomegranate seeds)
- Fresh mint leaves for garnish
Instructions
- Preheat your oven to 300°F (150°C). Line a large baking sheet with parchment paper. Use a dinner plate to trace a circle (about 9 inches) onto the paper, then use a smaller glass to trace a circle in the middle to create a wreath template. Flip the paper over so the pencil marks don’t touch the food.
- In a very clean glass or metal bowl, beat the egg whites on medium speed until soft peaks form. Ensure there is no trace of yolk or grease in the bowl, as this will prevent the whites from stiffening.
- Increase the mixer speed to high and add the caster sugar one tablespoon at a time. Continue beating for about 5-8 minutes until the meringue is thick, glossy, and you can no longer feel any sugar granules when you rub a little of the mixture between your fingers.
- Gently fold in the cornstarch, white vinegar, and vanilla extract using a spatula. These ingredients help create that classic marshmallow center and keep the meringue stable during the baking process.
- Spoon the meringue onto the prepared parchment paper, following the wreath shape you traced. Use the back of a spoon to create a “trough” or a hollow path around the center of the ring; this is where your cream will sit later.
- Place the tray in the oven and immediately reduce the temperature to 250°F (120°C). Bake for 90 minutes. Once finished, turn the oven off and leave the pavlova inside with the door slightly ajar until it is completely cool. This prevents the meringue from cracking due to sudden temperature changes.
- In a cold bowl, whip the heavy cream and powdered sugar until stiff peaks form. Be careful not to over-beat the cream, or it will become grainy and buttery.
- Place the cooled meringue wreath on a serving platter. Fill the center trough with the whipped cream. Top generously with fresh berries, pomegranate seeds, and mint leaves to complete the festive look.