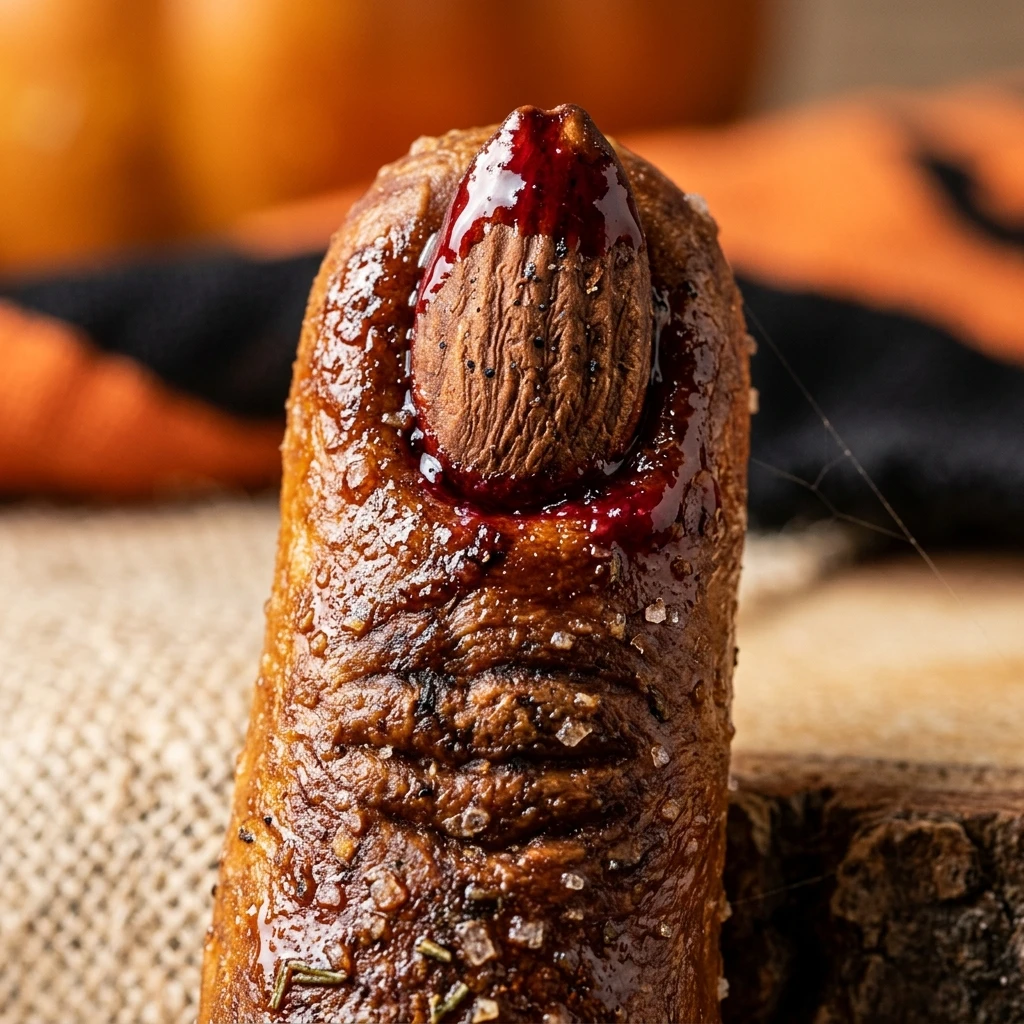

Halloween is the perfect time to get creative in the kitchen, and nothing says “spooky” quite like edible witch fingers. These Air Fryer Halloween Witch Finger Pretzels are the ultimate combination of salty, savory, and just a little bit creepy. They are incredibly easy to make, using simple ingredients that transform into a hauntingly delicious snack in just a few minutes.
Whether you are hosting a costume party or looking for a fun afternoon activity with the kids, these pretzels are a guaranteed hit. The air fryer ensures a perfectly golden-brown crust and a soft, chewy interior, making them much faster than traditional oven-baked versions. Get ready to impress your guests with a snack that looks as good as it tastes!
Recipe Information
- Prep Time: 15 minutes
- Cook Time: 8 minutes
- Total Time: 23 minutes
- Servings: 12 fingers
- Difficulty Level: Easy
Nutrition Information
- Calories per serving: 115 kcal
- Protein: 3g
- Carbohydrates: 18g
- Fat: 4g
- Fiber: 1g
- Sugar: 2g
- Sodium: 310mg
Why Make This Air Fryer Halloween Witch Finger Pretzels
These witch finger pretzels are the perfect balance of festive and functional. Unlike complex baking projects that take hours, the air fryer cuts down the cooking time significantly. This allows you to focus on the fun part: decorating! The dough remains light and airy, while the sliced almond “fingernail” provides a satisfying crunch that complements the soft pretzel texture.
They are also highly customizable. You can make them look extra ghoulish with green food coloring or keep them classic and golden. They serve as a fantastic conversation starter at any Halloween gathering and are much healthier than store-bought candy. Plus, the “bloody” dipping sauce adds an extra layer of flavor and thematic fun that everyone will love.
How to Make Air Fryer Halloween Witch Finger Pretzels
Making these spooky treats is a breeze! Just follow these simple steps to transform basic dough into ghoulish delights that will be the star of your Halloween spread.
Ingredients
- 1 tube (13.8 oz) refrigerated pizza dough or breadstick dough
- 12-15 sliced almonds (to act as the fingernails)
- 2 tablespoons unsalted butter, melted
- 1 teaspoon coarse sea salt or pretzel salt
- 1/4 cup raspberry jam or red decorating gel (for the “blood”)
- Optional: 2-3 drops green food coloring
Directions
Step 1: Prepare the Dough
Unroll your refrigerated pizza or breadstick dough on a lightly floured surface. If you want green fingers, knead a few drops of green food coloring into the dough until the color is even. Cut the dough into 12 equal-sized strips, roughly 4 to 5 inches long.
Step 2: Shape the Fingers
Roll each dough strip into a long, thin cylinder shape to resemble a finger. Don’t worry if they aren’t perfectly smooth; a little texture makes them look more realistic and “witch-like.”
Step 3: Add Knuckle Details
Use a small paring knife to make three shallow horizontal slits in the middle of each dough strip to represent the knuckles. Repeat this near the top and bottom of the finger for a more detailed, wrinkly look.
Step 4: Attach the Fingernails
Take a sliced almond and press it firmly into one end of each dough strip. Make sure to press it deep enough so it stays attached during the cooking process. This creates the creepy fingernail effect.
Step 5: Season and Prep
Brush each “finger” lightly with the melted butter. Sprinkle a small amount of coarse sea salt over the top. Lightly grease your air fryer basket or line it with a piece of perforated parchment paper.
Step 6: Air Fry to Perfection
Place the fingers in the air fryer basket in a single layer, making sure they do not touch. Cook at 350°F (175°C) for 6 to 8 minutes, or until they are golden brown and cooked through. Depending on the size of your air fryer, you may need to work in batches.
Step 7: Add the “Blood”
Once the pretzels are done and slightly cooled, carefully lift the almond “nail,” dab a little raspberry jam or red gel underneath, and press it back down so the red “blood” oozes out around the edges. You can also dip the blunt end of the finger in jam for an extra macabre look.
How to Serve Air Fryer Halloween Witch Finger Pretzels
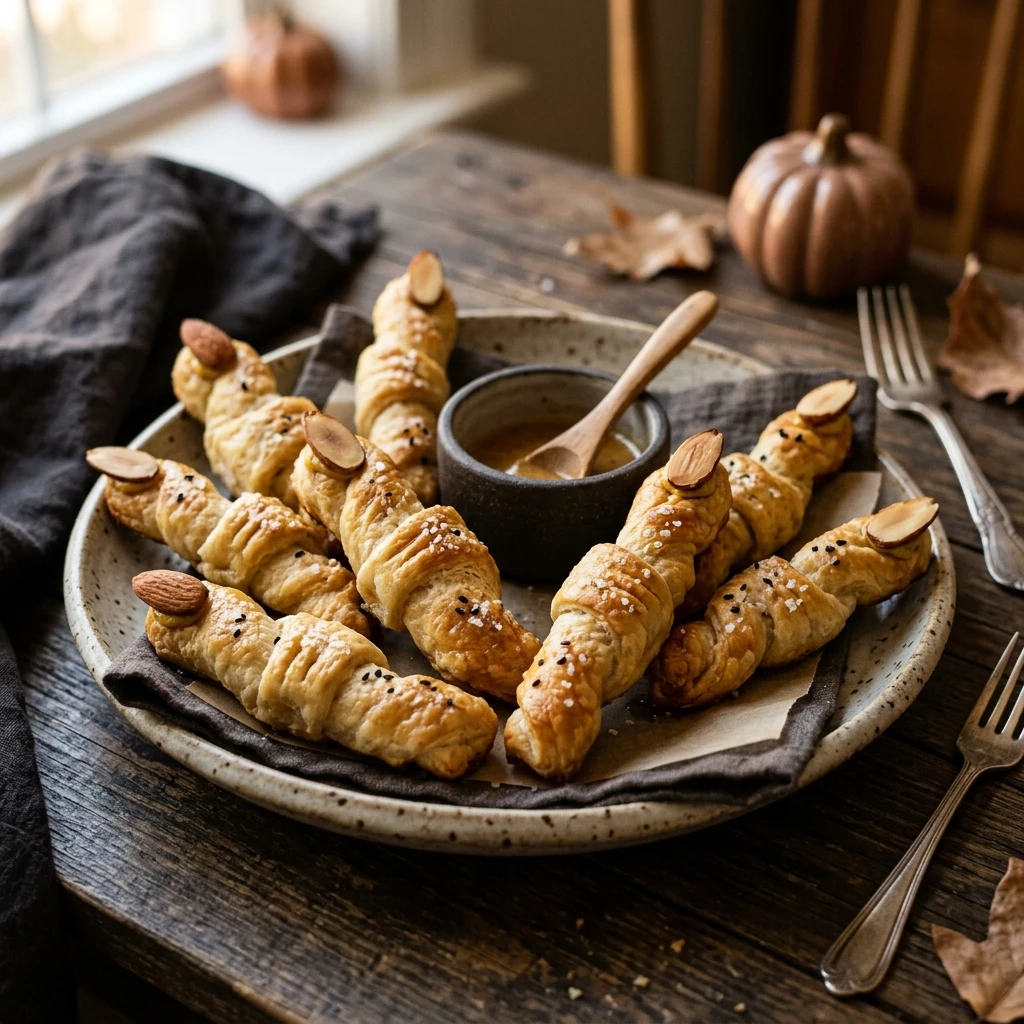
Serve these pretzels on a dark platter or a wooden board to make the colors pop. For an extra spooky presentation, place them around a bowl of “bloody” dipping sauce (additional raspberry jam or even warm marinara sauce). They look great paired with other themed snacks like deviled “eyeball” eggs or pumpkin-shaped cheese balls. Serve them warm for the best texture!
How to Store Air Fryer Halloween Witch Finger Pretzels
These pretzels are best enjoyed fresh on the day they are made. However, if you have leftovers, store them in an airtight container at room temperature for up to 2 days. To regain that fresh-baked crunch, pop them back into the air fryer at 350°F for 1-2 minutes before serving. Avoid refrigerating them, as this can make the dough tough and the almond nails soggy.
Expert Tips for Perfect Air Fryer Halloween Witch Finger Pretzels
To ensure your witch fingers look as creepy as possible, try tapering the dough slightly at the ends and making the knuckle area a bit thicker. This gives them a more anatomical, gnarled appearance. If the almonds fall off after cooking, simply use a tiny bit of honey or the jam as “glue” to reattach them. For a deeper color, you can use a quick egg wash (one egg beaten with a teaspoon of water) instead of butter before air frying.
Delicious Variations
If you prefer a sweet version, skip the salt and butter. Instead, brush the dough with cinnamon sugar and use a chocolate-covered almond for the nail. For a savory cheese version, sprinkle some finely grated parmesan cheese over the fingers before cooking. You can also swap the pizza dough for pretzel dough or even crescent roll dough for a different, fluffier texture.
Frequently Asked Questions
Q: Can I use frozen dough for this recipe?
Yes, you can use frozen bread or pizza dough. Just make sure it is completely thawed and has risen according to the package instructions before you begin shaping the fingers.
Q: How do I prevent the almonds from falling off?
Press the almonds firmly into the dough before cooking. If they do pop off due to the dough rising, just use a small dab of red jam or melted chocolate to stick them back on once they are out of the air fryer.
Q: Can I make these in a traditional oven?
Absolutely! If you don’t have an air fryer, bake them in a preheated oven at 400°F (200°C) for 10-12 minutes or until golden brown.
Q: What is the best dipping sauce for these?
For a savory snack, marinara sauce or a spicy cheese dip works great. For a sweeter treat, use raspberry jam, strawberry preserves, or even a red-tinted honey mustard.
Q: Can I make these vegan?
Yes! Most refrigerated pizza doughs are accidentally vegan. Simply swap the butter for a plant-based butter or olive oil, and ensure your “blood” jam or gel is vegan-friendly.
Conclusion
Air Fryer Halloween Witch Finger Pretzels are a festive, easy, and delightful addition to any October celebration. With their creepy appearance and delicious taste, they are sure to be a conversation starter. The air fryer makes the process quick and stress-free, giving you more time to enjoy the holiday festivities. Happy haunting and happy snacking!
Air Fryer Halloween Witch Finger Pretzels
- Cook Time: 23 minutes
- Total Time: 23 minutes
- Diet: Vegetarian
Ingredients
- 1 tube (13.8 oz) refrigerated pizza dough or breadstick dough
- 12–15 sliced almonds (to act as the fingernails)
- 2 tablespoons unsalted butter, melted
- 1 teaspoon coarse sea salt or pretzel salt
- 1/4 cup raspberry jam or red decorating gel (for the “blood”)
- Optional: 2-3 drops green food coloring
Instructions
- Step 1: Prepare the Dough. Unroll your refrigerated pizza or breadstick dough on a lightly floured surface. If you want green fingers, knead a few drops of green food coloring into the dough until the color is even. Cut the dough into 12 equal-sized strips, roughly 4 to 5 inches long.
- Step 2: Shape the Fingers. Roll each dough strip into a long, thin cylinder shape to resemble a finger. Don’t worry if they aren’t perfectly smooth; a little texture makes them look more realistic and “witch-like.”
- Step 3: Add Knuckle Details. Use a small paring knife to make three shallow horizontal slits in the middle of each dough strip to represent the knuckles. Repeat this near the top and bottom of the finger for a more detailed, wrinkly look.
- Step 4: Attach the Fingernails. Take a sliced almond and press it firmly into one end of each dough strip. Make sure to press it deep enough so it stays attached during the cooking process. This creates the creepy fingernail effect.
- Step 5: Season and Prep. Brush each “finger” lightly with the melted butter. Sprinkle a small amount of coarse sea salt over the top. Lightly grease your air fryer basket or line it with a piece of perforated parchment paper.
- Step 6: Air Fry to Perfection. Place the fingers in the air fryer basket in a single layer, making sure they do not touch. Cook at 350°F (175°C) for 6 to 8 minutes, or until they are golden brown and cooked through. Depending on the size of your air fryer, you may need to work in batches.
- Step 7: Add the “Blood”. Once the pretzels are done and slightly cooled, carefully lift the almond “nail,” dab a little raspberry jam or red gel underneath, and press it back down so the red “blood” oozes out around the edges. You can also dip the blunt end of the finger in jam for an extra macabre look.