Witch Finger Cookies
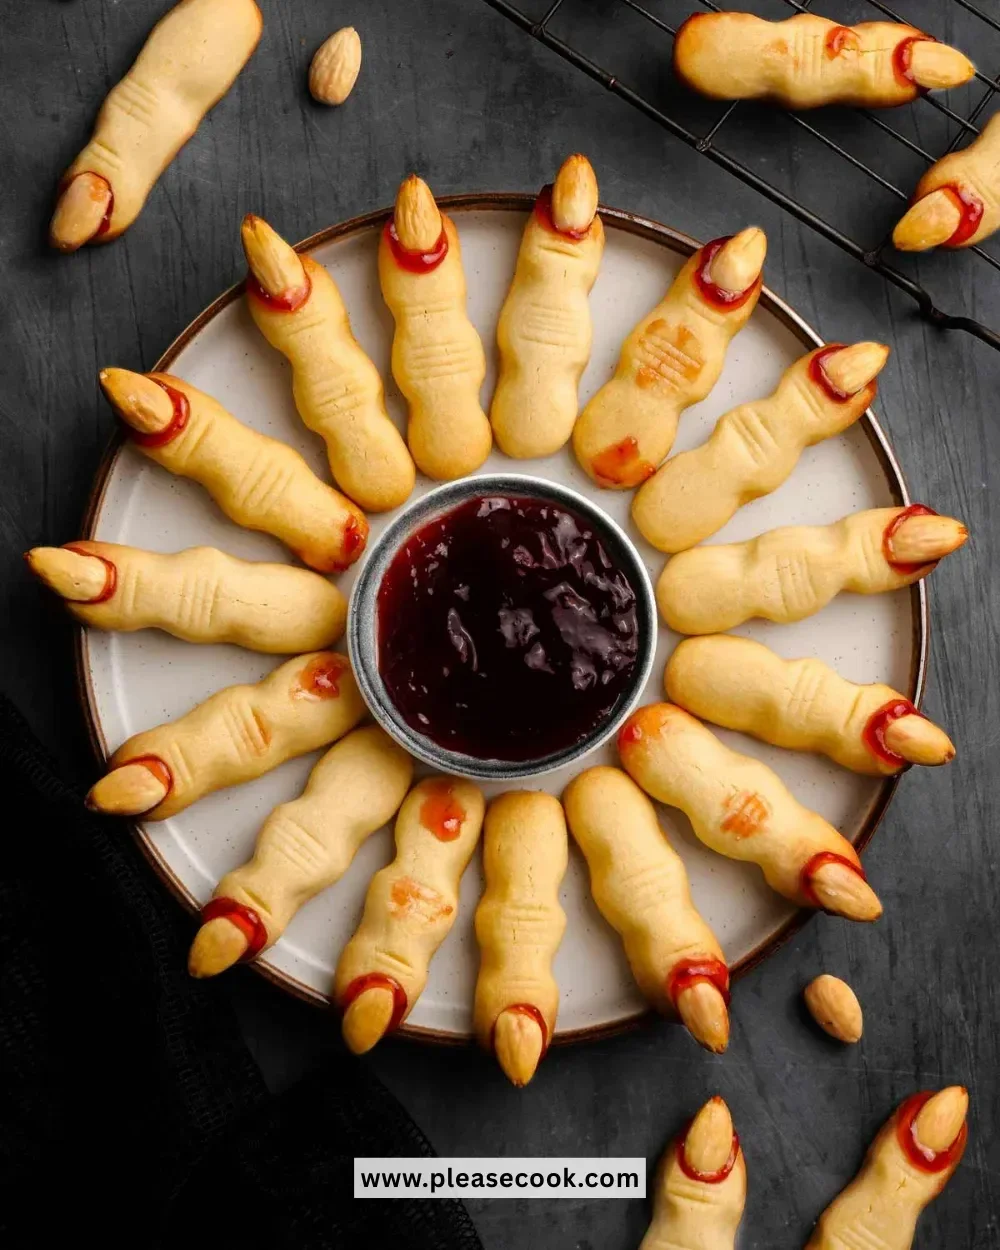
These creepy yet delicious Witch Finger Cookies are perfect for Halloween gatherings, spooky parties, or even just for fun baking with the family. With their whimsical shape and eerie almond "nails," they add a playful twist to any dessert table. Your friends and family will be both thrilled and delighted as they bite into these sweet, buttery cookies!
Recipe Information
- Prep Time: 20 minutes
- Cook Time: 15 minutes
- Total Time: 35 minutes
- Servings: 24 cookies
- Difficulty Level: Easy
Nutrition Information
- Calories per serving: 120
- Protein: 2g
- Carbohydrates: 16g
- Fat: 6g
- Fiber: 0g
- Sugar: 3g
- Sodium: 45mg
Why Make This Witch Finger Cookies
Witch Finger Cookies are not only adorable but also incredibly easy to make, making them a fun baking project for people of all ages. Their unique look sparks joy and laughter, setting a light-hearted tone for any Halloween event. Plus, they are a great conversation starter! The creamy texture of the cookies contrasts beautifully with the crunchy almond topping, ensuring everyone will enjoy a mix of flavors and textures.
How to Make Witch Finger Cookies
Baking Witch Finger Cookies is a straightforward process, breaking down into fun steps. Follow along to create your creepy culinary delights!
Ingredients:
- 1 cup unsalted butter, softened
- 1 cup powdered sugar
- 1 egg
- 1 teaspoon vanilla extract
- 2 1/2 cups all-purpose flour
- 1 teaspoon baking powder
- 1/4 teaspoon salt
- Whole almonds (for nails)
- Red or green colored sugar (for effect)
Directions:
-
Step 1: Preheat the Oven
Preheat the oven to 350°F (175°C).
-
Step 2: Mixing the Dough
In a large bowl, cream together the softened butter and powdered sugar until smooth. This should take about 2-3 minutes; you want the mixture to be light and fluffy.
-
Step 3: Adding Wet Ingredients
Beat in the egg and vanilla extract until well combined. The mixture should look rich and have a smooth texture.
-
Step 4: Combining Dry Ingredients
In another bowl, combine the flour, baking powder, and salt. Gradually blend this dry mixture into the creamed mixture, stirring just until the dough comes together.
-
Step 5: Shaping the Cookies
Shape the dough into finger shapes, about 3 inches long, and place them on ungreased baking sheets. Make sure to leave some space between each cookie to allow for spreading.
-
Step 6: Adding Nails
Press an almond into the tip of each ‘finger’ to represent a fingernail. This step is crucial for giving your cookies that spooky detail!
-
Step 7: Creating Knuckles
Use a knife to press in ‘knuckles’ for added detail. This simple technique adds character and enhances the creepy appearance.
-
Step 8: Adding Color
If desired, sprinkle the cookies with colored sugar to give them a more festive look. The colors will pop against the cookie dough!
-
Step 9: Baking
Bake in the preheated oven for 12-15 minutes, or until the edges are lightly golden. Keep an eye on them so they don’t overbake.
-
Step 10: Cooling
Let the cookies cool on a wire rack before serving. This allows them to set and makes for easier handling.
How to Serve Witch Finger Cookies
Serve these Witch Finger Cookies on a spooky platter alongside other Halloween treats. You can even create a fun Halloween dessert table with themed decorations. Pair them with a spooky punch or your favorite fall beverage for a complete festive experience.
How to Store Witch Finger Cookies
Keep your witch finger cookies in an airtight container at room temperature for up to a week. For longer storage, you can freeze them for up to three months. Just ensure they are wrapped tightly to prevent freezer burn.
Expert Tips for Perfect Witch Finger Cookies
- Make sure your butter is softened to room temperature for easy mixing.
- If you want a more intense flavor, consider adding a pinch of cinnamon or nutmeg to the dough.
- Experiment with different nuts for the “nails”—pecans or walnuts are tasty alternatives.
- If you prefer a softer cookie, slightly reduce the baking time.
- Always allow cookies to cool completely before stacking them to prevent sticking.
Delicious Variations
- Monster Fingers: Use green or blue colored sugar for a more vibrant, monster-like appearance.
- Spooky Chocolate Fingers: Add cocoa powder to the dough for a chocolate variation; reduce the flour by 1/4 cup.
- Fruity Fingers: Instead of colored sugar, drizzle with icing and sprinkle with candy pieces for a fruity twist.
Frequently Asked Questions
-
Can I use unsalted butter instead of salted?
Yes! Unsalted butter is preferred for controlling the salt content in baking. -
Can I make the dough ahead of time?
Absolutely! You can make the dough and chill it in the refrigerator for up to 48 hours before shaping and baking. -
What should I do if my dough is too sticky?
If you find the dough is sticky, add a little more flour, one tablespoon at a time, until it reaches a manageable consistency. -
What if I can’t find whole almonds?
Sliced almonds can work as a substitute, although they won’t look quite as much like nails. -
Can I double the recipe?
Yes, you can easily double the ingredients if you need more cookies for a party.
Conclusion
Witch Finger Cookies are a fantastic way to celebrate the spooky season with family and friends. Their fun design and delicious taste will bring a smile to everyone’s faces. So gather your ingredients, roll up your sleeves, and get ready to whip up these delightful cookies this Halloween – they’re bound to be a hit! Happy baking!