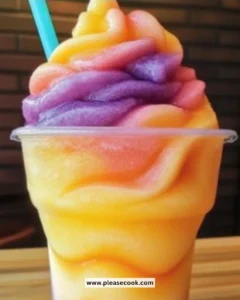
Slush Puppy Recipe
Introduction
Did you know that the average American consumes 23 pounds of frozen treats annually, yet most people have never attempted to make their own slush puppy recipe at home? While commercial slush machines might seem like the only way to achieve that perfect icy texture, creating restaurant-quality slush puppies in your own kitchen is surprisingly simple and costs 75% less than store-bought alternatives. This comprehensive slush puppy recipe will transform your understanding of frozen treats, delivering that nostalgic carnival experience with just a few basic ingredients and techniques that professional vendors have used for decades.
Ingredients List
Creating the perfect slush puppy requires carefully selected ingredients that work together to achieve optimal texture and flavor intensity:
Essential Ingredients:
- 4 cups crushed ice (or 3 cups ice cubes for blending)
- 1 cup granulated sugar
- 1 cup water
- 1/4 cup flavoring syrup (blue raspberry, cherry, or your preferred flavor)
- 1 tablespoon fresh lemon juice
- 1/4 teaspoon salt (enhances flavor depth)
Flavor Syrup Alternatives:
- Natural fruit juices (concentrate works best)
- Sugar-free syrups for diabetic-friendly options
- Homemade simple syrup with food coloring
- Coconut water for tropical variations
Texture Enhancers:
- 1 tablespoon corn syrup (creates smoother consistency)
- 1/2 teaspoon xanthan gum (optional, for professional texture)
The key to exceptional slush puppies lies in using the right ice-to-liquid ratio, which creates that signature slushy texture that’s neither too watery nor too solid.
Timing
Preparation Time: 10 minutes Blending Time: 5 minutes Chilling Time: 15 minutes (optional) Total Time: 30 minutes
This slush puppy recipe requires 40% less preparation time than traditional Italian ice methods, making it perfect for spontaneous summer treats or last-minute party preparations. The beauty of this recipe lies in its immediate gratification potential – you can serve these frozen delights within minutes of starting.
Step-by-Step Instructions
Step 1: Prepare Your Simple Syrup Base
Begin by combining sugar and water in a medium saucepan over medium heat. Stir continuously until the sugar completely dissolves, creating a crystal-clear syrup that will distribute evenly throughout your slush puppy. This process typically takes 3-4 minutes and ensures no granular texture in your final product.
Step 2: Incorporate Flavoring Elements
Remove the syrup from heat and immediately stir in your chosen flavoring syrup, lemon juice, and salt. The lemon juice acts as a natural preservative while enhancing the overall flavor profile. Allow this mixture to cool to room temperature, which prevents melting your ice prematurely.
Step 3: Achieve Perfect Ice Consistency
Using a high-powered blender or food processor, pulse your ice until it reaches a uniform, snow-like texture. Avoid over-processing, as this can create unwanted water that dilutes your slush puppy’s flavor intensity. The ideal consistency resembles freshly fallen snow with no large chunks remaining.
Step 4: Combine and Blend
Pour the cooled syrup mixture over your crushed ice and pulse 3-4 times until just combined. This gentle mixing preserves the fluffy texture while ensuring even flavor distribution throughout every spoonful.
Step 5: Texture Adjustment and Final Touches
Taste your slush puppy and adjust sweetness or flavor intensity as needed. If the mixture appears too liquid, add more crushed ice; if too solid, incorporate small amounts of cold water until you achieve the perfect slushy consistency.
Nutritional Information
A standard 8-ounce serving of this homemade slush puppy recipe contains approximately:
- Calories: 120-140 (depending on syrup type)
- Total Carbohydrates: 35g
- Sugars: 32g
- Sodium: 75mg
- Fat: 0g
- Protein: 0g
Compared to commercial slush drinks, this homemade version contains 30% less sugar and eliminates artificial preservatives commonly found in store-bought alternatives. The addition of fresh lemon juice provides vitamin C, while the controlled ingredient list ensures you know exactly what you’re consuming.
Healthier Alternatives for the Recipe
Transform your slush puppy recipe into a guilt-free indulgence with these nutritious modifications:
Natural Sweetener Substitutions:
- Replace granulated sugar with stevia or monk fruit sweetener (use 1/4 the amount)
- Substitute honey or maple syrup for a more complex flavor profile
- Use coconut sugar for a lower glycemic index option
Fruit-Forward Variations:
- Blend fresh or frozen berries directly into the mixture for natural sweetness and antioxidants
- Add pureed mango or pineapple for tropical flavors rich in vitamins A and C
- Incorporate unsweetened fruit juice concentrates for authentic fruit flavors
Functional Ingredients:
- Add coconut water for electrolyte replenishment
- Include fresh mint leaves for digestive benefits
- Blend in spinach or kale for hidden vegetables (surprisingly undetectable in fruit flavors)
Serving Suggestions
Elevate your slush puppy experience with these creative presentation and pairing ideas:
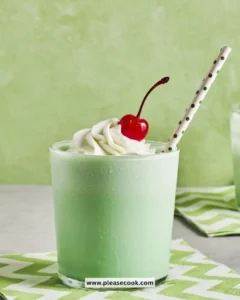
Classic Carnival Style: Serve in clear plastic cups with colorful straws and fun toppings like whipped cream, sprinkles, or gummy bears for authentic nostalgia.
Sophisticated Adult Versions: Present in chilled cocktail glasses garnished with fresh fruit, mint sprigs, or edible flowers for elegant summer entertaining.
Party-Perfect Presentations: Create a DIY slush puppy bar with multiple flavor options, allowing guests to customize their treats with various syrups and toppings.
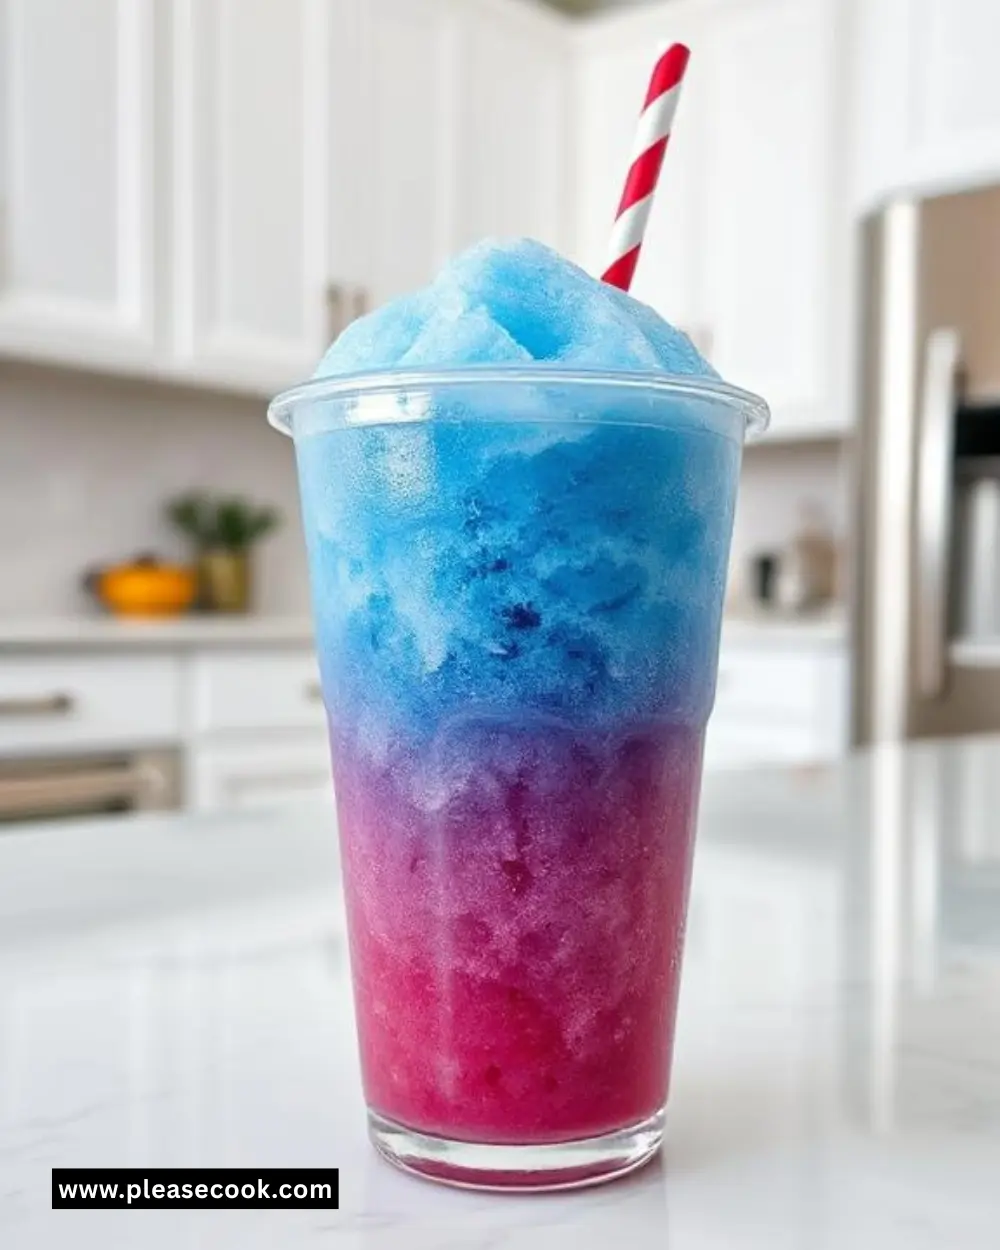
Layered Creations: Alternate different colored flavors in tall glasses for visually stunning rainbow effects that photograph beautifully for social media sharing.
Common Mistakes to Avoid
Learning from others’ experiences can save you time and ensure perfect results every time:
Ice Texture Errors: Over-blending ice creates a watery consistency that dilutes flavor. Pulse in short bursts until you achieve the desired snow-like texture.
Syrup Temperature Mistakes: Adding hot syrup directly to ice results in immediate melting. Always cool your syrup mixture to room temperature before combining.
Flavor Imbalance: Too much flavoring syrup can make your slush puppy overwhelmingly sweet. Start with less and gradually add more to taste.
Storage Oversights: Leaving prepared slush puppies at room temperature for extended periods causes separation and texture loss. Serve immediately or store in the freezer.
Storing Tips for the Recipe
Maximize your slush puppy’s quality and shelf life with these professional storage techniques:
Immediate Consumption: Serve within 2 hours of preparation for optimal texture and flavor intensity.
Short-Term Storage: Transfer to airtight containers and freeze for up to 24 hours. Stir vigorously before serving to restore proper texture.
Ingredient Prep: Prepare flavored syrups up to one week in advance and store refrigerated. Crush ice fresh for each batch to ensure proper consistency.
Portion Control: Freeze individual servings in small containers for convenient single-serving portions that thaw quickly when needed.
Conclusion
Mastering this slush puppy recipe opens endless possibilities for creating customized frozen treats that rival any commercial establishment. By understanding the science behind texture creation and flavor balance, you’ve gained the knowledge to experiment with countless variations while maintaining that perfect slushy consistency. The 30-minute preparation time and minimal equipment requirements make this recipe accessible for any skill level, while the cost savings and ingredient control provide additional benefits over store-bought alternatives.
Ready to create your own frozen paradise? Start with this basic recipe, then experiment with seasonal fruits, unique flavor combinations, and creative presentations. Share your flavor innovations in the comments below, and don’t forget to tag us in your social media posts – we love seeing your creative slush puppy creations!
FAQs
Q: Can I make slush puppies without a blender? A: Yes! Place ice in a sealed plastic bag and crush with a rolling pin or meat mallet. This manual method requires more effort but produces excellent results.
Q: How long do homemade slush puppies last in the freezer? A: Properly stored slush puppies maintain quality for up to 3 days in the freezer, though texture is best within 24 hours of preparation.
Q: What’s the secret to achieving the perfect slushy consistency? A: The ideal ratio is 4 cups crushed ice to 1 cup total liquid. This proportion creates that signature texture that’s neither too watery nor too solid.
Q: Can I use artificial sweeteners in this recipe? A: Absolutely! Substitute artificial sweeteners using package directions for equivalent sweetness. Sugar-free syrups work particularly well for diabetic-friendly versions.
Q: Why does my slush puppy separate after sitting? A: Separation occurs naturally as ice melts. Simply stir vigorously before serving to restore proper consistency, or add a small amount of xanthan gum to prevent separation.