Pita Bread Recipe
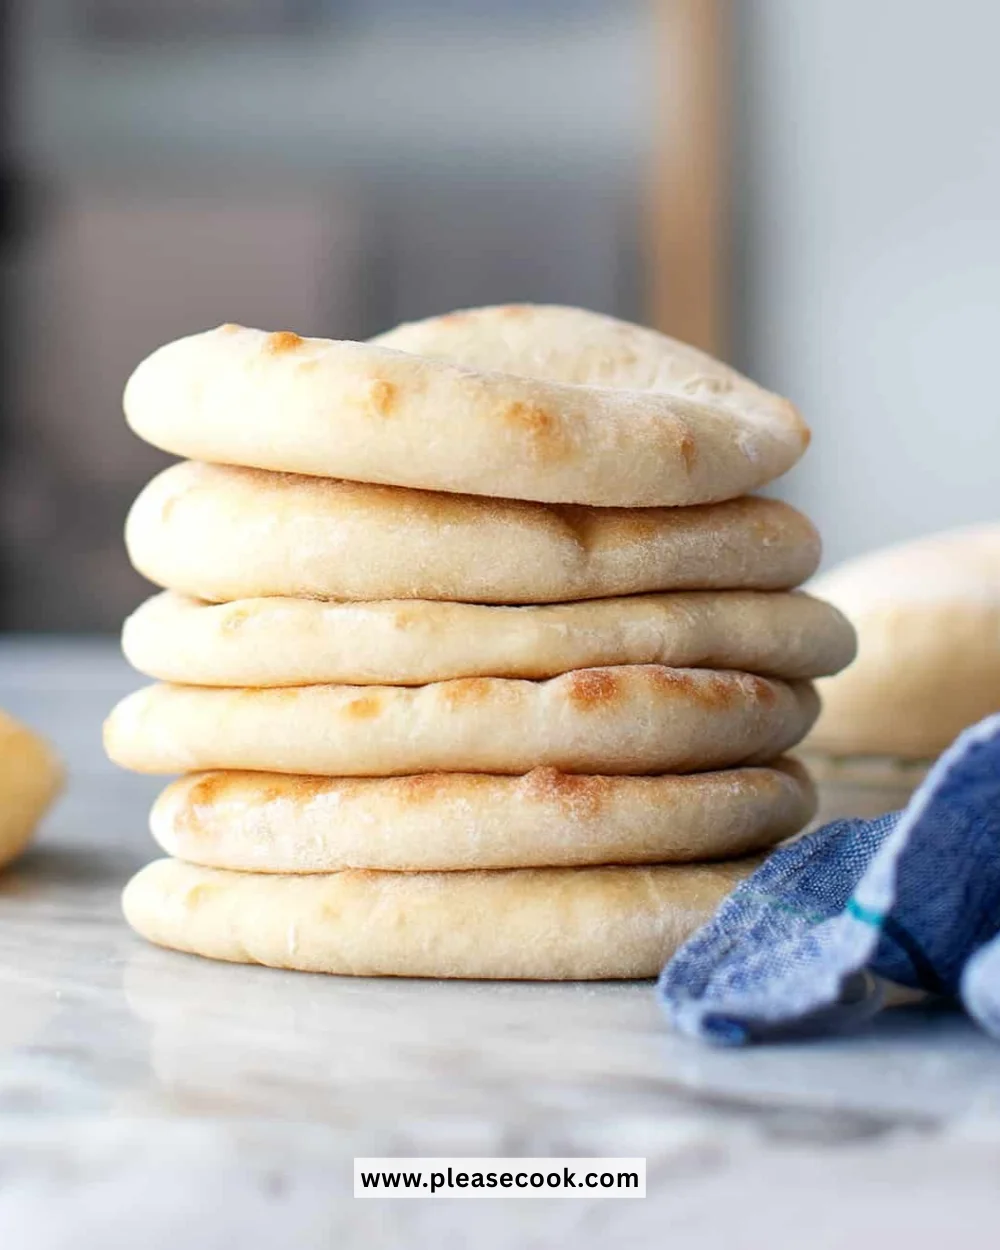
Pita bread is a delightful and versatile option for your meals, whether you’re making sandwiches, dips, or wraps. Its soft and chewy texture, combined with its distinct pocket, makes it a favorite in many cuisines around the world. Making pita bread from scratch not only fills your kitchen with an irresistible aroma but also gives you the satisfaction of enjoying warm, fresh bread straight from the oven.
Recipe Information
- Prep Time: 10 minutes
- Cook Time: 7 minutes
- Total Time: 1 hour 17 minutes (including rising time)
- Servings: 6
- Difficulty Level: Easy
Nutrition Information
- Calories per serving: 150
- Protein: 4 grams
- Carbohydrates: 30 grams
- Fat: 1.5 grams
- Fiber: 1 gram
- Sugar: 0.5 grams
- Sodium: 200 mg
Why Make This Pita Bread
Homemade pita bread is incredibly rewarding. Not only does it taste far superior to store-bought options, but it’s also free of preservatives and additives. The simplicity of the ingredients will shine through, creating a warm, fluffy bread that’s perfect for pairing with your favorite dips and fillings. Whether you’re whipping up a quick lunch with hummus or making a hearty dinner with grilled meats, this pita is sure to elevate any dish. Plus, the process is quite approachable, making it an excellent choice for beginners looking to expand their baking repertoire.
How to Make Pita Bread
Step 1: Preparation
In a bowl, combine 1 cup of warm water with 1 teaspoon of sugar and 1 packet (2 1/4 teaspoons) of active dry yeast. Let it sit for 5-10 minutes until it becomes frothy. This step activates the yeast, ensuring your pita bread will rise beautifully.
Step 2: Mixing
In a large mixing bowl, add 2 cups of all-purpose flour and 1 teaspoon of salt. Pour in the frothy yeast mixture along with 1 tablespoon of olive oil. Stir everything together until a dough begins to form.
Step 3: Kneading
Transfer the dough to a floured surface and knead it for about 5-7 minutes until it feels smooth and elastic. This process develops the gluten, giving your pita its perfect texture.
Step 4: Rising
Place the kneaded dough into a lightly oiled bowl, cover it with a clean cloth, and let it rise for 1-2 hours or until it has doubled in size. This rising time is crucial for achieving those lovely, puffy pockets.
Step 5: Preheating
While the dough is rising, preheat your oven to 475°F (245°C). This high temperature helps create the hot, steam-filled environment necessary for puffing up the pitas.
Step 6: Shaping
Once the dough has risen, punch it down gently and divide it into small balls, about the size of a golf ball. Roll each ball out into circles approximately 1/4 inch thick, ensuring even thickness for uniform baking.
Step 7: Baking
Arrange the rolled circles on a baking sheet and bake them in the preheated oven for 5-7 minutes. Watch closely as they puff up, turning lightly golden brown.
Step 8: Cooling
Remove the pitas from the oven and let them cool slightly before serving. This is the time to enjoy the wonderful aroma filling your kitchen!
How to Serve Pita Bread
Pita bread can be enjoyed in countless ways. Serve it warm with a side of hummus or tzatziki for dipping. It also makes a fantastic wrap for grilled chicken, vegetables, or falafel. Slice them open and fill with your favorite salad for a quick, nutritious lunch.
How to Store Pita Bread
To keep your pita bread fresh, store it in an airtight container or plastic bag at room temperature for up to 3 days. For longer storage, freeze the pitas by placing parchment paper between them and sealing them in a freezer bag. They can last for up to 3 months. When ready to eat, simply thaw at room temperature or warm in the oven.
Expert Tips for Perfect Pita Bread
- Make sure your water is warm, not hot; it should feel comfortable to the touch. This helps to activate the yeast without killing it.
- For extra flavor, consider adding herbs or spices to the flour when mixing.
- If you find the dough sticky, add small amounts of flour as needed during kneading.
- Use a pizza stone if you have one; it helps achieve a better puff and crust.
Delicious Variations
- Whole Wheat Pita: Substitute half of the all-purpose flour with whole wheat flour for a nuttier flavor.
- Herbed Pita: Add dried herbs like oregano or rosemary to the dough for a fragrant twist.
- Stuffed Pita: Before rolling out, stuff the dough with your choice of cheese or finely chopped vegetables.
Frequently Asked Questions
- Can I make this pita bread ahead of time? Yes! You can prepare the dough up to the rising stage, then refrigerate it overnight. Allow it to come to room temperature before shaping and baking.
- Why didn’t my pitas puff up? Several factors might affect this: the oven wasn’t hot enough, the dough didn’t rise properly, or the rolled-out dough was too thick. Ensure proper preheating and follow the thickness recommendation for best results.
- Can I use instant yeast instead of active dry yeast? Absolutely! You can use the same amount of instant yeast and skip the waiting time for frothing with water since it can be mixed directly with the flour.
- What can I serve with pita bread? Pitas are fantastic with dips like hummus, baba ganoush, or tzatziki. Fill them with salads, grilled meats, or roasted vegetables for a hearty meal.
- Can I add flavors to my pita dough? Yes! Feel free to experiment by adding spices or finely chopped herbs to the dough for extra flavor.
Conclusion
Making homemade pita bread is not only simple but also incredibly rewarding. With just a few basic ingredients, you can create fluffy, warm pockets of bread that enhance any meal. The process is straightforward, and the results are delicious. So gather your ingredients, follow the steps, and treat yourself to the wonderful experience of fresh pita bread. Happy baking!