Juicy Crispy Chicken Tenders
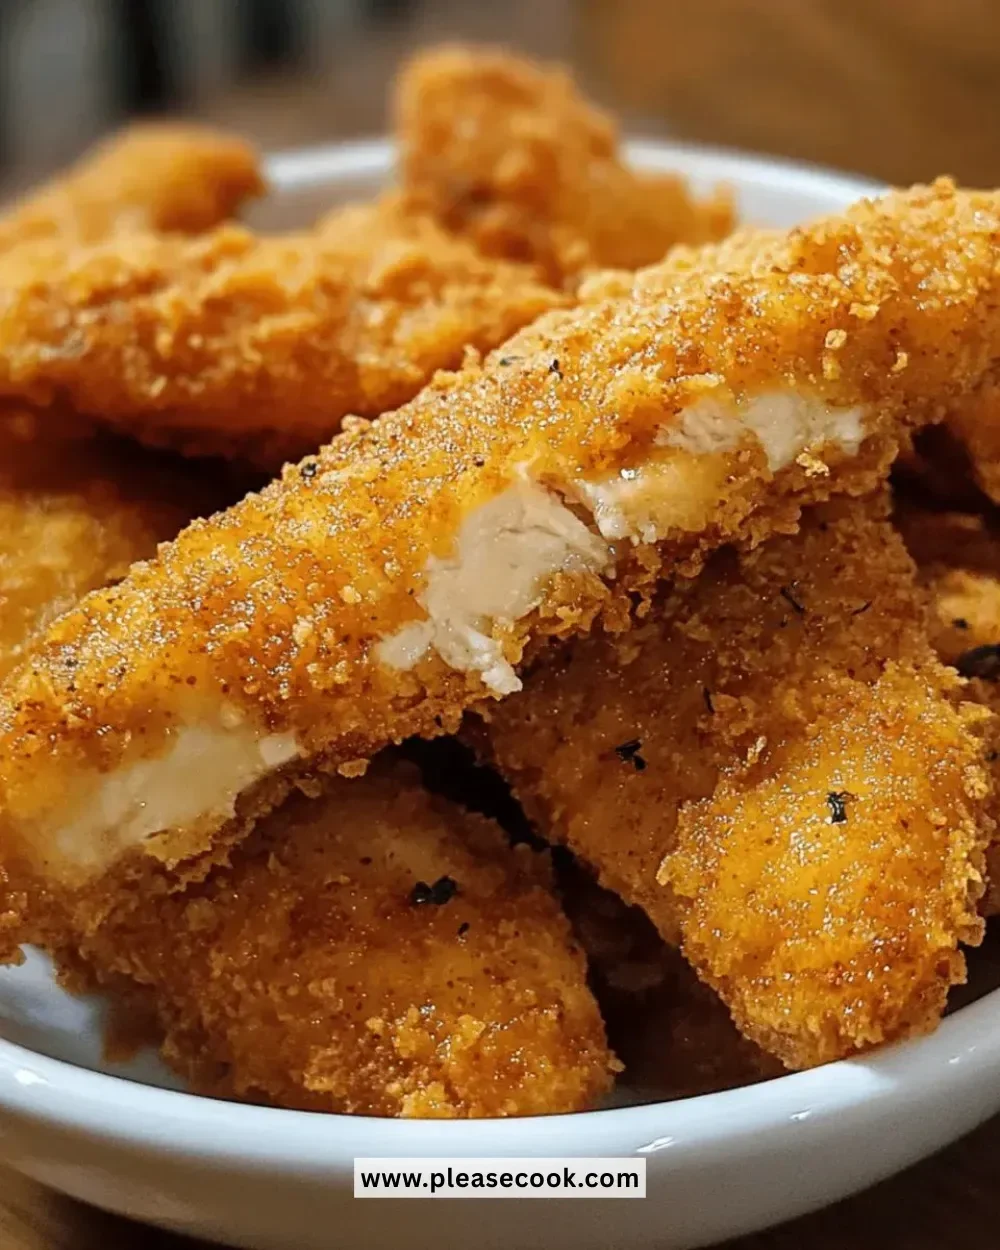
Juicy crispy chicken tenders are a crowd-pleasing favorite that can bring joy to any meal. Whether you’re serving them at a family dinner, as a party appetizer, or even for a simple weeknight treat, these tenders deliver on flavor and texture. Their golden-brown, crunchy coating complements the tender, juicy chicken perfectly. This recipe showcases how easy it can be to create restaurant-quality chicken tenders in the comfort of your home.
Recipe Information
- Prep Time: 30 minutes (plus marinating time)
- Cook Time: 10 minutes
- Total Time: 40 minutes
- Servings: 4
- Difficulty Level: Easy
Nutrition Information
- Calories per serving: 350
- Protein: 25g
- Carbohydrates: 30g
- Fat: 15g
- Fiber: 1g
- Sugar: 1g
- Sodium: 500mg
Why Make This Juicy Crispy Chicken Tenders
Making your own chicken tenders at home not only allows you to control the ingredients but also guarantees freshness and flavor. The buttermilk soaking technique ensures the chicken remains incredibly juicy and packed with flavor, while the crispy breadcrumb coating satisfies your craving for crunch. Plus, this recipe is versatile and can easily be adjusted to suit various tastes. From classic dipping sauces to adding spices for a kick, the possibilities are endless.
How to Make Juicy Crispy Chicken Tenders
Ingredients:
- 1 lb chicken tenders
- 1 cup buttermilk
- 1 cup all-purpose flour
- 1 cup breadcrumbs
- 1 tsp garlic powder
- 1 tsp paprika
- 1 tsp salt
- 1/2 tsp black pepper
- Oil for frying
Directions:
Step 1: Preparation
In a bowl, soak the chicken tenders in buttermilk for at least 30 minutes. This step is key for ensuring a juicy interior and flavorful meat.
Step 2: Mixing
In another bowl, mix together the flour, breadcrumbs, garlic powder, paprika, salt, and black pepper. This dry mixture will create that beautiful, crispy texture when fried.
Step 3: Cooking
Heat oil in a frying pan over medium heat. This ensures that the oil is hot enough to crisp the coating without burning it. Take the chicken from the buttermilk, coat it in the flour mixture, and arrange it in the hot oil. Fry until golden brown and fully cooked, approximately 4-5 minutes on each side.
Step 4: Finishing
Once cooked, remove the chicken tenders from the oil and let them drain on paper towels. This will help rid them of excess oil and keep them crispy. Serve hot for the best experience.
How to Serve Juicy Crispy Chicken Tenders
Juicy crispy chicken tenders are delicious on their own but can also be elevated with a variety of dipping sauces. Consider pairing them with ranch dressing, honey mustard, or spicy sriracha ketchup. They also work wonderfully as a main dish served alongside fries, a fresh salad, or even tucked into a soft wrap for a portable meal.
How to Store Juicy Crispy Chicken Tenders
To store leftover chicken tenders, allow them to cool completely, then place them in an airtight container. They can be kept in the refrigerator for up to 3 days. For longer storage, freeze them in a single layer on a baking sheet and then transfer them to a freezer bag, where they’ll last for about 2 months.
Expert Tips for Perfect Juicy Crispy Chicken Tenders
- For extra flavor, consider marinating the chicken in the buttermilk overnight.
- Using a mixture of panko breadcrumbs can enhance the crunchiness.
- Don’t overcrowd the pan while frying, as this can reduce the temperature of the oil and result in soggy tenders.
- Test the oil temperature by dropping a small piece of bread into it; if it sizzles immediately, you’re ready to fry.
- Allow the tenders to rest for a couple of minutes after frying to let the juices redistribute.
Delicious Variations
- Spicy Chicken Tenders: Add cayenne pepper or hot sauce to the buttermilk for a spicy kick.
- Herb-Crusted: Incorporate dried herbs like thyme or Italian seasoning into the breadcrumb mixture for an aromatic twist.
- Baked Tenders: For a healthier option, bake the coated tenders at 400°F for about 20-25 minutes, flipping halfway through.
Frequently Asked Questions
Q1: Can I use regular milk instead of buttermilk?
A1: Yes! If you don’t have buttermilk, you can make a substitute by adding 1 tablespoon of vinegar or lemon juice to a cup of milk and letting it sit for 5-10 minutes.
Q2: How can I keep chicken tenders crispy when storing leftovers?
A2: To maintain their crispiness, store tenders on a wire rack instead of sealing them in an airtight container immediately. This will prevent moisture from making them soggy.
Q3: What oil is best for frying chicken tenders?
A3: Use oils with a high smoke point such as canola, vegetable, or peanut oil, as they can tolerate the heat needed for frying without burning.
Q4: Can I make these chicken tenders gluten-free?
A4: Yes! Substitute all-purpose flour with a gluten-free flour blend and use gluten-free breadcrumbs for a delicious gluten-free version.
Q5: How do I know when the chicken tenders are done?
A5: The internal temperature of the chicken should reach 165°F. You can also check that they are golden brown and the juices run clear.
Conclusion
Juicy crispy chicken tenders are an easy and satisfying dish that can elevate any meal. With a tender interior and a crunchy exterior, they are sure to delight family and friends alike. Whether you make them for a casual dinner or a gathering, this recipe is bound to become a go-to favorite. Don’t hesitate to give it a try—your taste buds will thank you!