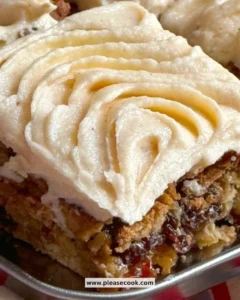
Chocolate Mint Thumbprint Cookies

Chocolate Mint Thumbprint Cookies bring a delightful twist to the classic thumbprint cookie. Imagine the warm and comforting aroma of cookies baking in your kitchen, blending rich chocolate notes with a refreshing hint of mint. These cookies feature a soft and chewy texture, creating a lovely contrast to the decadent chocolate mint candy nestled within. Perfect for holiday gatherings or an afternoon treat, they are sure to impress everyone who takes a bite.
Recipe Information
- Prep Time: 20 minutes
- Cook Time: 12 minutes
- Total Time: 32 minutes
- Servings: 24 cookies
- Difficulty Level: Easy
Nutrition Information
- Calories per serving: 150
- Protein: 2g
- Carbohydrates: 20g
- Fat: 7g
- Fiber: 1g
- Sugar: 10g
- Sodium: 75mg
Why Make This Chocolate Mint Thumbprint Cookies
These Chocolate Mint Thumbprint Cookies are the perfect dessert to satisfy both chocolate lovers and mint enthusiasts alike. The combination of rich cocoa and refreshing mint creates a deliciously balanced cookie that’s perfect for any occasion. Not only are they a treat for the eyes with their beautiful thumbprint design, but they’re also easy and fun to make, making them a great baking project for kids and adults. Plus, they’re a fantastic way to use up leftover mint candies during the holidays!
How to Make Chocolate Mint Thumbprint Cookies
Creating these delicious cookies is straightforward and fun! Follow the steps below to bring this delightful recipe to life.
Ingredients:
- 1 cup unsalted butter, softened
- 1 cup granulated sugar
- 2/3 cup brown sugar
- 2 large eggs
- 1 teaspoon vanilla extract
- 3 cups all-purpose flour
- 1/2 cup unsweetened cocoa powder
- 1 teaspoon baking powder
- 1/2 teaspoon salt
- 1 cup chocolate mint candies or mint chocolate chips (for filling)
- Powdered sugar (for dusting)
Directions:
Step 1: Preparation
Preheat your oven to 350°F (175°C). This step gets the oven ready for baking the cookies.
Step 2: Mixing
In a large bowl, cream together the softened butter, granulated sugar, and brown sugar until the mixture is smooth and well combined. This process incorporates air into the dough for a light texture.
Step 3: Adding Eggs and Vanilla
Beat in the eggs one at a time, ensuring each egg is fully incorporated before adding the next. Stir in the vanilla extract, enhancing the cookie mix with a sweet aroma.
Step 4: Combining Dry Ingredients
In another bowl, whisk together the flour, cocoa powder, baking powder, and salt. Gradually blend this dry mixture into the wet mixture, mixing until just combined. Be careful not to over-mix; this helps keep the cookies tender.
Step 5: Rolling the Dough
Roll the dough into small balls, about 1 inch in diameter, and place them on a baking sheet lined with parchment paper. Leave enough space between the balls as they will spread while baking.
Step 6: Making Indentations
Make an indentation in the center of each dough ball using your thumb. This will hold the chocolate mint candy that you’ll add later.
Step 7: Filling with Chocolate
Fill each indentation with a piece of chocolate mint candy or a scoop of mint chocolate chips. This promises a gooey center that’s full of flavor once baked.
Step 8: Baking
Bake in the preheated oven for 10-12 minutes, or until the cookies are set. Keep an eye on them; you want them soft but firm to the touch.
Step 9: Cooling
Once baked, let the cookies cool on the baking sheet for a few minutes before transferring them to wire racks to cool completely. This prevents them from breaking apart.
Step 10: Dusting
Before serving, dust the cookies with powdered sugar to add a lovely sweet touch and an extra flair.
How to Serve Chocolate Mint Thumbprint Cookies
These cookies are delightful served warm alongside a cup of hot cocoa or coffee. They also make a fantastic addition to dessert platters at parties or as a sweet surprise in lunchboxes. Feel free to add a scoop of vanilla ice cream on the side for an extra treat!
How to Store Chocolate Mint Thumbprint Cookies
Store the cookies in an airtight container at room temperature for up to a week. If you want them to last longer, consider freezing them. Just layer them with parchment paper in a freezer-safe container, and they can be stored for up to three months. Thaw at room temperature before enjoying.
Expert Tips for Perfect Chocolate Mint Thumbprint Cookies
- Use softened butter for even mixing; room temperature butter creates a smoother dough.
- If you can’t find chocolate mint candies, you can substitute with dark chocolate chips mixed with a few drops of peppermint extract for a similar flavor.
- Ensure your oven is fully preheated before baking to keep the cookies from spreading too much.
- For added texture, consider adding chopped nuts to the dough.
Delicious Variations
- Nutty Mint Cookies: Add 1 cup of finely chopped walnuts or pecans to the dough for a crunchy twist.
- Peppermint Bark Variation: Instead of chocolate candies, fill the thumbprint with crushed peppermint bark.
- Holiday Spice: Add 1 teaspoon of cinnamon or nutmeg for a warm, spiced flavor for the holidays.
Frequently Asked Questions
-
Can I make these cookies gluten-free?
Yes, you can substitute all-purpose flour with a gluten-free flour blend. Make sure the baking powder is also gluten-free. -
What can I use instead of mint candies?
You can use chocolate chips combined with a drop of peppermint extract or other flavored candies like caramel for a different taste. -
How can I make these cookies healthier?
Consider substituting half of the butter with unsweetened applesauce and reducing the sugar for a lighter version. -
Can I prepare the dough in advance?
Absolutely! You can prepare the dough, refrigerate it for up to 2 days, and bake when you’re ready. -
Why did my cookies spread too much?
Make sure your butter is at the right temperature (softened, not melted) and consider chilling the dough for 30 minutes before baking if that happens.
Conclusion
Chocolate Mint Thumbprint Cookies offer a perfect balance of chocolatey goodness and refreshing mint flavor, making them a delightful treat for any cookie lover. They are simple to prepare, fun to make, and a true crowd-pleaser. Whether for a special occasion or a cozy weekend bake, these cookies are bound to bring smiles to your table. Give them a try, and enjoy the deliciousness!
Print
Chocolate Mint Thumbprint Cookies
- Total Time: 32 minutes
- Yield: 24 cookies 1x
- Diet: Vegetarian
Description
Delightful thumbprint cookies with rich chocolate and refreshing mint, perfect for any occasion.
Ingredients
- 1 cup unsalted butter, softened
- 1 cup granulated sugar
- 2/3 cup brown sugar
- 2 large eggs
- 1 teaspoon vanilla extract
- 3 cups all-purpose flour
- 1/2 cup unsweetened cocoa powder
- 1 teaspoon baking powder
- 1/2 teaspoon salt
- 1 cup chocolate mint candies or mint chocolate chips (for filling)
- Powdered sugar (for dusting)
Instructions
- Preheat your oven to 350°F (175°C).
- Cream together the softened butter, granulated sugar, and brown sugar until smooth.
- Beat in the eggs one at a time, then stir in the vanilla extract.
- Whisk together the flour, cocoa powder, baking powder, and salt in another bowl, then gradually mix it into the wet mixture.
- Roll the dough into small balls and place them on a baking sheet lined with parchment paper.
- Make an indentation in each dough ball using your thumb.
- Fill each indentation with a piece of chocolate mint candy or a scoop of mint chocolate chips.
- Bake for 10-12 minutes until set.
- Let the cookies cool on the baking sheet before transferring to wire racks.
- Dust with powdered sugar before serving.
Notes
Store cookies in an airtight container for up to a week at room temperature, or freeze for up to three months.
- Prep Time: 20 minutes
- Cook Time: 12 minutes
- Category: Dessert
- Method: Baking
- Cuisine: American
Nutrition
- Serving Size: 1 cookie
- Calories: 150
- Sugar: 10g
- Sodium: 75mg
- Fat: 7g
- Saturated Fat: 4g
- Unsaturated Fat: 3g
- Trans Fat: 0g
- Carbohydrates: 20g
- Fiber: 1g
- Protein: 2g
- Cholesterol: 30mg